|

|
|
This site
was uploaded 07/12/2000
last time
updated 25/11/2001

DIABLO 2
QUESTS
|

Act I Quests

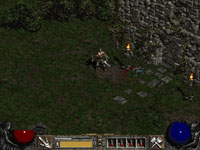
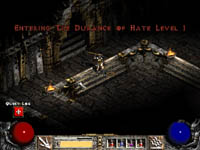
| Den of Evil |
 This
will be your first given quest. You will be given this quest by Akara,
the leader of the religious group, the Sisters of the Sightless Eye.
Your task is simple, go through the Blood Moor to the Den of Evil and
rid it of all monsters that inhabit it. The Den of Evil can usually be
found in the middle of the Blood Moor, and appears as a cave level.
Inside the Den of Evil, you will find nothing more than the monsters
that are found in the Blood Moor, which are Fallen, Fallen Shaman,
Gargantuan Beats, and Zombies. After venturing into the Den of Evil and
killing a lot of its monsters, a message will appear that you have X
amount of monsters left to kill. After you do kill every monster in the
den, a white light will spread through it, and you can go back to Akara
and claim your prize, which is an extra skill point that you may use for
any of your skills, which can be very handy. The den is a great place
for beginners to start building up there character with experience, so
don't try to pass the quest up. This
will be your first given quest. You will be given this quest by Akara,
the leader of the religious group, the Sisters of the Sightless Eye.
Your task is simple, go through the Blood Moor to the Den of Evil and
rid it of all monsters that inhabit it. The Den of Evil can usually be
found in the middle of the Blood Moor, and appears as a cave level.
Inside the Den of Evil, you will find nothing more than the monsters
that are found in the Blood Moor, which are Fallen, Fallen Shaman,
Gargantuan Beats, and Zombies. After venturing into the Den of Evil and
killing a lot of its monsters, a message will appear that you have X
amount of monsters left to kill. After you do kill every monster in the
den, a white light will spread through it, and you can go back to Akara
and claim your prize, which is an extra skill point that you may use for
any of your skills, which can be very handy. The den is a great place
for beginners to start building up there character with experience, so
don't try to pass the quest up.

|
| Sisters'
Burial Grounds |
 The
Blood Raven quest is given to you by Kashya, the military leader of the
rogues. Blood Raven is a nasty, evil rogue gone bad, and it is up to you
to put a stop to her evil doings. You must go beyond the Cold Plains,
and into the Burial Grounds to battle with her. She is very fast and has
the power to raise the dead. She is surrounded by her undead army of
skeletons and hungry dead, which is a zombie class. You must be careful
when dueling with her, for she is very quick, and it is wise to keep a
couple of stamina potions around so you can keep up with her. When you
reach the cemetery, you will hear her voice call out to you, "Join
my Army of the Dead" or "My army will Destroy you." If
you are not careful, you will be apart of her army of the dead. After
defeating her, a bright light will fill the cemetery and will kill any
of the remaining monsters of her army. She will drop an item, which is
usually a superior classed item. You will now find your way back to
Kashya, to claim your reward, which is the use of her rogues. The
Blood Raven quest is given to you by Kashya, the military leader of the
rogues. Blood Raven is a nasty, evil rogue gone bad, and it is up to you
to put a stop to her evil doings. You must go beyond the Cold Plains,
and into the Burial Grounds to battle with her. She is very fast and has
the power to raise the dead. She is surrounded by her undead army of
skeletons and hungry dead, which is a zombie class. You must be careful
when dueling with her, for she is very quick, and it is wise to keep a
couple of stamina potions around so you can keep up with her. When you
reach the cemetery, you will hear her voice call out to you, "Join
my Army of the Dead" or "My army will Destroy you." If
you are not careful, you will be apart of her army of the dead. After
defeating her, a bright light will fill the cemetery and will kill any
of the remaining monsters of her army. She will drop an item, which is
usually a superior classed item. You will now find your way back to
Kashya, to claim your reward, which is the use of her rogues.

|
| The Search for
Cain |
 Given
to you by Kashya, you must return to the to Tristram, the town of Diablo
I. Your quest has multiple parts to it. You must first travel to the
woods of Tristram, and retrieve a scroll from Tree of Inifuss. You must
touch the tree for the scroll to drop from its limbs. Once in your
possession, you must go back to rogue camp and give it to Akara, the
leader of the group. Now Akara will explain to you how to proceed with
the second part of your task, which is opening a portal to Tristram and
rescuing your friend, Deckard Cain. You must now travel to the Stony
Plains, where you find a group of big rocks that form a circle. After
touching each of the rocks, a red portal will open, and you will now be
transported to Tristram to rescue your long-time friend. You will find
that the town has been overrun by monsters, and buildings have been put
into flames. After finding Cain, you will lead him back to the rogue
camp. Your reward is that Cain will perform his exact services from the
original Diablo, which is identifying your items. Given
to you by Kashya, you must return to the to Tristram, the town of Diablo
I. Your quest has multiple parts to it. You must first travel to the
woods of Tristram, and retrieve a scroll from Tree of Inifuss. You must
touch the tree for the scroll to drop from its limbs. Once in your
possession, you must go back to rogue camp and give it to Akara, the
leader of the group. Now Akara will explain to you how to proceed with
the second part of your task, which is opening a portal to Tristram and
rescuing your friend, Deckard Cain. You must now travel to the Stony
Plains, where you find a group of big rocks that form a circle. After
touching each of the rocks, a red portal will open, and you will now be
transported to Tristram to rescue your long-time friend. You will find
that the town has been overrun by monsters, and buildings have been put
into flames. After finding Cain, you will lead him back to the rogue
camp. Your reward is that Cain will perform his exact services from the
original Diablo, which is identifying your items.

|
| Forgotten
Tower |
 This
quest is optional, and is given to you from an old book found on an
altar, which is deep in the wilderness of Marsh. If wish to read the
book, you will be told of an evil tower that has crumbled and cannot be
repaired. When finding the tower, which is revealed upon finding a
secret room, you will have to battle your way through four levels of
monsters. After you fight your way through the monsters, you will go to
the fifth and final level to discover an evil countess, which has taken
over the tower, only to make as evil as ever. You must defeat the
countess, and you will be rewarded by a random item. This
quest is optional, and is given to you from an old book found on an
altar, which is deep in the wilderness of Marsh. If wish to read the
book, you will be told of an evil tower that has crumbled and cannot be
repaired. When finding the tower, which is revealed upon finding a
secret room, you will have to battle your way through four levels of
monsters. After you fight your way through the monsters, you will go to
the fifth and final level to discover an evil countess, which has taken
over the tower, only to make as evil as ever. You must defeat the
countess, and you will be rewarded by a random item.
|
| Tools of the
Trade |
 This
quest is similar to the Anvil quest given by Griswold in Diablo. Given
by Charsi the blacksmith, your task is simple. Find and retrieve the
Horadric Maulus. You will have to venture off to find it, but that task
is not as simple as one, for it is guarded by a nasty and evil monster.
You must first kill this foe before getting the Horadric Maulus. After
retrieving the Horadric Maulus, you have two options. You can either
keep as a weapon, or Charsi can use it to upgrade one of your items into
a magical item. This
quest is similar to the Anvil quest given by Griswold in Diablo. Given
by Charsi the blacksmith, your task is simple. Find and retrieve the
Horadric Maulus. You will have to venture off to find it, but that task
is not as simple as one, for it is guarded by a nasty and evil monster.
You must first kill this foe before getting the Horadric Maulus. After
retrieving the Horadric Maulus, you have two options. You can either
keep as a weapon, or Charsi can use it to upgrade one of your items into
a magical item.
|
| Sisters to
the Slaughter |
 This
is the final quest of act one. You must defeat Andariel. She will not be
an easy foe, and is probably the nastiest monster of the act. You will
be given the quest by Cain, and it is required to go on to Act II. You
will find her in the deep parts of the monastery and will not be easily
found. You will know when you find her because she is surrounded with
creatures. This will be a true test of your skill and knowledge. After
finding and defeating Andariel, you will have to go to Warriv, the
caravan leader, who will lead you East to Lut Gholein. Cain will also
come to Act II with you. This
is the final quest of act one. You must defeat Andariel. She will not be
an easy foe, and is probably the nastiest monster of the act. You will
be given the quest by Cain, and it is required to go on to Act II. You
will find her in the deep parts of the monastery and will not be easily
found. You will know when you find her because she is surrounded with
creatures. This will be a true test of your skill and knowledge. After
finding and defeating Andariel, you will have to go to Warriv, the
caravan leader, who will lead you East to Lut Gholein. Cain will also
come to Act II with you.
|

Act II Quests
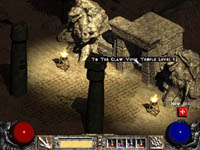
| Radament's
Lair |
 The sewers beneath the city of Lut Gholein have become infested with a
terror that steals away the city's citizens by night. This danger has
already claimed the family of Atma, the proprietor of Lut Gholein's
largest tavern. She implores you to track down the source of this evil
and root it from its lair. The sewers can be accessed either by a trap
door in the northeast part of town by the mercenary captain Griez, or by
the dockyard entrance near Warriv. Either way, you'll have to fight your
way through several chambers full of burning Dead and Archers. Once you
reach the Radament's lair, clear a path to him through his minions and
concentrate your attacks on him. If you have any poison resistance
items, it'd be a good time to wear them, since the Radament can poison
you. Once he's dead, grab the Book of Skill he drops, then search a
nearby chest for a Horadric Scroll. Return the scroll to Cain, and talk
to Atma to get lower prices at all the town's merchants.
The sewers beneath the city of Lut Gholein have become infested with a
terror that steals away the city's citizens by night. This danger has
already claimed the family of Atma, the proprietor of Lut Gholein's
largest tavern. She implores you to track down the source of this evil
and root it from its lair. The sewers can be accessed either by a trap
door in the northeast part of town by the mercenary captain Griez, or by
the dockyard entrance near Warriv. Either way, you'll have to fight your
way through several chambers full of burning Dead and Archers. Once you
reach the Radament's lair, clear a path to him through his minions and
concentrate your attacks on him. If you have any poison resistance
items, it'd be a good time to wear them, since the Radament can poison
you. Once he's dead, grab the Book of Skill he drops, then search a
nearby chest for a Horadric Scroll. Return the scroll to Cain, and talk
to Atma to get lower prices at all the town's merchants.
|
| The
Horadric Staff |
 Upon taking the Horadric scroll from the Radament's lair, Cain will
examine it and determine that the way to unlock Baal's tomb is to unite
the two pieces of a Horadric Staff using an artifact known as the
Horadric Cube. This is quite a lengthy quest, and you may complete many
of this act's other quests while working on this one. You must collect
the Horadric Cube, the Horadric staff shaft, and the Horadric staff
head.
Upon taking the Horadric scroll from the Radament's lair, Cain will
examine it and determine that the way to unlock Baal's tomb is to unite
the two pieces of a Horadric Staff using an artifact known as the
Horadric Cube. This is quite a lengthy quest, and you may complete many
of this act's other quests while working on this one. You must collect
the Horadric Cube, the Horadric staff shaft, and the Horadric staff
head.
The Cube is located under the sand dunes beneath the Dry Hills. Go to
that area and locate the entrance to the Halls of the Dead. On the third
level you must defeat a boss monster and claim the cube.
The Shaft is hidden in the bowels of the Sand Maggot's Lair, which can
be found in the Far Oasis. Venture down to the disgusting third level of
the lair and do combat with the giant worm that resides there. After
you've beaten its brains out, grab the Horadric Shaft and get out of
there.
The final piece of the Staff is the Claw Viper amulet, which can be
found on the second level of the Claw Viper Temple. To get there, travel
through the Far Oasis, to the Lost City, to the Valley of the Snakes.
Defeating the boss guarding this treasure can be difficult, so take
along some extra potions for the ride. Once you have all three pieces of
the quest, put the Shaft and the Amulet in the Horadric Cube, then use
the Cube's transmutate ability to join them into the Staff. Stash the
Staff in your locker for safe keeping until you're ready to finish this
act.
|
| The
Tainted Sun |
 Upon entering the Lost City area, the sun will dim as an unscheduled
eclipse blots it out, shrouding the entire world in shadows. If you
return to the Lut Gholein, you will discover that this disturbing event
is likely due to a temple being raised in the Temple of the Viper. You
need to go there anyway to retrieve the Viper Amulet for the Horadric
staff, so you might as well kill two birds with one stone. Travel
through the Lost City and find the Temple of the Viper. Dig deep into
its depths and find the Viper Template, guarded by a room chock full of
creatures. Destroy the Template to get the Viper Amulet and dispell the
foul magic holding back the daylight.
Upon entering the Lost City area, the sun will dim as an unscheduled
eclipse blots it out, shrouding the entire world in shadows. If you
return to the Lut Gholein, you will discover that this disturbing event
is likely due to a temple being raised in the Temple of the Viper. You
need to go there anyway to retrieve the Viper Amulet for the Horadric
staff, so you might as well kill two birds with one stone. Travel
through the Lost City and find the Temple of the Viper. Dig deep into
its depths and find the Viper Template, guarded by a room chock full of
creatures. Destroy the Template to get the Viper Amulet and dispell the
foul magic holding back the daylight.
|
| The
Arcane Sanctuary |
 Drognan will tell you of the mightiest of the Horadric mages, Horazon,
who built an Arcane Sanctuary so that he could pursue his studies in
peace. This, he thinks, might be a good place to look for information on
Tal Rasha's Burial Chamber. He also mentions that Lord Jerhyn would like
to have a word with you, and that it might be related.
Drognan will tell you of the mightiest of the Horadric mages, Horazon,
who built an Arcane Sanctuary so that he could pursue his studies in
peace. This, he thinks, might be a good place to look for information on
Tal Rasha's Burial Chamber. He also mentions that Lord Jerhyn would like
to have a word with you, and that it might be related.
Indeed, once you find Jerhyn he confesses the reason why his Palace has
been closed to the public. A portal to the Arcane Sanctuary has opened
up in the Palace cellars, and hellspawn have been steadily pouring out
and wearing down his Palace Guard. You must fight your way through the
beseiged Palace and enter the portal to destroy the source of these
monsters. This will involve wading through a lot of monsters as you go
through the Palace Harem, the Cellars, and finally go through the portal
to the Arcane Sanctuary itself, where you must seek out Horazon.
|
| The
Summoner |
 This is a very short quest that basically involves destroying the
Summoner, which is all that is left of the great mage Horazon. Once you
destroy him, read his journal to discover the arcane symbol that flags
the true temple of Tal Rasha, hidden deep in the Canyon of the Magi. A
red portal will open, giving you access to the previously inaccessible
area.
This is a very short quest that basically involves destroying the
Summoner, which is all that is left of the great mage Horazon. Once you
destroy him, read his journal to discover the arcane symbol that flags
the true temple of Tal Rasha, hidden deep in the Canyon of the Magi. A
red portal will open, giving you access to the previously inaccessible
area.
Warning: Do NOT save and exit your game at this point without
going through the portal and activating the nearby waypoint. There is a
bug in the game that will prevent the red portal from reappearing if you
save and exit first, thus breaking the level and making it impossible to
proceed.
|
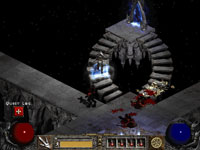
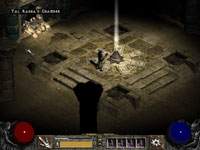
| The Seven
Tombs |
 Finding Baal before Diablo does requires you to locate Tal Rasha's tomb
where Baal is locked in a constant struggle with the Horadric mage
imprisoning him. To access the burial chamber, you must take the
completed Horadric Staff to Tal Rasha's tomb in the Canyon of the Magi
(thus you must have completed all this act's other quests first). There
are actually seven tombs in the Canyon of the Magi, six of which are
false leads designed to wear you down. The correct tomb is marked by the
symbol shown in the Summoner's journal, so enter that one and fight your
way to the room with the slot for the Horadric Staff that Cain
described.
Finding Baal before Diablo does requires you to locate Tal Rasha's tomb
where Baal is locked in a constant struggle with the Horadric mage
imprisoning him. To access the burial chamber, you must take the
completed Horadric Staff to Tal Rasha's tomb in the Canyon of the Magi
(thus you must have completed all this act's other quests first). There
are actually seven tombs in the Canyon of the Magi, six of which are
false leads designed to wear you down. The correct tomb is marked by the
symbol shown in the Summoner's journal, so enter that one and fight your
way to the room with the slot for the Horadric Staff that Cain
described.
Place the staff in the slot and watch the fireworks as the entrance to
the burial chamber is opened. It'd be a really good idea to cast a town
portal now, since you'll probably die a few times in the coming
conflict. The portal will allow you to take a short cut back to this
area when you respawn in town. Inside the burial chamber you must defeat
Duriel, a large maggot creature who is very tough. Thaw potions
come in handy against him, but there's no easy way past him.
|
Act III Quests
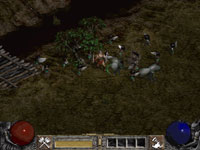
| The
Golden Bird |
 At first, there doesn't seem to be much to do in Kurast, but once you
wander out into the wilderness you'll trigger your first quest. Fight
enough monsters and you'll soon find a Jade Figurine. Taking this
Figurine back to Cain and showing it to him will prompt him to show it
to Meshif, who has been known to collect such treasures. Meshif will
exchange the figurine for a Golden Bird statuette. Cain will then tell
you to take the bird to Alkor, who may be interested in the ashes it
contains. Alkor will take the bird and use its ashes to brew a potion
that adds 20 life points to your stats, permanently.
At first, there doesn't seem to be much to do in Kurast, but once you
wander out into the wilderness you'll trigger your first quest. Fight
enough monsters and you'll soon find a Jade Figurine. Taking this
Figurine back to Cain and showing it to him will prompt him to show it
to Meshif, who has been known to collect such treasures. Meshif will
exchange the figurine for a Golden Bird statuette. Cain will then tell
you to take the bird to Alkor, who may be interested in the ashes it
contains. Alkor will take the bird and use its ashes to brew a potion
that adds 20 life points to your stats, permanently.
|
| Blade
of the Old Religion |
 The enchantment that holds the jungles surrounding Kurast is weakening,
and if it falls the city falls with it. To remedy this threat, Hralti
needs the holy Skatsimi blade called Bidbinn, so that he may harness its
mystic powers to reinforce the protective spells. You will find the
blade in the stubby little hands of a Pygmy in the Flayer Jungle. You
will actually encounter an entire village of these little monsters, and
must kill the one wielding the blade.
The enchantment that holds the jungles surrounding Kurast is weakening,
and if it falls the city falls with it. To remedy this threat, Hralti
needs the holy Skatsimi blade called Bidbinn, so that he may harness its
mystic powers to reinforce the protective spells. You will find the
blade in the stubby little hands of a Pygmy in the Flayer Jungle. You
will actually encounter an entire village of these little monsters, and
must kill the one wielding the blade.
|
| Khalim's
Will |
 This
is the main quest in Act III, and definitely the longest and most
difficult. You will probably complete the other quests before completing
this one. Mephisto has taken control of the Zakarum priests, and is
using a device known as the Compelling Orb to boil their hatred over and
turn them against the citizens of Kurast. A stout and powerful artifact,
the Orb can only be destroyed by an artifact of equal power: Khalim's
Will. You must, however, reconstruct this weapon by gathering the organs
of the one priest who was able to withstand Mephisto's perverting
influence. This
is the main quest in Act III, and definitely the longest and most
difficult. You will probably complete the other quests before completing
this one. Mephisto has taken control of the Zakarum priests, and is
using a device known as the Compelling Orb to boil their hatred over and
turn them against the citizens of Kurast. A stout and powerful artifact,
the Orb can only be destroyed by an artifact of equal power: Khalim's
Will. You must, however, reconstruct this weapon by gathering the organs
of the one priest who was able to withstand Mephisto's perverting
influence.
The first organ, the Eye, is hidden in the Spider Cavern, found in the
Spider Forest (note that there is also a dungeon in that area called the
Arachnid Lair, so don't confuse the two). The Brain of Khalim is deep in
the Flayer Dungeon within the Flayer Jungle. The third component, the
Heart, is in the bottom of the sewers, which can be accessed through
either Upper Kurast or the Bazaar. Finally, you must retrieve Khalim's
flail by slaying one of the members of the High Council, which can be
quite a chore. Once you have all four components, combine them in the
Horadric Cube to create Khalim's Will.

|
| Lam
Esen's Tome |
 Alkor
believes that an ancient tome written by the priest Lam Esen may be of
some aid in the battle against the Three. This book is buried in the
Ruined Temple, a dungeon that can be found in either the Upper Kurast,
Bazaar, or Causeway areas. Find it and defeat the guardian of the Tome
and return it to Alkor. Talk to him again to get five attribute points
you can add anywhere to your stats. Alkor
believes that an ancient tome written by the priest Lam Esen may be of
some aid in the battle against the Three. This book is buried in the
Ruined Temple, a dungeon that can be found in either the Upper Kurast,
Bazaar, or Causeway areas. Find it and defeat the guardian of the Tome
and return it to Alkor. Talk to him again to get five attribute points
you can add anywhere to your stats.
|
| The
Blackened Temple |
 This
is a relatively straight forward quest: kill all the members of the High
Council and smash the Compelling Orb with Khalim's Will. The Compelling
Orb can be found in the Travincal area. Simply equip Khalim's Will and
attack it to destroy it. This will then open a stairway down to the
Temple's Guardian Tower where Mephisto is imprisoned. This
is a relatively straight forward quest: kill all the members of the High
Council and smash the Compelling Orb with Khalim's Will. The Compelling
Orb can be found in the Travincal area. Simply equip Khalim's Will and
attack it to destroy it. This will then open a stairway down to the
Temple's Guardian Tower where Mephisto is imprisoned.
|
| The
Guardian |
 It
couldn't get any simpler than this: Kill Mephisto. Of course, you'll
have to fight your way through several very tough bosses and other
enemies to get to him, and he's more than a handful himself. Keep
pounding on the Lord of Hatred until he goes down, then return to town
and ready your supplies before heading through the portal into the very
shores of Hell itself. It
couldn't get any simpler than this: Kill Mephisto. Of course, you'll
have to fight your way through several very tough bosses and other
enemies to get to him, and he's more than a handful himself. Keep
pounding on the Lord of Hatred until he goes down, then return to town
and ready your supplies before heading through the portal into the very
shores of Hell itself.
|
Act IV Quests
| The
Fallen Angel |
 This is one of the more tragic stories in Diablo II, and you must play a
bit part in it. The angel Tyrael describes one of the late champions of
Pandemonium Fortress, Izual, who led an assault on Hell itself, and paid
a terrible price. Izual was cast out of both Heaven and Hell, and
possessed by a creature dredged up from the pits of hell for the
singular purpose of torturing and imprisoning him. Tyrael feels that
Izual's crimes have been fully paid for by ages or torture, and charges
you with finding and releasing him. You must track down the tortured
soul on the Plains of Destruction and destroy him. Once you do so you
will receive two skill points to use as you see fit.
This is one of the more tragic stories in Diablo II, and you must play a
bit part in it. The angel Tyrael describes one of the late champions of
Pandemonium Fortress, Izual, who led an assault on Hell itself, and paid
a terrible price. Izual was cast out of both Heaven and Hell, and
possessed by a creature dredged up from the pits of hell for the
singular purpose of torturing and imprisoning him. Tyrael feels that
Izual's crimes have been fully paid for by ages or torture, and charges
you with finding and releasing him. You must track down the tortured
soul on the Plains of Destruction and destroy him. Once you do so you
will receive two skill points to use as you see fit.
|
| Hell's
Forge |
 While Mephisto's Soulstone still exists, the Greater Evil still has a
foothold in the mortal world. You must destroy it to lock him out of
your world altogether, and doing so will require you to travel to the
Hellforge and strike the Soulstone with the mighty hammer found therein.
Trek across the Plains of Despair and into the City of the Damned, until
you finally enter the Hellforge. There you will fight Hephasto and all
his minions. Once they are defeated, equip the Hellforge Hammer and
click on the Hellforge. This will destroy the Soulstone and give you a
nice shower of precious jewels.
While Mephisto's Soulstone still exists, the Greater Evil still has a
foothold in the mortal world. You must destroy it to lock him out of
your world altogether, and doing so will require you to travel to the
Hellforge and strike the Soulstone with the mighty hammer found therein.
Trek across the Plains of Despair and into the City of the Damned, until
you finally enter the Hellforge. There you will fight Hephasto and all
his minions. Once they are defeated, equip the Hellforge Hammer and
click on the Hellforge. This will destroy the Soulstone and give you a
nice shower of precious jewels.
|
| Terror's
End |
 You knew it would eventually come to this, right? You must defeat Diablo
himself in his own lair to vanquish him forever and avenge all the lives
he has taken and misery he has sewn. Travel to the River of Flame and
make sure to activate the nearby waypoint. Crack open the five seals in
Diablo's lair to bring the Lord of Terror to you. Unfortunately, some of
his cronies will show up first when you break some of the seals, so
you'll have to take them out. Diablo is super tough, so taking him down
is going to require some real effort and a lot of coming back from the
dead. But it's worth it.
You knew it would eventually come to this, right? You must defeat Diablo
himself in his own lair to vanquish him forever and avenge all the lives
he has taken and misery he has sewn. Travel to the River of Flame and
make sure to activate the nearby waypoint. Crack open the five seals in
Diablo's lair to bring the Lord of Terror to you. Unfortunately, some of
his cronies will show up first when you break some of the seals, so
you'll have to take them out. Diablo is super tough, so taking him down
is going to require some real effort and a lot of coming back from the
dead. But it's worth it.
|
|
 |


 |
|
|