PS2 Controller Lockup
There are a number of reasons why a controller locks up in the PS2 but we will start with the simplest procedures first. The most common problem that happens to people with this problem is they think it is definately their PS2 not so first I want you to check your controller for cuts in the cable if there aren't any. Try another controller you know works if that still doesn't work then for sure you know its your console. When certain its your console here is your solution the first and less costly solution is to buy another controller port. I will explain below how to replace one.
Replacing a controller port
The first step is to get your PS2 cover off to if you don't know how click here. If you do and already have it off continue reading you will notice it is secured by either 2 or 3 screws 2 screws (pictured below)
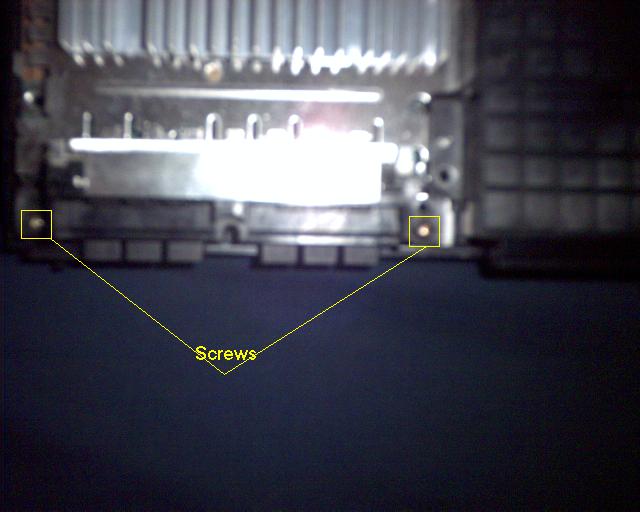
Now you are to loosen the 2 or 3 screws securing the controller port. Pull it up and towards you will notice a ribbon connected at the top of it grab it and firmly grip the controller port and rock the ribbon cable back and fourth until it comes loose. Click Here to go to the PS2 parts link page to find out where to buy this part. This solution usually solves the controller lockup issue but very rarely the entire main board must be replaced continue reading to find out how. Remember this is very rarely the problem.
Mainboard Replacement
Sorry but I don't have pictures for this one. click here to go to the parts link page to find out where to purchase the PS2 mainboard. But I will explain this as clearly as possible first you have to get the case off if you don't know how click here if you already have the cover off continue to remove the mainboard is a real challenge to explain with words first you must remove all the screws that secure the mainboard to the PS2 case including the screws that anchor the fan and switch assembly. There should be from 8 to 10 screws. After they are loosened you must loosen the controller port screws lift out the controller port no need to dissconnect the ribbon cable. Now it is time to remove the DVD drive casing you will notice it is secured by pieces of metal gripping onto pieces of plasic tightly carefully take a regular (slotted-head) screw driver and pry the metal away from the plastic just enough to lift the DVD drive off the case mounts there are about 2 of these mounts. After that you are ready to lift the mainboard make sure there are no objects plugged into the USB ports. Now lift the mainboard up from the back all the way and pull it up and the board will come out. Now reassemble the DVD unit controller port etc. on the new mainboard and secure it to the case. The trick to get all the plugs in the right place is remove them all one at a time and replace them one at a time and you can't put a cable or plug in the wrong place.
Back to Main Page

