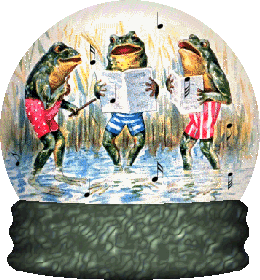
The last step we did in part 1 was to save the finished picture in psp format.
Now make 3-5 copies of that psp image. (Edit/copy, Edit/paste as new image). Don't do anything with the original picture; that's the one you'll save as a psp file and use to keep making new copies of if you don't like your first results or if you decide to use it again for another project. Besides musical notes, you might want to use raindrops, or tadpoles, or flies ...or Budweiser beer cans! ;-) It depends on your imagination and what you can find to use.
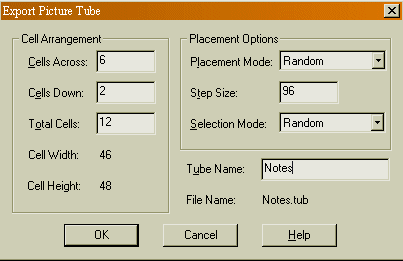
The simplest way to add animation to a globe is to find a tube that has clear images of what you want to use. Here's the notes tube I made; download it into C:\Program Files\Paint Shop Pro\Tubes (assuming that's where your .tub files are). Browse to that file in Paint Shop Pro, open it, select File/Export/Picture tubes. There are six images across and two down; refer to the diagram below (this is the dialogue window that opens after you click "export tube") for how to fill in the information.
Incidentally, if you need some good tubes, (and sooner or later you will), here's a link to a site that links to and very helpfully describes dozens of tube sites: Vistar's Page. One of the sites she links to has the best collection of tubes I've seen anywhere on the web, and I surf a lot for tubes!. Here's the direct link to Rhonnie's Paint Shop Pro Tubes.
Now Click on the Picture Tube tool and open your Notes tube. Vary the sizes of the notes from about 30% to about 65% using the slider. Place about 9-12 notes in each image. If you want, make 5 images, then experiment later with deleting one or two frames. You'll get a more varied pattern the more frames you make, but you also use more space and cause a longer download time. Save each image after you place the notes. The first one you could call frogglobe1.psp; the second frogglobe2.psp, etc. Be sure to vary the placement of the notes as well as the size.
Open Animation shop:
Click on the animation Wizard, Check only Same Size as the first image frame, then click next.
Check transparent for canvas color, click next.
Check - Centered in the Frame and With the canvas color and click next.
Check Yes repeat the animation indefinitely, and fill in how long each frame will displayed (start with 30/100 for now), click next.
Now you'll add the images you just saved; Click add and select image1.psp from the folder where you saved it, repeat for image2 etc. Click next.
Click Finish.
View your animation. Click on the first filmstrip icon to see how it looks.
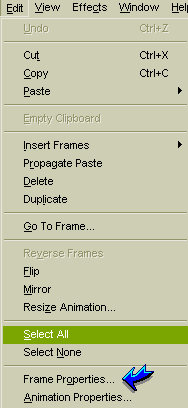
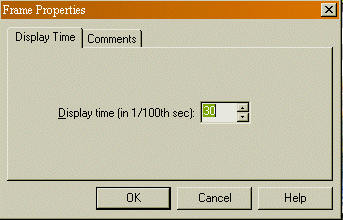
If it doesn't look right, try adding or deleting frames, or cut and paste to different locations in the filmstrip. You can also change the frame display time by clicking *Edit/Frame Properties and changing the number. *If you want to change all the frames at one time go to Edit/Select All before you change the frame properties. Experiment. If you select too low a number, the animation can look rather frenzied, but if you go too high the motion gets jerky unless you add more frames.
Once you are satisfied with it, click on File/Save As and save it as a GIF file; name it and make sure you save it to the folder where your web page is that you're going to display it on.
Leave at high quality and click next; the program will now optimize the animation.
Check the download times; if they are too high, you may want to go back and resize the animation later. Click Finish. Your globe is done!
Applying effects to a plain base. These techniques are not all broken down step by step; there are too many variations for that to be practical. If you're working on one of these and get stuck, send me a picture of what you're working on and tell me where you got hung up; I'll give you more precise directions.
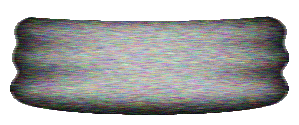
Increase the colors to 16 million. Select the background with the magic wand, then go to Selections/Invert. Keep the base selected. If you would like to experiment with the Deformation tool, you can make this into interesting shapes before you decorate.
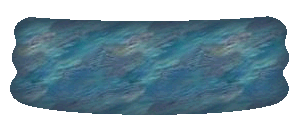
For the tutorial, we'll keep this as a plain low base.
If you have Blade Pro, you can try dozens of effects, changing the colors and depth to create a lot of different styles. Just go to Image/Plug-in Filters/Flaming Pear/Blade Pro. The advantage of Blade pro is that it can preserve the shading and ridges of the original graphic (just be sure to put reflection almost or completely to 0, and keep the radius low as well.)
After you apply the original effect, you can add tubed images to decorate it. You can make the tubed images one color, or add a layer to the original base then apply the tubes, then you can select them all and apply the same effect to them. You may have to alter the color or some of the settings a little to make your add-ons blend in without getting completely lost.
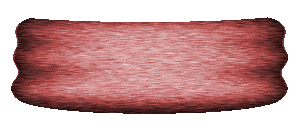
Another technique you can use is to use the flood fill tool with any pattern you like. Pour the pattern into the shape, then invert selections and do an image/drop shadow. Make the color a very dark shade of one of your pattern's primary colors (change your background color then use Background Color as the Color Attribute), make the opacity 100%, and put the blur up high, around 30. Vertical and horizontal should be 0. This will shade the outer edges of the shape and make it look a little rounded. Go to Selections/None and save.
A third way to decorate the base is to add texture to it by adding noise, then using a motion blur. If you don't have Blade Pro, or prefer something simpler, this is another good technique for preserving the ridged and shadowed effects. The steps are Image/Noise/add. I set it at 50% noise/Random. Now go to Image/Blur/Motion Blur. Set the direction at 90 degrees, the intensity at 6.
Go to to Colors/colorize; for the color here I used Hue=255/Saturation=103. Play with the sliders to get a color you like.
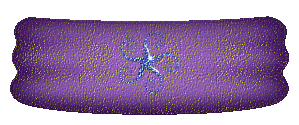
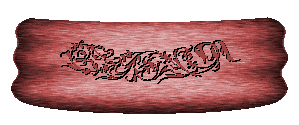
Use tubes or ding-bat fonts to decorate if desired. There's a great selection of decorative fonts at Fonts & Things - the most unusual fonts online.... You can pick up Holiday Fonts, zodiac fonts, or a great looking font to use for an initial or a name. The one used on this base is a dingbat decorative font called "Flower Ornaments." I used a size 36 'g' then used an image/effects/cutout with the opacity at 100, the blur at 0 and the horizontal and vertical both at 1 and then both again at -1 to give it a burnt-in look.
This is all for now on the Bases; I should have a section done soon on how to make them from scratch. It's just missing a few steps; but I'm getting ready for vacation and will be out of town for a week.
This is the end of the 2nd half; go back to page 1 of tutorial to review it or to download one of the other bases: Globes Part 1


 View your animation. Click on the first filmstrip icon to see how it looks.


 Use tubes or ding-bat fonts to decorate if desired. There's a great selection of decorative fonts at Fonts & Things - the most unusual fonts online.... You can pick up Holiday Fonts, zodiac fonts, or a great looking font to use for an initial or a name. The one used on this base is a dingbat decorative font called "Flower Ornaments." I used a size 36 'g' then used an image/effects/cutout with the opacity at 100, the blur at 0 and the horizontal and vertical both at 1 and then both again at -1 to give it a burnt-in look.