Animated globes are the big craze on the web now. Yes, I fell into the globe craze too; thanks to a tutorial by Molly Dog (aka Larry). Click here to try out his version; it's geared for people who are comfortable using the more technically advanced features of Paint Shop Pro and is much shorter. If you need step-by-step explanations, my tutorial breaks down all the steps and goes into more detail on making bases. I've had several requests for how to do the bases; I'll supply a link for a tutorial on how to make your own from scratch; for now go to the end of Globes part 2 for a few tips on how to decorate the unfinished version I've uploaded here. Of course you're also welcome to use any of the ones that I place on this site if you prefer; you can resize them, add tube pictures or re-colorize them to suit your project.
Incidentally, not all globes have to be animated. If you want to display a globe with no motion, you can have music playing on your website behind it, then it functions well as a decorative music box all by itself. This is particularly useful if you have a gorgeous color washed background that separates into ugly lines when you change it from jpg to gif format (which is what most animation programs change it to).
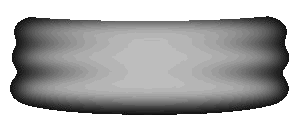
Here's a selection of bases; the grayish white one at the end is the unfinished one for applying your own effects to that we're going to cover at the end of the tutorial. If you have a good selection of clipart, also be alert for pedestal bases and interesting looking containers you can use.
These are reduced in size; when you save one it will save at its original size.
First, start a new image, size about 315x400, background transparent.
Second, look through the clipart that you own and select the subject you want to use for the globe. If you choose gif formatted art to start with, you will generally have better luck. If it's in jpg or psp format,
reduce the colors to 256 (then change it back: hit undo) so you can see whether the finished picture will retain the same texture, or at least a texture that is pleasing to you. Here's a picture of a flower I wanted to use in a globe; I wasn't able to animate it because the background separates. This happens a lot with skin tones also, so be sure to check unless you're starting with a gif.
Select the center of the area you want to use in the globe; using the selection tool with type set to circle, select a circle about 250-300 pixels wide with the mouse.
On the left is the picture I started out with for this globe. You can copy and use it to follow along if you don't have a picture of your own selected yet. (It's reduced on this page; the actual size is 294x343). Using the selection tool with type set to circle, put the crosshairs about at 156 and 186 (the bottom of the middle frog's right pantleg), then click down on the left mouse button. Pull back until you have a circle about 250x250 (numbers are at the bottom of the PSP screen) and release the mouse. (See the picture on the right). With the circle still selected, magnify the picture and use the clone tool and the push tool to spread the texture between the plants into the space above. Don't worry about the white below, that part will be covered by the base. When it looks uniform, edit/copy the selected portion. Click on the new image you made at the beginning and select edit/paste as transparent image. Position the circle in the center close to the top.
The circle should still be selected; if not, use the wand to select the transparent background, then invert the selection. Now choose image/plugin filters/Filter Factory A/Spotlight. Leave the top parameters as they are, but change the inner grain to 170 and the outer grain to 97.
If you don't have filters, you can still get a rounded globe effect; but it won't glow as much in the middle. You will also want to use this technique if you are working with the inside of the globe black (nighttime fireworks, for example) and plan to show it against a black background; click here to view an example of one I did for one of my web sites. Before copying the circle to the new image, select Image/effects/cutout. Your settings will be: fill interior=not checked/shadow color=white/opacity=88/blur=19/vertical=4/horizontal=0. Now copy the circle to the new image.
Start a new layer, then select one of the bases and fit it to the bottom of the globe. I chose the algaebase, which is initially a little large for this globe. Before copying it, bring the colors back up to 16.7 million. Paste the base image into the globe window. If it is too large, go to image/resize and uncheck "resize all layers" leave "maintain aspect ratio" checked. Reselect the base if necessary, then set it under the bottom of the globe. Snug it up evenly so the sides of the base fit right up against the glass, then release. If needed, keep resizing the base until it fits properly, then choose merge layers.
The last step before animating the globe will be to get rid of some of the excess space. Deselect everything (Selections/none). Set the selection tool to rectangle. Start near the top left corner; outline around the globe then go to Image/crop to selection. Save the picture as frogglobe.psp.
Questions? Problems? Did I leave out a vital step? Email me at JJJPEMom@aol.com. I'll respond as quickly as possible.
This is the end of the first half of the tutorial.
Go to page 2 of tutorial to continue: Globes Part 2


 On the left is the picture I started out with for this globe. You can copy and use it to follow along if you don't have a picture of your own selected yet. (It's reduced on this page; the actual size is 294x343). Using the selection tool with type set to circle, put the crosshairs about at 156 and 186 (the bottom of the middle frog's right pantleg), then click down on the left mouse button. Pull back until you have a circle about 250x250 (numbers are at the bottom of the PSP screen) and release the mouse. (See the picture on the right). With the circle still selected, magnify the picture and use the clone tool and the push tool to spread the texture between the plants into the space above. Don't worry about the white below, that part will be covered by the base. When it looks uniform, edit/copy the selected portion. Click on the new image you made at the beginning and select edit/paste as transparent image. Position the circle in the center close to the top.
  The circle should still be selected; if not, use the wand to select the transparent background, then invert the selection. Now choose image/plugin filters/Filter Factory A/Spotlight. Leave the top parameters as they are, but change the inner grain to 170 and the outer grain to 97.