Part 1: Round Frames
From | 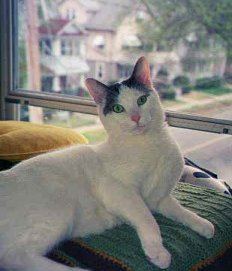 | to |  |
Select a picture. Since you have to save in gif format, don't pick anything too complex; gif isn't as kind as jpg to pictures. Animals, cartoons, pictures of projects or products and line drawings probably will work better than pictures of people unless they're of exceptional clarity. Also, pick a picture that has room around the area you're copying to drag the circle tool. Something at the top or corner of a picture probably won't work. If you are copying a person or animal, make sure the face or head isn't obstructed by hands or paws; they'll look odd when the picture has been cut out.
Here's a link for tons of filters; Filter Factory and other Plug-ins. You'll need the Filter Factory A to do the frames.
Note: I made some of these pictures smaller than they really are in order to fit them into the tutorial. Beginning and ending pictures are the correct size.
 Open picture and select and save circle.
- Start a new file; 300x300, background white, 16.7 million colors.
- My initial picture is a jpg rectangle, 232x271. I want to frame only the head, so I use the selection tool, set it to Selection type = circle; feather = 0; check antialias.
- Then I select a spot between the cat's eyes, left click and drag until the circle is 120x120. You may need to go larger or smaller, depending on the size of your initial picture.
- Copy and paste into the center of the new file.
- Find center and draw frames around the picture.
- Using the color picker, select two related colors from the picture for the foreground and background colors.
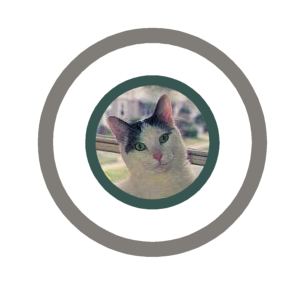
- Select the shapes tool. Shape=Circle; Style=Outlined; Outline width=10; anti-alias.
- Find the approximate center of the circle, Make a notation of the coordinates so your second circle will start in the same place. Left click and drag until the picture is enclosed. (Make sure no white is showing inside the selected area).
- Use the Arrow to flip foreground and background colors. Using the same coordinates as the first circle, start another circle: Shape=Circle; Style=Outlined; Outline width=15; anti-alias. drag until you're at about 215x215 if your picture is about the same size as mine.
- Fill area between circles.
- Select area with magic wand. Match mode=RGB; Tolerance=0; Feather=3.
- Using the color picker, select a medium color from the picture.
- Fill.
- Select both circles and apply filters.
- Using the magic wand, select both outline circles (not the area between them) Match mode=RGB; Tolerance=0; Feather=1.. Use shift key so you can select both of them at the same time.
- Image/Plug-in Filters/Filter Factory A/Woodgrain. You can use the defaults except for the last two: Amounts should be between 160 -200. Grains should be at 5. Click ok.
- Image/Plug-in Filters/Filter Factory A/Pool Shadow. Again, you can use the defaults except for the last two: Shadow intensity=50; Brightness =130. OK.
- Image/Plug-in Filters/Filter Factory A/Mirror. Use defaults. OK.
- Image/Effects/Cutout: Uncheck fill interior. Color=Black; Opacity=90; Blur=2.4; Offset vertical and horizontal=2. Then repeat this step, using Offset horizontal and vertical at -2.
- Cut your picture out of the excess white in your picture (if any) to cut down the size.
- Save a copy of your picture at this point as (for example) picture1.gif.
Questions? Problems? Did I leave out a vital step? Email me at JJJPEMom@aol.com. I'll respond as quickly as possible.
This is the end of the first half of the tutorial.
Go to page 2 of tutorial to continue: Animation Part 2
Back to Main Page
Back to RaggBagg index
Updated: September 3, 2001