

Topic: Crickl's Recipes
 I did a bad thing one Christmas. Not thinking it was a bad thing at all when I began, it turned into a holiday obsession that I will never be rid of....
While reading a ladies’ magazine with cute decoration ideas and recipes for the holidays, I came across a recipe for English Toffee. I was newly married and on a strict budget….we were both seminary students and as poor as dirt. As a teen and college student, I had my own tradition of getting a can of Almond Roca for my family for Christmas. The candy is not expensive, but I knew making it from scratch from very simple ingredients would be cheaper, I could make some for each family member and it would be more special.
Little did I know that 22 years later, my family and friends await that toffee every year, like crazed addicts! Some of them even keep the jar or tin I gave it to them in and hand it back to me the following year.
“So you won’t have to buy so many this year WHEN you make the toffee.”
Uh huh…..
So I am going to share the recipe with you, but I will include this warning: you may not ever be able to stop making it once you’ve dabbled in it. So beware!!
I am including all the tips and tricks I have learned from making toffee every Christmas for 22 years. It is not complicated, but trust me, the tips are tried and true! One tip is that you cannot make a decent batch of toffee if you live in a high elevation area! Don’t even try it. When we lived in the mountains of Arizona, I had to make the toffee on trips to Phoenix or when we went to visit my husband’s family in Oklahoma for Thanksgiving. They don’t take elevation as a valid excuse. I must make the toffee.
First is a very detailed explanation of candy making. Please do read it all if you are going to attempt it. It is not hard, but it does need to be done correctly and in a very timely way. At the end are very concise instructions so it’s easier to read them as you are making the candy. I put the basic recipe, including ingredients all in bold in case you want to copy just those into a recipe card.
Enjoy! (but beware!)
Materials needed:
-Heavy bottomed saucepan of medium size
-A wooden spoon or spoon made for cooking candy and stirring constantly at very high heat. The type of spoon that works best is one with a flat end, so you can scrap the bottom of the pan constantly. After several batches of toffee, the wooden one with crack but it still works best.
-A candy thermometer. I brake candy thermometers that are made of glass, so I tend to use my plain old meat thermometer most. It works fine, but make sure you don’t hold it to the bottom of the pan. Try to suspend it in the candy so you get an accurate reading. The trick is holding it there while constantly stirring, so clip it on the side of the pan and kind of tip it so it’s not hitting the bottom of the pan while taking the temperature.
-Metal cookie sheet. Metal cools much more quickly than a stone or glass one. Spray the sheet with cooking spray very lightly. The toffee will not run over the sides of the sheet if it is a regular sized one, so it’s ok to used one without edges.
****Children should not be under foot while making candy. Should it spill or bubble and splatter, it will cause very severe burns!****
English Toffee
Makes 1 pound
1 cup butter (do not use margarine)
1 cup sugar
3 Tablespoons water
1 teaspoon vanilla (splurge and get the really good kind from Trader Joes)
1 Hershey bar
3/4 cup chopped nuts (if desired) pecans or almonds taste best
To prepare for quick steps when toffee is cooked, have these things ready before cooking ingredients:
-Spray cookie sheet with cooking spray and set it on a dish towel on the counter. (the dish towel protects your counter from being scorched)
-Open the wrapper of the Hershey bar and break each square apart, ready to top your toffee. You can also use ? to a full cup of chocolate chips.
-Prepare your nuts for topping if you use them. Chop finely or bash them to bits in a ziplok bag with a coffee mug or rolling pin…..as finely chopped as you can.
Cooking:
Put butter, sugar and water in a heavy bottomed saucepan. Cook on medium heat (or just a little higher, but be careful not to used too high of heat or you can scorch it and ruin the batch) until mixture reaches 300?, stirring constantly. (this is where it gets tedious as you stir….it usually takes about half an hour to get it to hard crack stage…300?).
As toffee cooks, it will turn from yellow and bubbly to thick caramel color, which is when you want to put the thermometer in. Move the thermometer periodically to prevent scorching in that spot. Never (EVER) stop stirring….it WILL scorch very easily. Let the answering machine get the phone, let the baby cry, let the dog piddle on the carpet, just don’t let the toffee burn! =)
When it reaches 300?, turn heat off and remove pan from burner, then quickly stir in vanilla. It will splatter a little, so take care. I hold the pan over the sink while adding vanilla.
Pour immediately into sprayed cookie sheet. It will at once begin to harden, so do not try to spread it out. Let it flow where it will.
Putting the hot pan in the sink or back on the stove is all the time it needs to harden enough to begin laying the chocolate squares onto the hot toffee. It will begin to melt immediately, so begin spreading it to cover the top with a spatula.
Lick spatula as to not be wasteful of any chocolate. I may point out here that you should NOT, EVER, under any circumstances (!!!!) lick the spoon you just stirred toffee with. You will not have skin on the roof of your mouth for a week. Please don’t ask me how I know that.
While chocolate is still soft, sprinkle surface with finely bashed nuts and enjoy how pretty it all is! After it cools completely, lift edges of toffee and randomly break it into appropriately sized pieces. Any inappropriate sized pieces may be eaten by the cook at his/her discretion.
Place into air-tight containers which you can decorate if you wish and enjoy a job well done and accolades as plentiful as the sand of the sea!
Okay, now that you have read the way too detailed instructions, here they are in simple form that is easier to read.
Basic instructions (with no snarky details):
Put butter, sugar and water into saucepan on medium heat and stir constantly until mixture reaches 300?.
Turn off heat, stir in vanilla, and pour onto greased cookie sheet.
Lay broken chocolate bar on top, spread as they melt, sprinkle with nuts, cool thoroughly.
Break into pieces and store in air-tight containers.
Makes 1 pound of delicious candy!
 It's funny, I thought having all this recuperating time after surgery would give me lots of time to write and post thoughtful blog entries.....but I haven't. My brain is a little dull and listless...it's not super-bad, but bad enough to feel a blank stare come on when I even think of writing a blog entry. So I will refer you to something interesting that I found today.
 It's been cool enough to sleep with a fan in the window the past week and we are enjoying the Phoenix Fall weather. I have to clarify Phoenix Fall because it's not like the usual crisp wind, fire smoke smell in the air or sweater-wearing-ish Fall we're used to. Still, there is a change for the cooler in the air and it is refreshing! Today we woke up to rain pouring onto the street and roof, tumbling down the street on both sides. So we opened up the doors and let the refreshing, clean air come wisping through the house. The air conditioner is still set at 78 and has not come on yet. And Charles has been doing yard chores most of the afternoon. We have no leaves to rake. Mesquite and ficus trees don't loose their leaves all at once and you barely notice they are changing. But bushes need trimming, windows need calking, and it's nice to just be out there today in the 77 degree, windy weather.

 We talked for a few minutes, focusing on my recent surgery and how quickly I am bouncing back. J jokingly said she had no pity for me after hearing I didn't have to have major abdominal surgery for the hysterectomy and she told me about hers. Then we compared gall bladder surgeries, mine laproscopic, hers major abdominal surgery. Then N chimed in discussing bladder lifts and the wonders thereof.
 You know how when you stub your toe or have a hangnail, it's all you can think about? Every move you make, you're thinking about the pain, the frustration soars when you bang the toe again in the same spot, salt gets under your hangnail and it sends you reeling. I hate that.
  I would have looked at the pictures in this post as torture 2 days ago! I have been consumed over a small part of the body that has plagued my every waking moment!
  Today, I barely thought about it. That is why there was no update this morning, no call to prayer this afternoon, no whining this evening. I know people have been praying and talking me through this, yet when I get some relief from the obsession, I forget to thank people, to even give them a report on the success!
  It is still there, still not completely 'right', but it's much better than constant discomfort and frustration that I've dealt with the past 3 days especially.


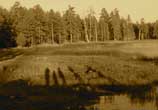
 Once the weather gets cool, I consider it Fall. We get Fall weather here in the mountains earlier than normal. So I am already in the Fall mode….thinking about mums in my garden, looking for changing leaves, and rooting out my Fall recipes. Pumpkin bars, apple pie, soups, aaaaaaaaand the ever Fallish of Fall recipes….ginger snaps. We lived in New Jersey for almost ten years and every Fall we would go to the store and see tall stacks of orange boxes at the end of the grocery isles…..boxes of Sweetzel’s Spiced Wafers. By the second Fall we lived there, I had to buy a box of them since there were so many stacked up in every store you went to, that it made you curious as to what was so special about these cookies….well it made me curious anyway. From the first bite, they became my favorite cookie. They weren’t like other ginger snaps…..they were almost black with spices and hard as a rock, so you has to dunk them in your coffee or milk, which just added to their charm.
  Sift together the spices, flour and soda. Add the dry ingredients to the molasses mixture. Mix well. Refrigerate overnight. When thoroughly chilled, form into small balls about 1 inch in width. Roll the top side of these balls in sugar. Place on greased or parchment lined cookie sheet. Bake at 350 degrees for 8-10 minutes. Makes approximately 6 dozen cookies.