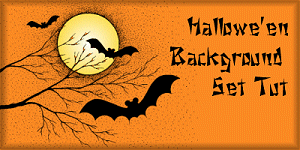
This tutorial shows you how to create this entire background set, or you can create just the background for stationery. Hope you enjoy this tutorial. The following is a zip for both the font and the graphic, which is saved as a psp file. Save it, then open it along with your program. Install the font.
Let's Begin! Remember to save often! 1) We are going to start with the background. Open a new image 200 x 200, black background, 16.7 mill col. Change your foreground colour to #9624AA or a colour of your choice. Get your draw tool, straight line, point to point line, stroked, width 7, antialise and vector checked. Take your draw tool and hold it over the new image until you see (100,0) appear at the bottom left corner of your program. Check the bottom left corner of your screen, you should see (100,0) appear. That is where to start. Click once, applying a square. Go down to (100, 25) Drop another square. Then continue to draw a zig zag line, dropping squares until you are at 100,175. Drop this square at (100,175). *Note you can move the box and place it at (100,175)* Then another at (100,199). What this does is give you a straight line where the top and bottom of your background meets. Now click anywhere off the image and what you should have appear is your line with a vector box surrounding it. Move the vector up at the center node, and down at the bottom center node slightly making certain your bar extends off the top and bottom. This line reminds me of a lightening bolt. 2) Now convert it to rastor by clicking on your layer palette, right clicking on this layer and finding convert to rastor. Here is what you should have:
3) Now using your magic wand, click on the left of the line we just created. You should have a selection of the area to the left of your bar. If not, take your deformation tool and click on your line and extend the ends to meet the top and bottom of your image. 4) Click on your bottom layer, then create a new layer. Go to selections, modify, expand by 1 pixel. Change your foreground colour to #FB8A25, a bright orange. Take your flood fill tool, solid, PSP7 users turn off your background, making certain you are on the new blank layer, flood fill. Deselect. 5) Zoom in once. If you have little corners, not covered, take your retouch tool, push setting, about size 8, opacity 100, density 100, step 25, hardness 100; holding your mouse over the orange push towards the bar filling the little gaps. 6) Now you can add a bevel to the line or leave it plain. In this example I decided to leave my bar plain. 7) Now take the graphic which was in your zip file called bats. Open it, and edit copy it. Then edit paste it over the orange. Resize it by 75%, maintaining aspect ratio, and all layers NOT applied. You should have something similar:
8) Now take your magic wand and select the inside of the moon. You will need to click holding the shift key at the following areas where the bright blue x's are.
9) Go to selections, modify, expand by 1. 10) Add a new layer under the graphic ~bats~ layer. 11) Change your foreground or stroke colour to #FFF0BB and your background or fill colour to #FFC843. 12) Go to your flood fill gradient, and find sunburst, repeat 0, gradient center, horizontal 50, vertical 50. Click once. Go to effects, noise add uniform 3. Select none. Yes there are little orange areas not covered. Do not worry, these look like leaves. Don't you agree?
13) Take your crop tool and position it as following, and trim the area, especially if you used a bevel on your line.
14) Change your background, or fill colour to black. Merge all flatten. Go to borders and add the following border:
15) Your background is completed. To check and see if it will aline properly, create a new image, 300 width x 600 height, go to your flood fill tool, pattern and fill with your background image. It should aline evenly. 16) Open the star.psp given in your download. I made this. Edit copy it, resize it to 75%, duplicate and position it, then edit copy resize 75% again, sharpen. Duplicate several of these and position. Then Duplicate it again, resize 75%, and position, duplicate a few more and position your stars as following:
17) You are done the background. Save and enjoy! Take a break! Smiles.. Header and Buttons The header and buttons are also quite easy to create. For the header open a new image 300 x 150. Transparent background, 16.7 mill. colours. Flood fill with #FB8A25. Add a new layer and following steps 7) to 12) add the graphic. Then go to effects, buttonize and add the following:
Then click on your type tool, and find 19 font. The font comes from a royalty free cd. Type your heading, position the type. Your header is done. To make the buttons, as for my logo, create an image 131 x 56. Follow as for the header, except you do not have to flood fill the moon. Also you will need to resize everything. When you get to the buttonize, resize the height and width to 5. File save. Hope you enjoyed this tutorial. © Monday, September 10, 2001 to TTG All rights are reserved. Do not duplicate nor copy any part of this tutorial, or use any of these graphics in another tutorial.
Created Saturday, September 8, 2001, All rights reserved. To view other tutorials written by TTG go here. |