 Character Studio Tutorial
First off I'm using a counter Strike model because I suck at Modelling right now. I simply exported it to 3ds format from Milkshape3d because he has a good pose I also plan on putting it in Quake3 because I like it but only for personal use and to get the conversion process down to a science so credit goes to the Counter Strike team for the making of this model
Tools that you will need
 3d Studio Max R3 Obcourse
Character Studio 2.2
Pop'N Fresh's MD3 Exporter for 3d Studio Max
Get it Here
Npherno's MD3 compiler
Get it here
Now that that's out of the way lets get started
First obcourse load your mesh
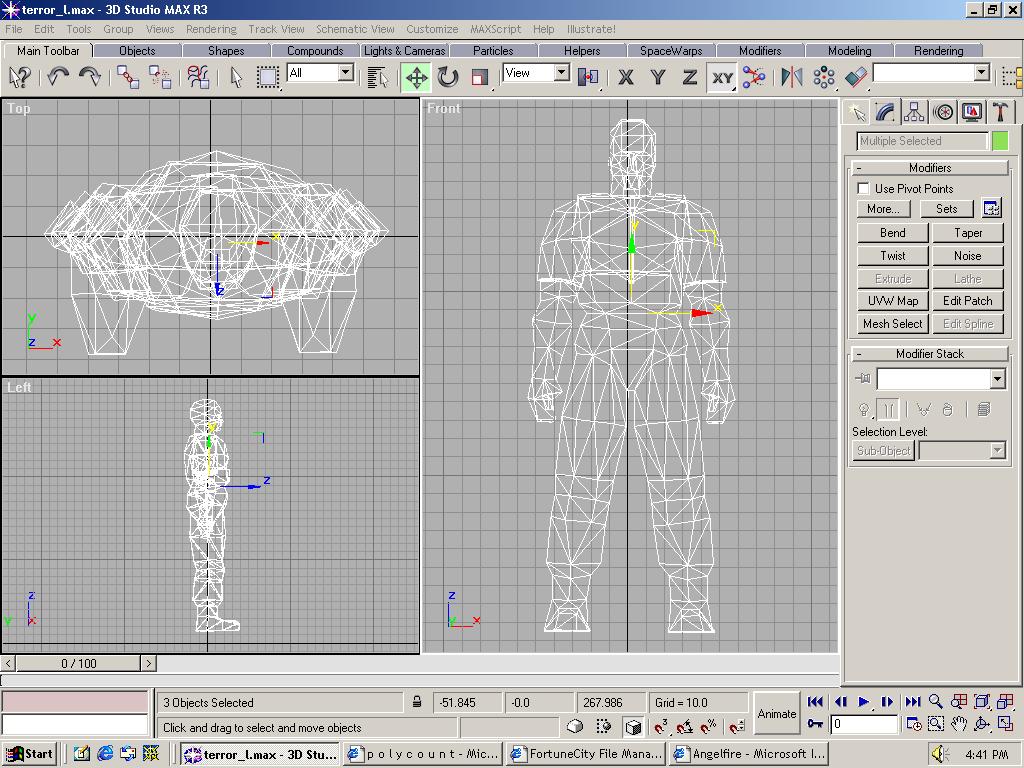
You should have 3 different parts representing your character: h_head for the head, u_torso for the upperbody and l_legs for the legs obcourse. Okay then once you've got everything in place you should select all the parts and freeze them so that nothing moves when we apply the biped unto the mesh to do this you must click on the display icon and click on the freeze rollout and choose freeze selected

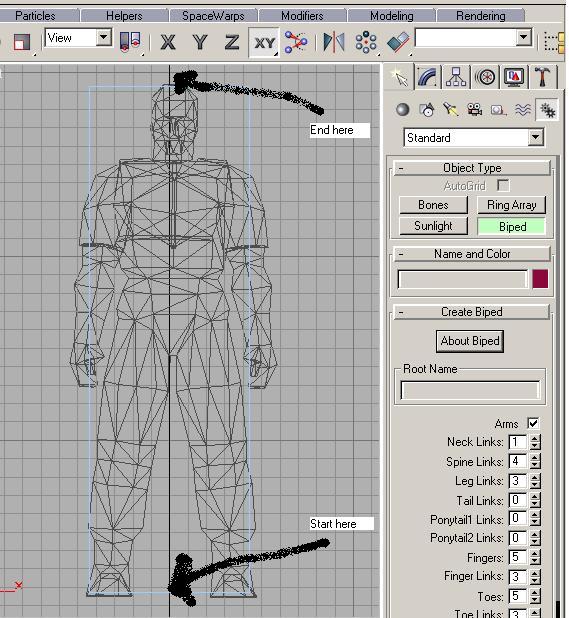
Then click on create -->systems--->biped

After you select biped place the mouse pointer on the bottom in between the feet and while holding the left mouse button drag it to the top of the head this is the process of loading the skeleton
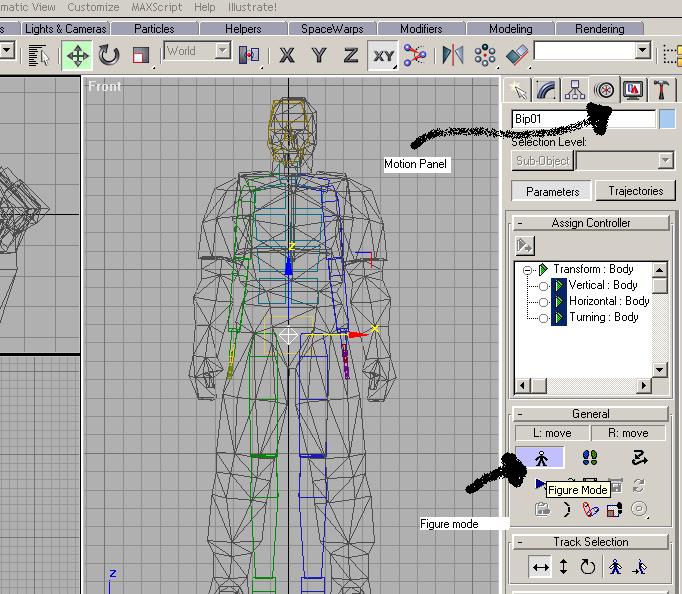
Then before you start moving the parts into the skeleton you gotta make sure you click on the motion panel then click on figure mode
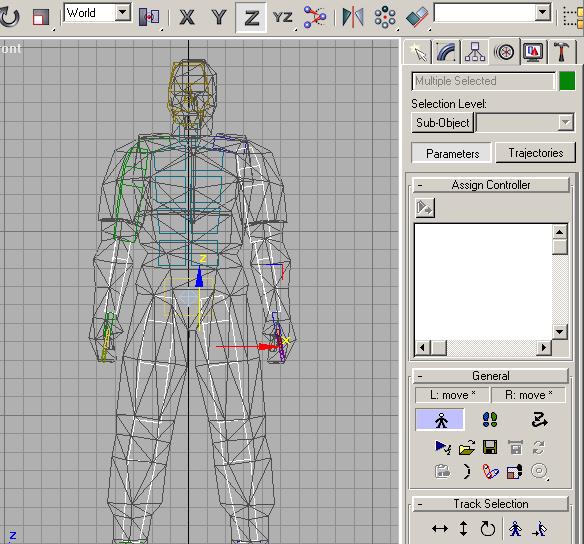
Then start moving the parts into the mesh it doesn't have to be exact as long as you have the shoulders, knees, and head aligned with the mesh and you might need to scale some parts so that they fit inside the mesh
then once you have everything in place go ahead and click on the unfreeze all button so go click on display and unfreeze all. Then select the all the parts of the model except for the skeleton itself and click on modify--->then more---> and select physique from the list that pops up
Then click on attach to node which is the little stick figure with a target in it's belly
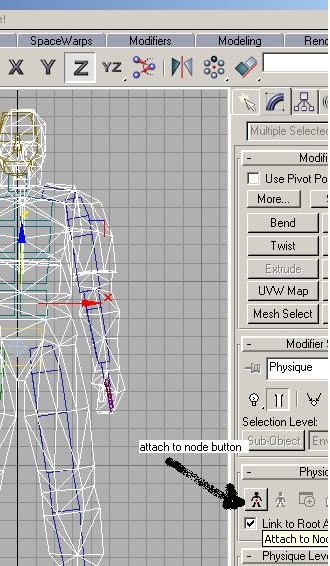
Then click on the pelvis and another window should popup when it does click on initialize and now your mesh should look like this

Now move the arm up if the mesh stretches don't panic this normal
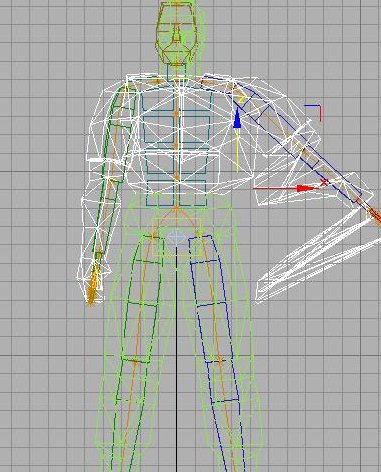
Now what you gotta do is is click on the subobject button and select vertex from the dropdown menu. Click on select make sure that no blending is selected from the blending between links drop down menu it should look like this

Now what you gotta do is click on select then select some of the points that stayed in place when you moved the arm you can select multiple ones or one at a time it doesn't matter once you have them selected click on the assign to link button and simply click where it is supposed to be placed as shown below
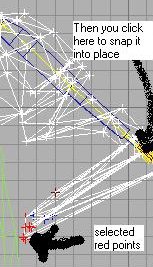
You gotta repeat this process until everything is in place do it for the legs and head also just remember what you gotta do I had a very hard time figuring this out remember the steps
1. Click on select
2. Click on the stretched out points that you wanna move back into place
3. Click on the assign to link button
4. Click to where you move it to
5. Once your done moving the points you've selected go back to step 1. to start on the part you wanna put back in place
Hope that helps I'm not sure if it's self explanatory

Okay so once you have all that done it's time to animate if you find it hard to animate then you can load a bip file from one of the Quake3 characters now if you wanna learn how to load bips go here. Otherwise follow the sequences below
Before animating tho you might wanna add the tags first I personally don't know how to do it from scratch so what I did is copy them from a regular Quake3 Id model by opening up first the torso and copy the tags over to your torso by first clicking on edit then click on select then click name. After that you might wanna move the id torso out of the way and the tag will be there and move it over your torso
Make sure you save the animation as one sequence just make sure you follow the steps below more or less. You will need to make an animation.cfg file for you your model so that the game will know which frames to execute
- death1=(approx. 30 frames)
- death2=(approx. 30 frames)
- death3=(approx. 30 frames)
- taunt=(approx. 45 frames)
- weapon attack=(exactly 6 frames)
- melee attack=(exactly 6 frames)
- change weapon=(exactly 9 frames)
- weapon idle=(exactly 1 frame)
- melee idle=(exactly 1 frame)
-crouched walk=(approx. 10 frames)
- walk=(approx. 15 frames)
- run=(approx. 12 frames)
- backpedal=(approx. 10 frames)
- swim=(approx. 10 frames)
- jump forward=(approx. 10 frames)
- jump forward-land=(approx. 6 frames)
- jump backward=(approx. 10 frames)
- jump backward land=(approx. 6 frames)
- standing idle=(approx. 10 frames)
- crouched idle=(approx. 10 frames)
- turn in place=(approx. 8 frames)
After all that is done the model is animated and you have it skinned tags are animated etc. etc. it's time to bring out Npherno's MD3 compiler click on import objects then click on select all--->rebuild normals---> then export object do this for each part the head, the torso, and the legs
you gotta make the animation.cfg file if your using a bip file then just use the one that comes from the ID model that the bip pertains to. For example if you use Bitterman.bip then you wanna go into the pak0.pk3 file and copy the animation.cfg from the bitterman model path in the pk3 file is models\players\bitterman and put it in models\players\your model's name.
Okay now for the hard part making a pk3 follow the steps below
1. make folder and call it models
2. make another folder and name it players
3. make yet another folder and name it whatever you named your model
4. place all the parts, including .skin files in this folder.
5.Now right click on it and click on add to zip if you have winzip or if you have zipmagic which is better if you ask me to use for zipping up files the reason I think is because winzip sometimes won't save all the folders you've created and zipmagic will anyways with zipmagic you rightclick choose zipmagic and then zip.
6. Once it's zipped just rename it for example if it's yourmodel.zip just rename it to yourmodel.pk3
Now save the .pk3 file to your baseq3 folder and your done
I hope this helps some of you out there as soon as I learn more I will add more to this tutorial but I guess this covers everything if not let me know.