|
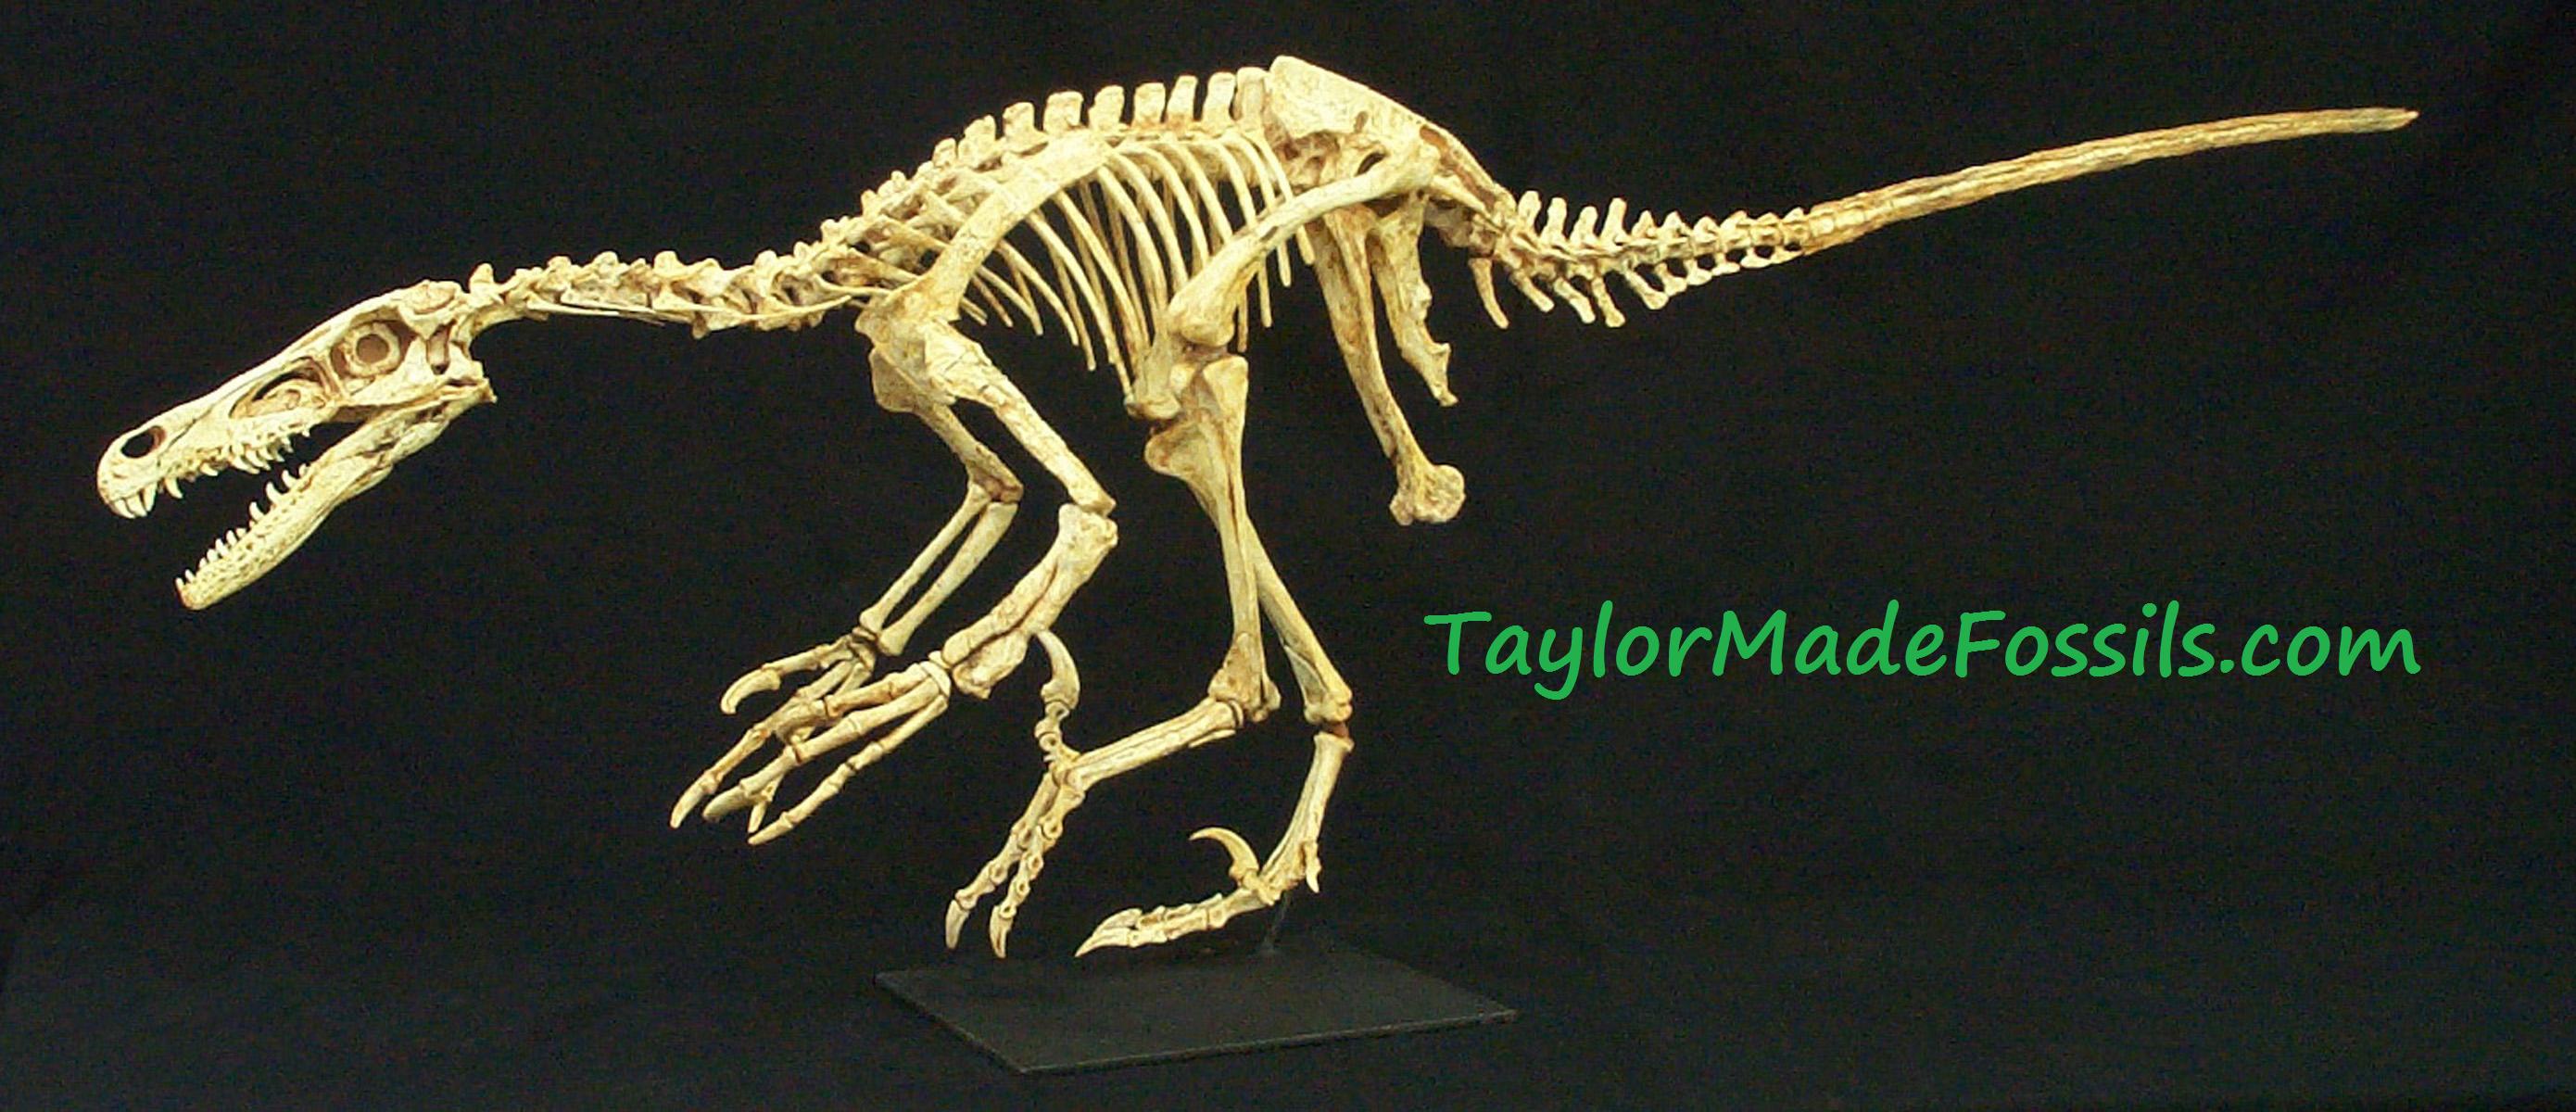
This page will give you instructions to mount and assemble your own velociraptor skeleton. You can purchase the cast online here at TaylorMadeFossils.com .
We will be adding more photos as time allows.
The photos here are for reference only.
Some rudimentary cleaning and filling has been donethe casts, however additional preparation mayt be desired.
Please contact us with questions.
The following is the suggested order of assembly for putting together your velociraptor, as well as some necessary and recommended tools and materials.
Dremel tool
Heat gun (paint stripper)
Exacto knife
Sandpaper
110 V mig welder with .023 wire
Drill and bits
Pliers, wire cutters, etc.
Vise
Steel rod, 1/4" and smaller (cold roll steel is recommended)
Assorted steel wire
Small hand grinder
Super glue with accelerator;
Epoxy puddy
1) Weld rear legs and pelvis into desired position. Note: keep spray bottle or 5 gallon bucket of water at hand to minimize burn damage to casts. Adequate ventilation is highly recommended.
2) Weld a pre-shaped rod for dorsal and cervical vertebrae to front of pelvis. We recommend using 1/4" cold-roll steel and splicing 1/8" diameter rod towards the neck.
3) Weld a support rod for foot underneath tibia/fiula and affix to a sturdy steel base plate.
4) Drill and thread dorsal vertebar up to #2 (dorsal) onto armature. Line up centra and zygaphphyses of vertebrae as ribs can be bent later with a heat gun if needed
5) Mount scapulae, arm bones into desired positions. A 3/32" rod welded to armature in front of #2 dorsal vertebra is recommended for holding scapula and humerii. Drill and thread remaining dorsal (#1) and cervical vertebrae. Anterior cervical block will slide on to 1/8" rod.
6) Attach pupis/ischium. Glue and wire are recommended.
7) Attach posterior dorsal ribs by drilling a hole for thin wire in the rib head and also into the corresponding vertebra and glue wire pin to attach each rib. Pins are not necessary; if desired ribs may simply be glued into place. Bending some ribs may be necessary for proper alignment; heat rib casts, hold in desired position then spray with water to cool. Cast will assume new position when cooledl However, be careful not to overheat casts.
8) Attach 2 tail pieces. Unless permanently bonded, a secondary wire will be necessary on each joint to prevent rotation of pieces.
9) Assemble and attach hands and feet. Glue and wire pins are recommended. Before attaching left hand, attach left carpal bone; note position of carpal bone on distal end of right ulna/radius.
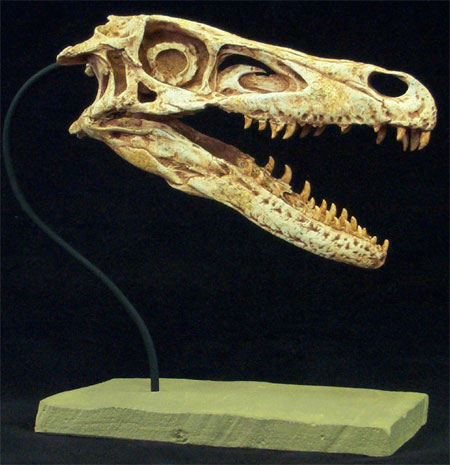
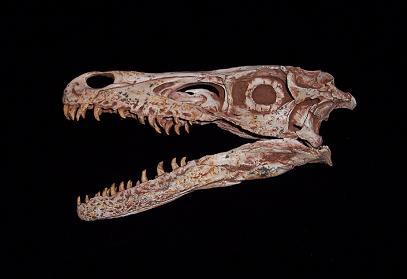
10) Attach #1 chevron. Attach jaws to skull with glue and or wire pins. Attach skull to neck with a 1/8" hole in back of skull.
11) Glue cervical ribs onto corresponding vertebra. It may not be necessary to use all the pairs of anterior cervical ribs. There are remains of cervical ribs fused on the cervical vertebra block. The anterior ribs provided can be cut/spliced on the fused remains, or used as desired.
12) After heating and aligning ribs, thoroughly clean mount with mineral spirits. If a white bone finish is desired, it is recommended that the resin cast be painted flat white (oil base spray paint is recommended) as the plastic resin may yellow slightly over time.
|
|
|
Taylor Made Fossils
1550 Irving Avenue
Saint Louis, Missouri 63133 USA
(314) 503-9750
We are open 24 hours. Call anytime day or night
 or
or

If you have questions or would like to be added to our mailing list, please Email us.
|
|


  |
Velociraptor cast replicas Velociraptor reproductions common misspelling: velocoraptor
Dinosaur cast replicas for sale