|
After better than 2 years of
R&D, building things 2 and 3 times,
starting over with a different engine all together,
(only to return back to it), grinding,
cleaning, polishing, reading,
writing, website publishing, phone
calls, I finally have something I can be proud
of. Something that when the nay sayers take a look
at it, don't think I so crazy after all for putting
a CORVAIR engine in my airplane. And
believe me, I've heard it all. And probably
you have too. DUMB things like, "Don't you know
that those cars flipped over?", or "Didn't
Ralph Nader outlaw that car?" Even if either
statement were true, how would that relate to the
use of the car's engine in an airplane??? |
Anyhow, you didn't come here to read my
rantings, you wanted to see some nice pictures.
These Photos were shot at the 2001 Laughlin tandem wing fly-in.

The Warp Drive propeller in this photo was installed for
this photo opportunity,
courtesy of John Moyle, fellow Corvair engine builder (but not this engine)
and aircraft designer.
|

This view shows a bit of the extruded aluminum roller
rockers, chro-mo valve
springs and the titanium valve retainers.
The roller rockers are a product developed by and sold by
Mr. Bob Sutcliffe of
SC Performance. I purchased the springs and retainers from him as well.
|

The intake manifold runners are made from mandrel bent 6160 aluminum
tubing, which I cut and had TIG welded for me by a local sprint car
builder. The tubing is available from Burns Stainless
in Costa Mesa, CA
|
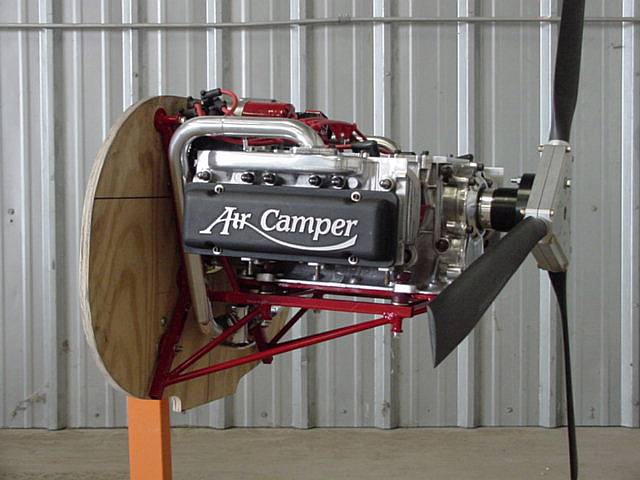
Although I'm not building a Pietenpol, I left the logo on this valve cover to show
off Todd Miller's work.
Tod is a Pattern Maker, and he produces this cast aluminum
valve cover, which actually weighs less than the stamped steel stock valve cover
with the hold down clamps installed. Todd sells them for $60 plus shipping for the pair.
I took the other valve cover (not shown) and removed the cast Aircamper Logo
and actually saved 70 grams! That cover was also polished.
|

This is a great shot of the top cover and my prop
hub spacer.
Also highly visible are the 8mm Moroso spark plug
wires
recommended in William Wynne's Manual.
|

The underside shows the stock steel pushrod tubes which have been cleaned up
with a wire wheel, and temporarily installed. I will be
installing aluminum PR
tubes as soon as they are either available, or I just go out and finish
making my own.
I started making a set some time back, and although my prototype is quite
light, the OD is just too large, and will probably be too close to the exhaust.
I need to get some thicker walled material so I can thin down the center section
to clear the exhaust stack. More on that later.
|
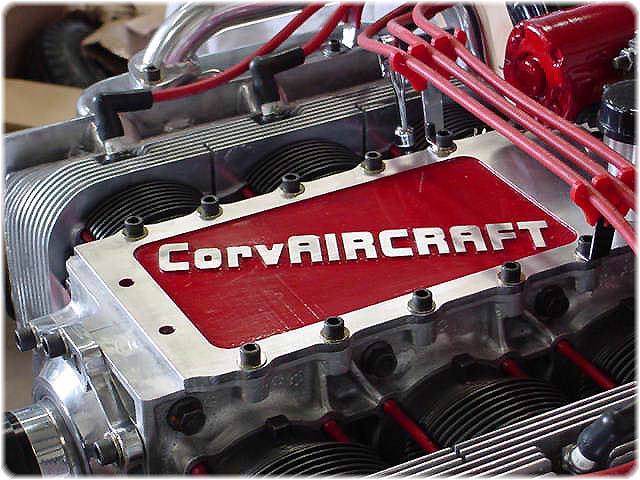
Ted Hansen was kind enough to give me this aluminum plate, cut to size,
with the holes already drilled. It was a bit thicker than what I was planning to
use, but this gave me a great opportunity to have some CNC milling done in it.
I was initially going to mill some cooling fins on either side of the plate, but
I decided to get a bit artistic instead. With the help of a local sign shop,
we came up with this design.
|

I made sure to keep the CorvAIRCRAFT logo small enough to leave me
some room in the top cover to have the oil filler / breather welded to the
underside. I also needed room on the plate to bolt the rear attach for the
starter housing, which I've still not done. But the space is there.
The threaded nipple on the side of the filler neck will have a hose attached
to it, and routed to a oil separator.
In the future, I'll be offering this top cover
to those who would like one.
|
|

