There are several ways to draw hair and many hair styles to choose from, so first we'll pick a hairstyle and a color for our doll. You can use the palette above as a guide, if you like. Or you can make your own. I am going to try and give this doll shiny red highlights, so I have added a brighter red to my palette. See image 2 below for my colors.
Image 2
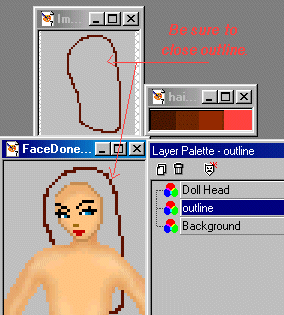
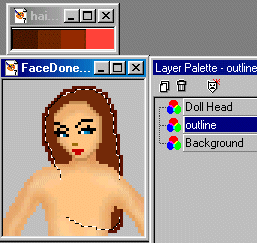
Start by adding a new raster layer. Name it "outline" and move it below your head. And then we need to draw the outline of the hairstyle that we want to use. Pick your darkest color for this and set the size to 1. Make sure you draw this outline all the way around the head until the lines connect, so that you can flood fill it. (See image.) We'll work on the top part of the hair, the part around the face, later... on this hairstyle.
 Select the inside part of this outline and using your second darkest color, flood fill it.
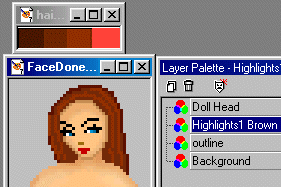
 Deselect and add another raster layer. Pick your third color, and draw in some waves or lines for the seperate sections of hair. This helps to add highlights.
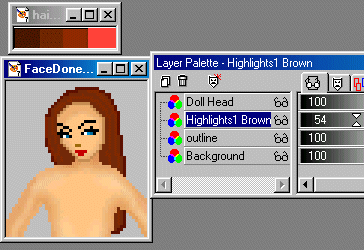
 Now you can play with the opacity to blend this layer in a bit. I lowered mine to 54 so that the lines aren't so obvious.
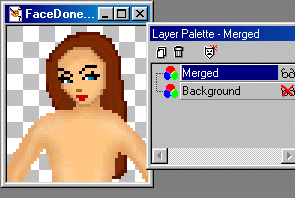
 Now for this hairstyle, we need to merge the layers, so that we can work on the front part of her hair.....Layers...Merge Visible. If you use a background, do not merge it.
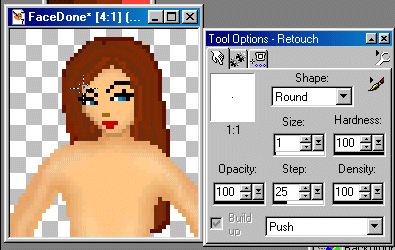
 We are going to use the "Push Brush" (set it on Size 1 at 100% opacity and density) on the Tool Options Palette, and push the hair in place for the bangs or front part of the hair. Push it in around the face, and push it down for the side bangs of her hair. (See image.) You can also push the highlights around for this. You can use this tool and push any other part of the hair into place as well, any part that you don't like or think looks off a bit. This generally happens with almost any hairstyle you draw, so make good use of this tool, and be creative.
 And now for the finishing touches. Add another layer. I want her to have red shiny highlights, so I picked the brightest red. Draw on the highlights. This usually goes by which direction the light is shining on a person....or doll, as in this case. This takes some practice. I used the airbrush set to 3 on this one.
 Go up to "Effects" now and use "Blur"...."Gaussian Blur" set to 1.99. Click OK.
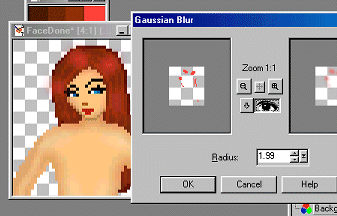 This blurs the highlights, but it also spreads them all over the place. lol! Let's clean that up.
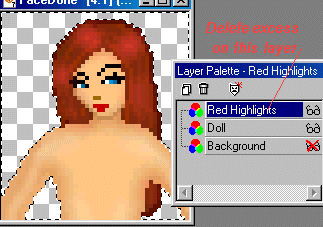
Select the Hair Layer now....make sure you highlight the layer and using your selection tool, click outside the hair. Then click on the layer that has the bright red highlights on it....and hit your "Delete" key on your keyboard.
This blurs the highlights, but it also spreads them all over the place. lol! Let's clean that up.
Select the Hair Layer now....make sure you highlight the layer and using your selection tool, click outside the hair. Then click on the layer that has the bright red highlights on it....and hit your "Delete" key on your keyboard.
 Make sure that your face layer doesn't have any red highlights spread on it. Erase them if it does, and merge your layers. And we now have shiny hair. You can touch it up a bit using the Retouch Options, if you wish, and pushing the hair around where you want it when you're finished. Just don't forget to clean up those extra pixels when you're done with it. :) Questions? Email me at the Email Button below. I will be glad to answer.

|