 |
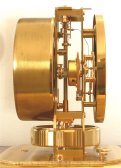
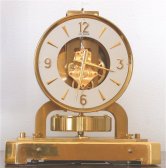
The Atmos clock is one of the most difficult clocks a repairman will encounter at the bench. This clock should only be serviced by a professional: repairs should not be attempted by anyone without proper training. All yellow parts in this clock are gold plated, which helps to explain its very high cost and its stunning appearance, but this also makes taking photos much more difficult. Each Atmos clock is truly a work of art. Click on the images below to see enlargements (which open in a new window).
Particular care must be paid when removing the minute hand. The tip of the center shaft can break off easily.
|
Fig. 1
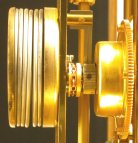
After removing the hands, remove the dial and bezel. Also remove the bellows. There are two large screws holding the movement. You must hold in the large spring on the back of the clock and the second wheel while removing the movement, after which you slowly allow the mainspring to unwind.
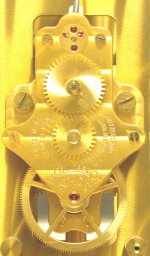 |
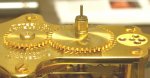
Fig. 2
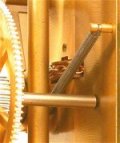
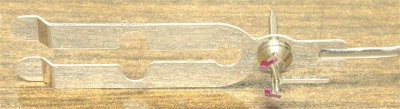
Be careful not to damage the pallet fork while removing the movement. Figure 3 shows the end of the pallet fork with the roller in it. Check the roller to see that it can rotate freely.
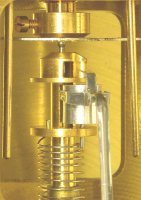 |
Fig. 3
Figure 4 shows the spring on the back. The bellows expand and contract with changes in temperature. At 60şF, the bellows are contracted, allowing the spring to expand. As the spring expands, it pulls on a small chain (also gold plated), which acts to wind the mainspring. The chain should be attached such that, when the rear spring is fully extended, the spring will extend by 45-48 mm.
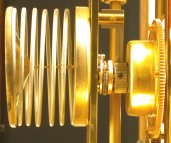 |
Fig. 4
As the temperature warms to about 75şF, the bellows expand, pushing the spring in, as shown in Figure 5. The chain is pulled back by a return spring, mounted on the chain wheel next to the ratchet wheel. The bellows are also affected by changes in atmospheric pressure, which is why this is called the "Atmos" clock. Changes in atmospheric temperature and pressure act to wind the mainspring.
|
|
Fig. 5
The bellows consist of a flexible metal capsule filled with an inert gas and a few drops of ethyl chloride, which boils as the temperature becomes warmer, causing the bellows to expand, and vice versa.
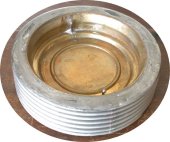 |
Fig. 6
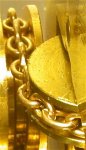
Each and every horizontal link must be parallel (so must each vertical link). Otherwise the winding action may fail.
|
Fig. 7
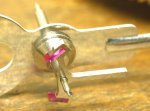
Remove two screws on the back of the movement to remove the pallets. Take care not to bend the lower arms of the pallet assembly.
|
Fig. 8
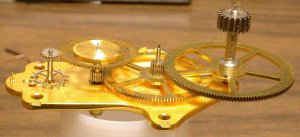
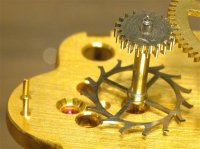
Remove the four screws in front of the movement to take it apart. Be careful not to bend any pivots.
|
Fig. 9
Clean each pivot with pithwood and check for rust.
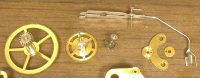 |
Fig. 10
Clean all the jewel holes with pegwood. Remove the cap jewels for cleaning.
|
Fig. 11
Clean the inside surfaces of the pallet fork with pegwood. Be careful to avoid bending the fork arms.
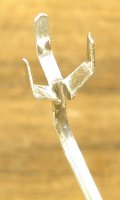 |
Fig. 12
The escapement pallets are similar to those in modern Swiss pocket watches. Clean the pallets with pegwood.
|
Fig. 13
The impulse surfaces of the escape wheel must be cleaned with pegwood. The escape wheel is very easily damaged, so utmost care must be taken.
|
Fig. 14
Assemble the movement with care: the escape wheel pivots are fragile.
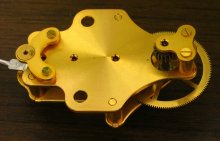 |
Fig. 15
Unhook the return spring that pulls the chain back. Then remove the bent pin that holds the chain in the back spring while holding the chain wheel and holding the back spring in to loosen the chain. Remove the back spring. There are six screws under the base of the clock, arranged in two rows of three. Loosen by two turns only the two middle screws. Then remove the six screws on the front frame that holds the mainspring assembly and the second wheel. Remove the front frame while holding the mainspring assembly and the second wheel.
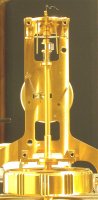 |
Fig. 16
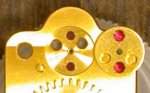
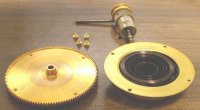
Remove four screws on the mainspring barrel to expose the mainspring.
|
Fig. 17
There is a tension spring on the outer edge of the barrel that complicates the removal of the mainspring, which could easily be damaged if not removed carefully for cleaning. Cleaning the mainspring is extremely important since this clock uses very little power. Lubricate the mainspring with oil along its entire length before inserting it into the barrel. Do not use grease because this is a thin mainspring.
|

|
Fig. 18
To assemble the clock, install the mainspring assembly and the second wheel. Remember to tighten the two middle screws under the clock base. Lubricate the bushings of the first and second wheels only. Do not lubricate any other parts of this clock. Hook the return spring onto the frame. Use a thin wire to guide the chain through the back spring, inserting the bent pin while holding the back spring and holding the chain wheel. The location the pin should be such that the back spring protrudes by about 40 millimeters when released, as shown in Figure 19.
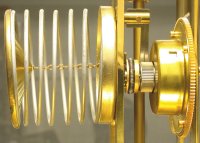 |
Fig. 19
When installing the movement, make sure the roller is in the pallet fork, as shown in Figure 3. Wind the mainspring by pushing the back spring in and releasing it (but do not pull it out) until it will not expand any more (see Figure 5). Attach the bezel, the dial and the hands. Be careful with the minute hand. Attach the bellows assembly last.
 |
 |
 |
Fig. 20-22
Regulate the timekeeping by moving the lever on top. One division is equivalent to ten seconds faster or slower per day.
 |
Fig. 23
WARNING: if you have not taken an Atmos repair course or been taught by an experienced professional, do not attempt repairs on Atmos clocks.
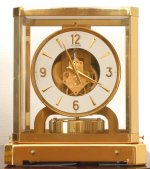 |
Fig. 24
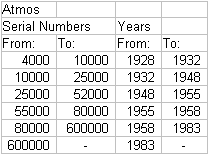
Here is more Atmos information:
Atmos Brochure (1972)
Atmos Setup (1972)
 |
"Clocks were a part of the accouterments of wealth. From the earliest times, clocks were a mark of your station in life. They showed you were educated and intellectually curious. Only the rich could afford to be in this kind of contract with their environment."
New York Times
The Atmos clock is a good example of this.
This Atmos clock was sent from Dallas, TX.
Clock Repair Main Page
Escapements in Motion
Links Page
Tributes Page