Visual Basic Tutorials
Introduction To VB6 by: o07
So you want to get to know Visual Basic huh?? Well, there's a few things your going to need to make sure you have before we start.
1. Microsoft Visual Basic 6 (Professional at least).
2. A brain that can think logically.
3. At least 40 MB's of disk space.
What is Visual Basic?
Visual Basic is a RAD (Rapid Application Development) OOP (Object Oriented Programming) programming language used to program with the Microsoft Windows operating environment. Visual Basic was developed by the Microsoft Corporation...
Part 1:
Getting used to the IDE
When you start Visual Basic you will see a screen like the following...

Make sure "Standard EXE" is selected then click the "OK" button. You are now officially inside Visual Basic's IDE (Integrated Development Environment). Press Ctrl+R to show the Project Explorer window if it is not visible. Press F4 to show the Properties window if it is not visible. Get used to these shortcut keys, this will save a whole lot of time in the future when your going through projects like mad. Double-click 'Form1 (Form1)' in the Project Explorer window. Your IDE should look somewhat like the following...
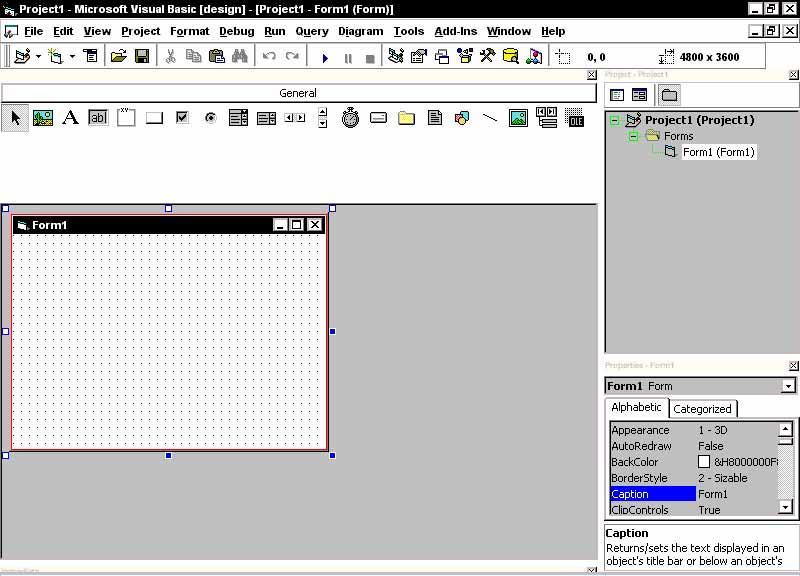
Ok, now see the menu bar (with all the icons in it, it says 'General' above it.)?? Hover your mouse above any of the icons and a description of it will pop up. These are the objects you can use to make your programs. You can add to your objects by going to Project then Components; or by simply pressing Ctrl+T...
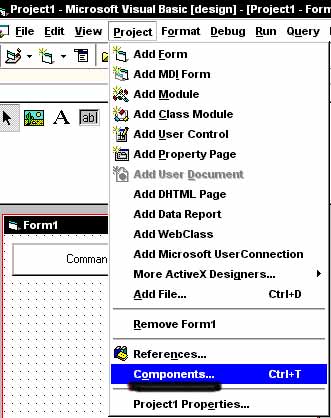
After you do that a window will pop up like the following:
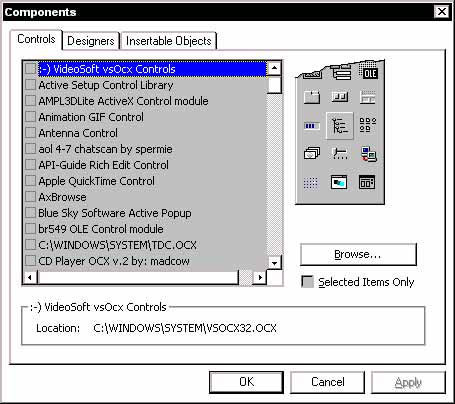
From here you choose which objects you would like to use in your program. Simply click the box to the left of the object you would like to use in the list to add the object to your program. After you choose all the objects you are going to use click 'OK' to add them fully.
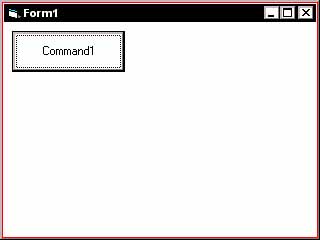
Now you should have new objects added to your "ToolBox" menu. To use them in your program simply click the object in the ToolBox menu and then draw them into your form by clicking once and holding it on the form and then dragging it to however big or small you want it and then releasing the mouse. The following example uses the Command Button tool (OBJECT):


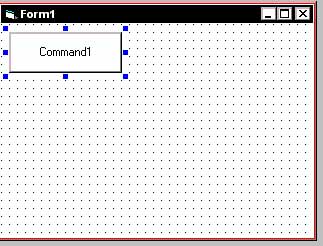
You successfully added a component to your project. Now double-click the Command Button on the form. You should see something like the following:
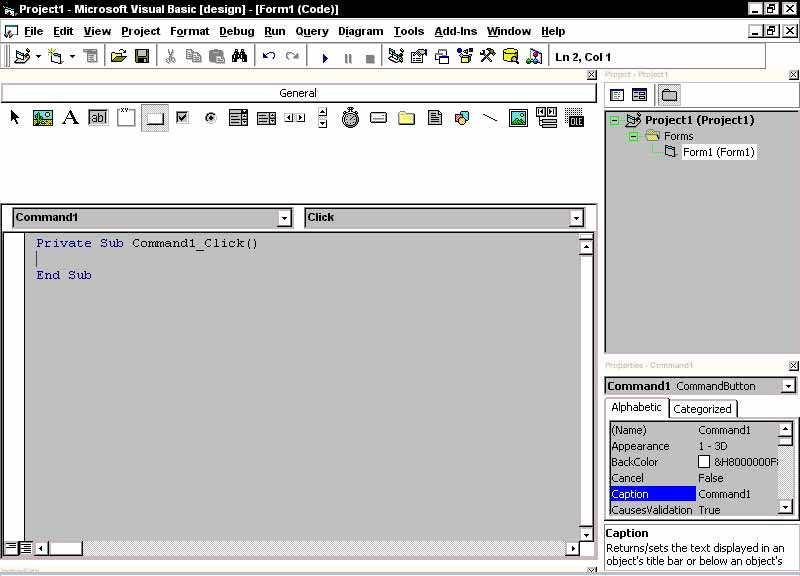
This is where the code goes for the actions of your objects. See it says...
Private Sub Command1_Click()
End Sub
...don't mind the Private part, just notice the other names. The "Sub" keyword in there declares that the following part of code is a sub-program. The "Command1" part is the object we are using, and the "_Click()" part is the action we are taking with the object.
Type End inbetween the two parts of text...

If you move down to the next line of text with your arrow key notice that the text "End" turns blue. Thats because End is a keyword used in Visual Basic. (Remember that keywords cannot be used as variables in your programs.) There are many keywords used in Visual Basic so watch out for them.
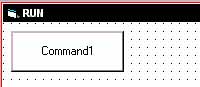
Now you want to test your program to see if the code you used works. On the top toolbar click the icon that looks like a blue arrow pointing to the right...

...thats the Run Button. So you ran your program and you see this...
...click the Command1 button. Notice what the keyword End did for your program. It did just what you would think it would do, ends the program.
Now in the Properties box click on "Caption"...

Type RUN in the box. Notice that on the top scrollbar the text turned from "Form1" to "RUN"...
Play around more with some other objects, properties, and things. Get used to moving around the IDE. Check out some other shortcuts for options in the main menu and remember some. The more shortcuts you can remember the faster you will move around the IDE. When you think your ready move on to the next tutorial.