

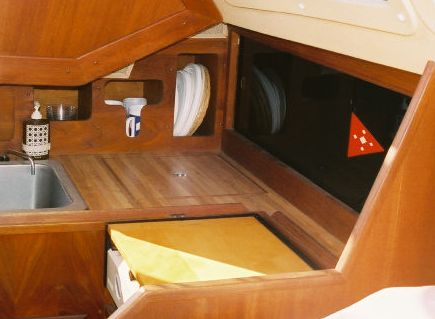
The Cal 9.2 was designed with a KENON Gimbaled Alcohol pump up stove. It worked great every time, but starting it took a bit of practice. You must prime it enough to have the burners hot enough to vaporize the alcohol for proper blue flame. If liquid comes out, you can have a flare up. A cutting board topped the burners and could be used to protest the plastic sliding doors behind the stove.
 The great debate on what is the safest raged on one of the sailing
blogs, alcohol and propane appeared to be the most common choice.
Kerosene gimbaled stoves are also safe, but need to be primed and
like the pressurized alcohol stoves sound like jets taking off when
running. Bob had a kerosene stove on this Ariel 26, gimbaled mounted to
the bulk head. We warmed many a can of soup on it, seams that a good
can of soup would warm the sole on a cold day on the bay. Old Clemens
got the credit for the saying" The coldest winter I ever spent was a
summer in San Francisco".
The great debate on what is the safest raged on one of the sailing
blogs, alcohol and propane appeared to be the most common choice.
Kerosene gimbaled stoves are also safe, but need to be primed and
like the pressurized alcohol stoves sound like jets taking off when
running. Bob had a kerosene stove on this Ariel 26, gimbaled mounted to
the bulk head. We warmed many a can of soup on it, seams that a good
can of soup would warm the sole on a cold day on the bay. Old Clemens
got the credit for the saying" The coldest winter I ever spent was a
summer in San Francisco". The area behind the stove was blocked off with plywood and a plywood shelf was below it. The empty area behind the stove would make excellent stowage if made accessible. You could reach through the access door under the stove, but utilization of this space was just not practical.
But it gave me an idea. I wanted to upgrade to a propane stove with oven, but the 2 burner ovens were just too expensive. I was looking at over $900.00 and then adding a propane locker and controller. I included the propane Xintex control system when I upgraded the electrical panel. It has 2 leak sniffers, I thought I could install a stove and propane bulkhead heater. I really liked the Force 10 version with the 1" flue pipe. Perhaps some day. I sat down at the computer with a student version of Pro-E and started to scheme on what this propane stove and stowage would look like.
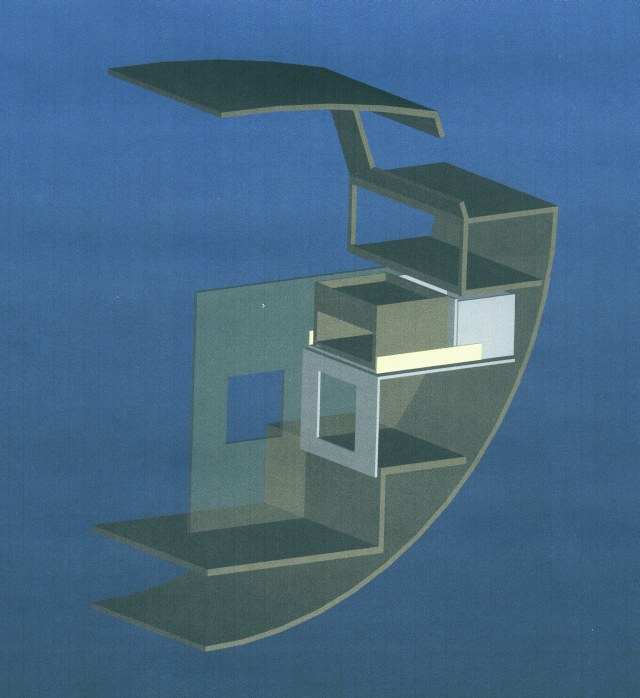 The
old computer started to have refresh problems after I did several
components and assemblies. This was as complicated as I could get. It
shows the standard stowage above the stove and the open area below the
stove. I would have to design a slide out shelf with a box behind. The
lower shelf would have to be redone, lowered to make room for the
taller stove.
The
old computer started to have refresh problems after I did several
components and assemblies. This was as complicated as I could get. It
shows the standard stowage above the stove and the open area below the
stove. I would have to design a slide out shelf with a box behind. The
lower shelf would have to be redone, lowered to make room for the
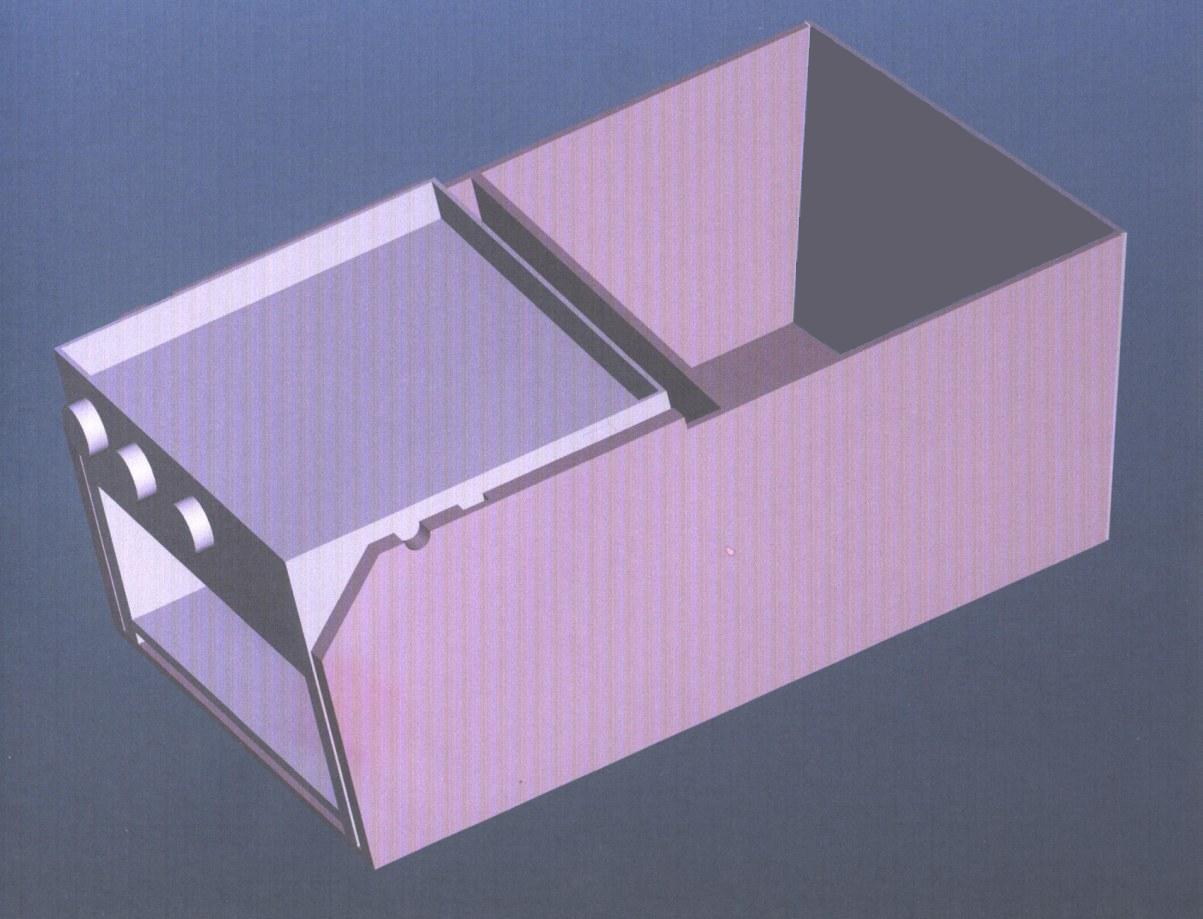
taller stove.I found a Force-10 2 burner stove with broiler for under $200.00 delivered. The catch was it was missing the knobs and the burner caps. I found the knobs at Fawcets during the Annapolis boat show and a small burner cap from a marine supplier in Washington State. The large cap may have to be home made. I'm just using a thick disk of aluminum until I can make a steel cap.
I wanted the shelf to have the option of allowing the stove to gimbal in the future, but only planed to use it at anchor. The concept was finalized as below.
The previous source that I used for Marine plywood was Boulter Plywood decent prices and quick delivery. I chose the Merranti, Philippine Mahogany for the plywood and found a 1" thick board of teak to do the edges and trim. The ply was 7 layers 3/8" or 9mm thick. They recommended doing the cutting and it would result in a smaller package and less expensive shipping charge. The design was transferred to an autocad layout checking the grain direction for each panel and then emailed to them. I received a package by UPS less than a week later. The cross cuts had a little chipping of the grain but I also experienced this with a new fine toothed carbide blade. Their cuts/ sizes were more precise than I could do.
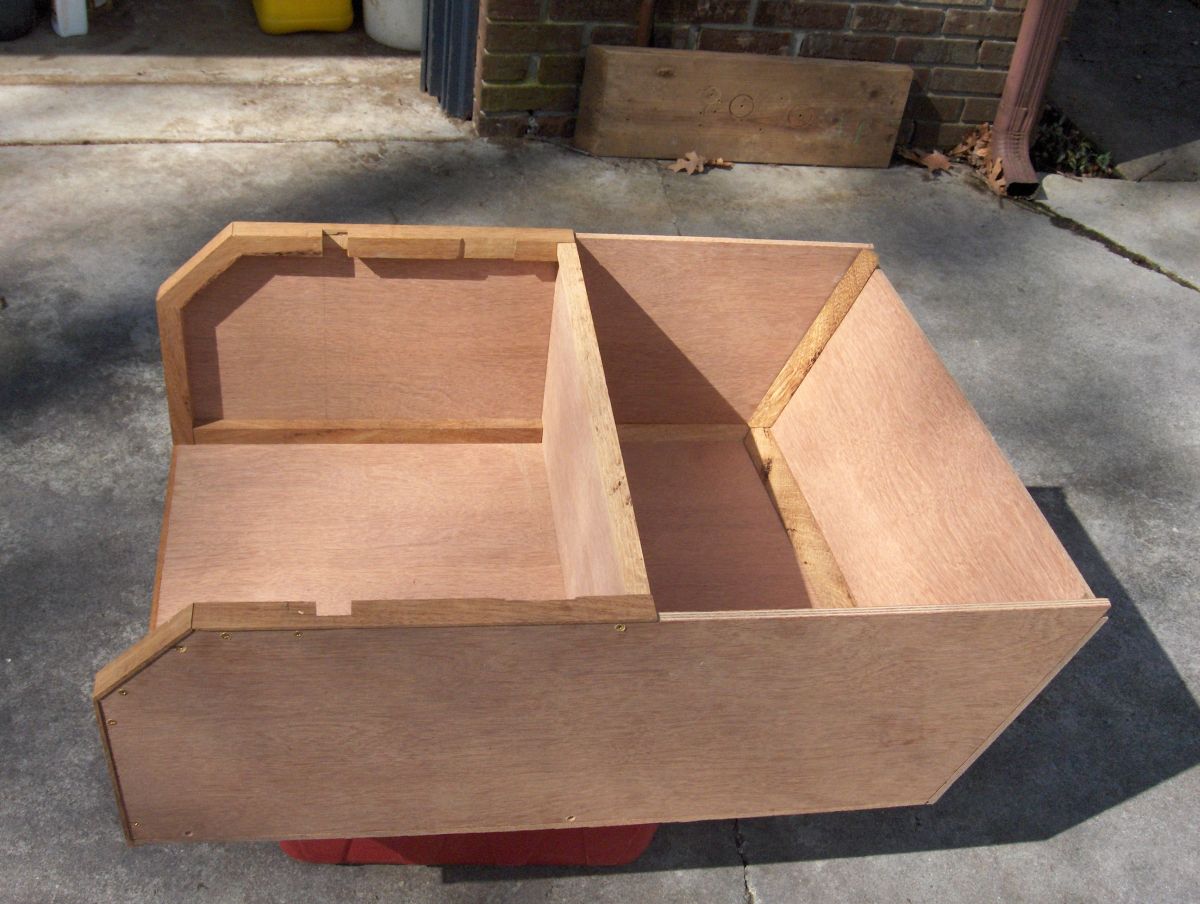
It was held together with small brass screws for dry fitting before gluing it together was MAS Epoxy. I was a fan of the WEST SYSTEM until I ran out and the local store only had the MAS brand. After a few batches I was sold on it. No amine blush to clean up before further working with it. All surfaces were coated with 2 coats, still sanded between coats for a smoother finish. I found drawer slides at Lowes, 100 lb limit. 24" long fully extending. I did not need the entire length, just long enough to slide the stove out to access the stowage box behind it. Today we installed it for a test fit.
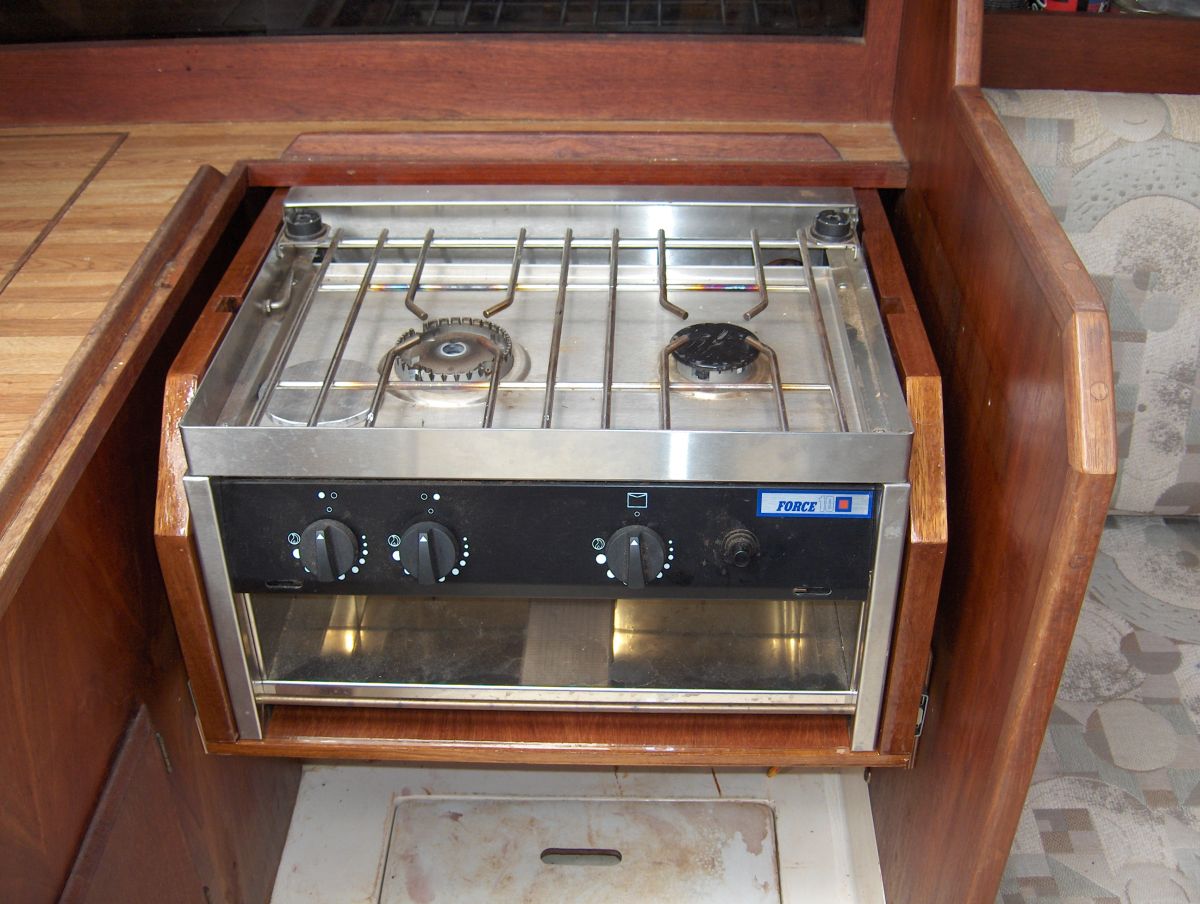
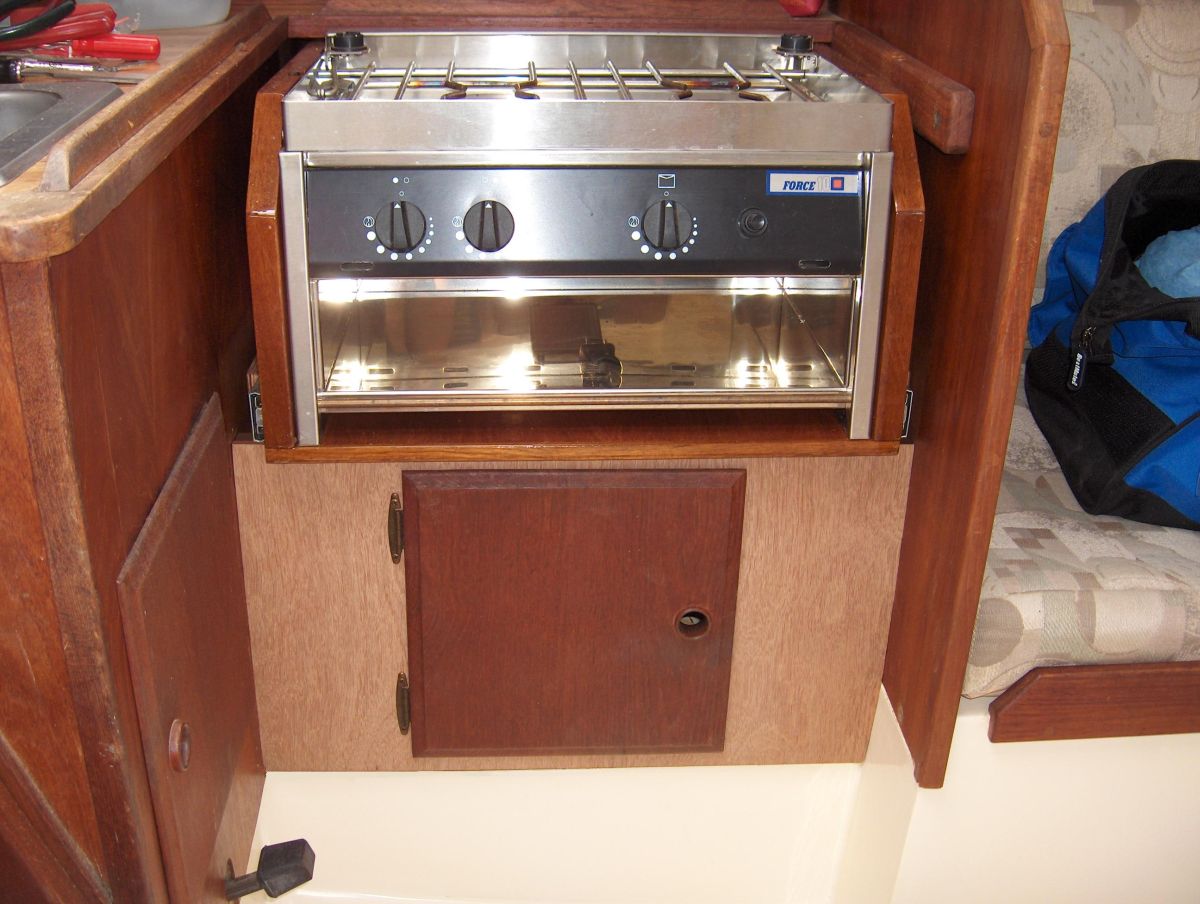
The stove did fit with less storage height below it, but this was the compromise of having the broiler option on the stove. I still need to complete this part of the installation. I wanted to ensure that the installation of the stove was completed, it would be difficult to work through the door that will access the lower stowage. The door to the stowage under the sink will open up 90 degrees. I could see myself forgetting the necessary clearance and not being able to open this access door.
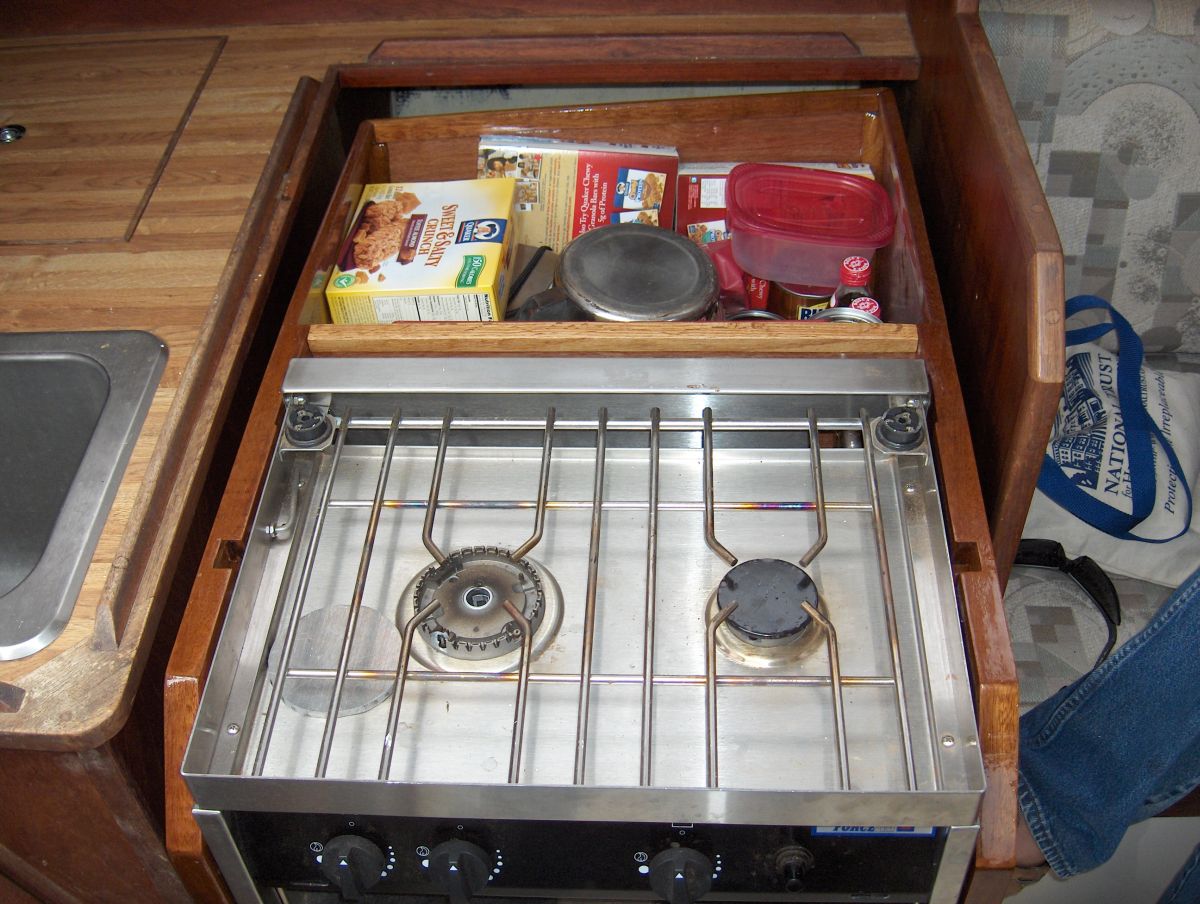
The ultimate test was to fill the stowage with pots and pans, canned food, etc and try it out. I was able to clear out the food from the little pantry behind the sliding doors and the pots and pans that were under the old stove. Counter space is limited, so the plan is to add a cutting board top over the stove that can be secured down. The stove also needs a catch to secure it in the closed and open positions. I can just see it flying open on a port tack! We did a Goat Island race today, in 12 to 20 knots, put both rails in the water and the stove and stowage faired well. Managed to check the fit of the new bottom section today. It was a little tight to the fiberglass on the lower right side. I will have to sand that some more.
I'll finish it up and post a few more pics of the completed installation.
5-17-09 E.R. All rights Reserved