Site hosted by Angelfire.com: Build your free website today!

Flying Swords Tutorial

By Daryl Balluff

Download the tutorial here

What you will learn in this tutorial:


TUTORIAL

  1. Open a fresh new 3d Studio file and save the file as flyingswordstut.max.
    In the Perspective view, Make a Box with the dimensions on the right:
    Name it Blade. This will be your blade (duh). If you want the sword to be longer or shorter, just add or subtract more units. make sure the ratio between the size and segments stays the same. Use the Rotate () Tool and rotate the box 45 degrees on the Z-Axis. Save again.
  2. Use the Non-Uniform Scale () Tool and scale the box to 15%.
  3. Right click on the box and under Convert To click Convert to Editable Mesh. Under the Selection Rollout click on the Vertex () Button.
  4. 4. In the Front Viewport, select the middle vertices on the top row.
    Use Soft Selection and change the parameters to the ones on the right:
    Then move the vertices upwards until it looks like a sword tip (see picture for example). Select vertices and even the sword sides out so the sword is straight. Now Save.
  5. In the Left Viewport, select the top vertices again and use the non-uniform scale to scale it to 0% on the X axis. Make sure the soft selection is still on. Like before, even out the sides so they are even. Then select the top 5 rows and non-uniform scale them to 0%. If confused, use the picture below:

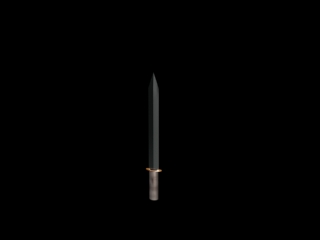
    Now save. The blade is now complete!


  6. Make a ChamferCylinder with the dimensions on the right. Name it tophandle In the Top Viewport, move the cylinder over so it is centered of the sword. Use the non-uniform scale tool on the Y-Axis to 50%. It should look like this:

  7. Make another ChamferCylinder with the dimensions on the right. Name it handle Use the non-uniform scale in the Top Viewport and scale it 125% on the X-Axis. Move the cylinder with the Top and Left Viewport so it is slightly inside of the 1st ChamCyl but below it. See pic for more info:

    Save. The sword is now complete, minus the materials.
  8. Now it is time to make the materials. Open the material editor and press the button labeled Standard. Click the radio button next to Mtl Library under Browse From:. Find the material named Metal_Chrome (Standard) and click on it. Then press Ok. Put these specifications in:

    Scroll down to the Maps rollout and check the button next to Refraction. Across from it, press the button labeled None. It will bring you to the map editor. Find the Raytace material in the Browse From: New folder. Select Raytrace and press ok. Now press the button next to Reflection. Apply the material to the blade either by dragging the material onto the blade or by selecting the blade and pressing the Assign Material to Selection.


  9. Go back to the Material Editor and select the 2nd material. Find Metal_Dark_Gold (It's right next to the Metal_Chrome in the Mtl Library). Do the same thing you did to the Metal_Chrome to the Metal_Dark_Gold, raytrace and all. Put this material on the tophandle object. Select the 3rd material and find the Metal_Wall. No need to change the settings for this material. Put it on the handle object. Select the whole sword and Group the sword by going to the top toolbar and under Group select Group. Name is Sword. The sword is now complete! Render the object in the Perspective viewport and it should look similar to this:


  10. Time to make a scene out of the sword. In the scene, there will be hundreds of swords hurtling at the screen. To make this effect, we will need to make a SuperSpray Particle object. Under the Particles heading, select the SuperSpray and make one as large as possible in the perspecive viewport. Use the rotate tool and rotate the superspray so the arrow is pointing directly at the perspective view. Move the emitter back a little bit and now follow these parameters (they are long!):

    Under the Instancing parameters, click the Pick Object button and select the sword. the scene should look something like this:

    Move the scene around until it looks like the swords are all over the screen. Kinda like this:

    THE SCENE IS COMPLETED! Save. Now click the Render Scene button and make sure the parameters look like this:

    Click the Render button. The tutorial is now over