
"XTREME"
HEAD PORTING 101

All the pictures on this page were taken using an old Compact C video camcorder, it's what I used to shoot the video of my car @ the track with the poor audio on the first page of this website too and that's why these pictures are low resolution. What can I say ? If ain't broke, use it, if it is broke, fix it. If you can't fix it, do without.
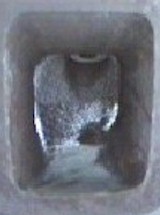
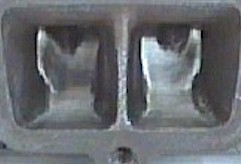
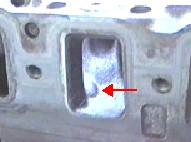
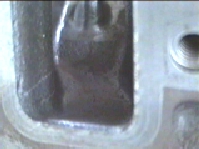
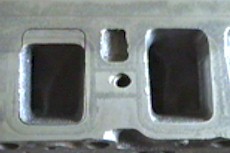
OK, what you're looking at here is the exhaust ports of a Small Block Oldsmobile #6 head. First photo shows the center exhaust ports in stock form, take note of the flow restricting EGR/AIR bumps which must be removed. Photo 2 shows an end exhaust port after the EGR/AIR bump has been removed. Take note of the "dimple" that now must be removed. The dimple is an indentation which is removed by grinding and blending the ramp around the dimple until the dimople is gone. This takes some work and attention to detail should be applied so when you finish the ramp it looks like Photo 3 with EGR/AIR bumps and dimples removed. Take note how the ramp has been finished and how it's been blended into the ports roof with a smooth transition. This is done by going back and forth, from side to side with an almond shaped carbide bit. A Die Grinder will remove the EGR/Air bumps very fast with a barrel shaped carbide bit or stone but I would recommend using a Dermel Tool with a flex shaft and almond shaped carbide bit to bring down the ramp. Dremel tool is also better for tear dropping valve guides and when reshaping valve pockets. The flex shaft comes in real handy when raising and widening the intake ports or cleaning them up, as it can go all the way in, up and around turns in the ports.
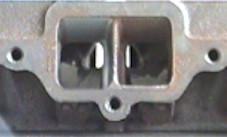
Now you'll want to raise the exhaust port .100 as show in photos above to help increase exhaust flow.
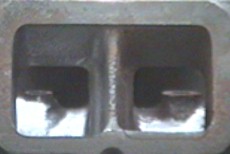
Let take a look at the intake ports shall we ?? To improve flow you'll want to remove the bump you'll find in the intake ports and blend the area flat with the rest of the port as shown in the pictures above. If you look at the picture on the right, you can also see how the differences between the tear dropped valve guide boss as compared to the stock valve guide boss in the picture on the left.

If you want to make "Big" horsepower you'll want to raise the intake ports roof more than 3/8 of an inch to achieve maximum flow. Easy way to do this is to just lay a Mr.Gasket Big Block intake gasket on the head and take a fine tip felt pen and outline the gasket opening and then grind away as shown in the photo's above.
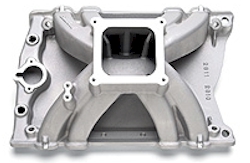
http://www.edelbrock.com/automotive_new/mc/manifolds/oldsmobile/oldsmobile.shtml
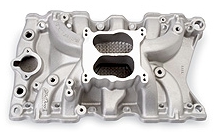
The only intake that was available for the SB olds that you could raise the intake ports on to match these Big Block sized ports was the Edelbrock RPM when I high ported these small block heads. [Pictured on the left], sometimes needs some aluminum added above the ports as the roof gets pretty thin when opening up the runners to match Big Block sized ports. The RPM intake is a good intake but if you want even distribution to each cylinder, there is a new singleplane intake available from Edelbrock called the "VICTOR" [pictured on right] that can be opened up to Big Block sized ports without welding. Don't let people tell you that you are going to lose low end torque if you open up the intake ports on your small block olds heads to the size of Big Block heads, they don't know what they are talking about and probably have never even built an Oldsmobile engine, muchless modified one.


I was fortune enough to know someone who welded up the sides and tops of the runners on a 25 year old Holley Street Dominator so it could be ported to match the larger big block sized intake ports, this intake has alot of history but that is another topic in itself.
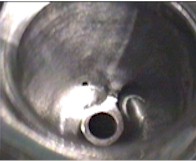

When tear dropping the valve guides and opening up the valve pocket, BE CAREFUL or you will find the water passage as I did in one of my intake valve pockets. My suggestion is to not to go down as deep as I did. Look at your valve pocket and then look at mine, I removed alot of metal creating those tear dropped valve guide and pocket.
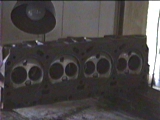
Found this picture of the combustion chambers after I removed all the sharp edges by hand with wet/dry sand paper. The process is exactly the same as polishing aluminum, you start out with 400 grit and finish with 2000 grit using soapy water. Be sure to leave your old valves in place when doing this to protect the valve seats. When I finished the combustion chambers, they were as smooth as glass to the touch. They really shined after I used some Mothers Aluminum polish on them. Polishing combustion chambers is often over looked or not offered by most cylinder head porters/engine builders but doing this really helps prevent detonation/pre-ignition in Oldsmobile engines. Even if you are using aluminum heads, polishing the combustion chambers should be considered.
This isn't by any means a textbook way to port your heads but if you're mechanically inclined, you should be able to figure out what needs to be done to factory Oldsmobile heads by reading and looking at the pictures here and on the porting BBO heads on the other page, it's all there, you can do it.
