
Put Your Nulls to Good Use
An Introduction to Hypervoxels 3.0 for Lightwave 6
By Jaco
Hello again, space cadets! By now, I’m sure you’ve gotten the hang of blowing things up, and other assorted forms of madness, but today, we’re focusing on setting up those big blasts, and making them looking even nicer with the help of Lightwave 6. One of the greatest new features of Lightwave 6 is the newest incarnation of Hypervoxels. The new interface alone is a vast improvement over 5.6, at least, in my opinion.
It is, (as per usual for Hypervoxels,) a little tricky to get started with.
Let's get started with our Hypervoxel explosion, because I know you all want to know the latest and greatest way to blow the crap out of stuff. (Plus, it’s very easy to set up and implement into an old explosion scene, or great for topping off a new one.)
Load up Lightwave 6 Layout, if you haven’t already, and add a Null object to your scene. It would be a good idea to name this null if there's more than one null or other objects in your scene.
Note: If you wanna get fancy, load up that BigPlanet.lwo you've always wanted to destroy in addition to your null object. (Or try something different, like the cow.)
Make sure the null object is selected, and Open the Object Properties Panel. (p) You should see a box pop up like the one below.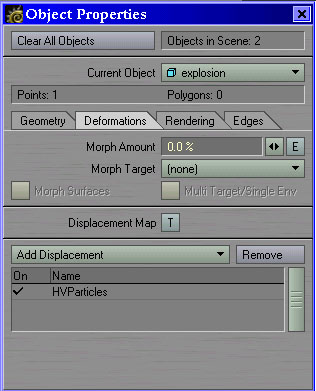
Under the Deformations tab, select the HypervoxelsParticles in the Add Displacement dropdown menu. (Note: It will show up as HVParticles in the dropdown field. Don’t panic.) If you have used Hypervoxels in Lightwave 5.X, this step should seem quite familiar to you. Close the Object Properties panel again. (p) We’re ready to add the Hypervoxelly goodness.
Open the Settings tab,
and select the Volumetrics button under the Effects section of the menu.

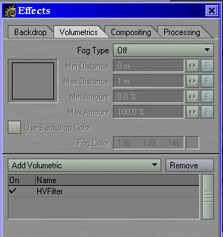
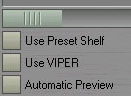
Once you have the right object selected, we can move over a few panels into the Preset shelf. You should see the preset shelf when you open the HVFilter panel, but if not, just check the Use Preset Shelf box at the bottom of the main panel.
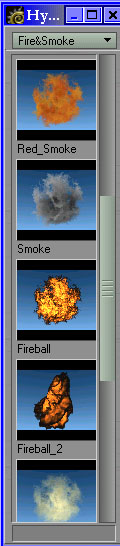
From the Preset Shelf dropdown, select the Fire&Smoke Presets, you should see a bunch of thumbnails appear. Select the one you like the best, and double click on it. A confirmation box will appear, asking if you want to load these settings, Click "Yes." I selected the Fireball preset for my explosion.
That’s it!. You’re pretty much done. All that’s left is to animate the explosion.
When it comes time to animate the explosion, starting at frame 0, scale your null object down to 0.00 on all axis. Then, move to frame 60, and scale your explosion up to say, 2 or 3 on all axis. Just remember, Hypervoxels take a heck of a long time to render, so you might want to consider staying small if you don’t have a lot of computer power or a lot of time to spare. Set up your scene to render, and go to bed, is my suggestion.
When you are using explosions on a large scale, you might want to take note of the size of the particle(s) you are using in your hypervoxels panel.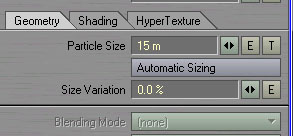
Make sure the size is appropriate for the scale of the explosion you are trying to simulate. You wouldn’t use a 1 m particle to blow up a planet, for example. Just remember, the bigger the particles you use, the longer it will take to render. If you really, really want to blow up that planet, I suggest scaling the planet down to a reasonable size, not scaling the hypervoxel particles up. (Don’t forget to resize your planet’s textures if you scale it down.)
If you don’t want your hypervoxels to show up before the explosion is supposed to take place, use an envelope on the Dissolve field in the hypervoxels panel. (The button with the ‘E’ on it.)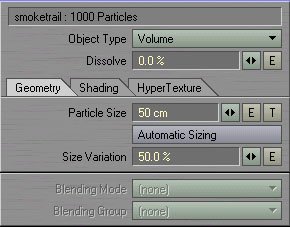
This is the same procedure as mentioned in my previous tutorial, which you can find here, under the tutorials page.

Here's a sample animation I did of a Star Wars style Podrace using this method. Thanks to Clint Scott for the great Podracer models.
Anyway, this should give you the basics of using Hypervoxels 3.0 to blow things up. Have fun, and try not to hurt anyone.
Come visit my website for more Lightwave and Inspire 3D tutorials, and other assorted junk.
-jaco
