

Pre Production capes
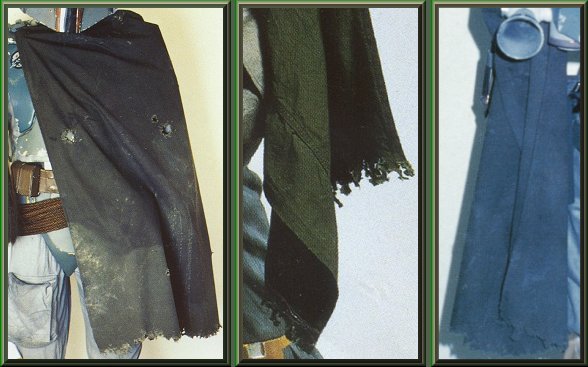
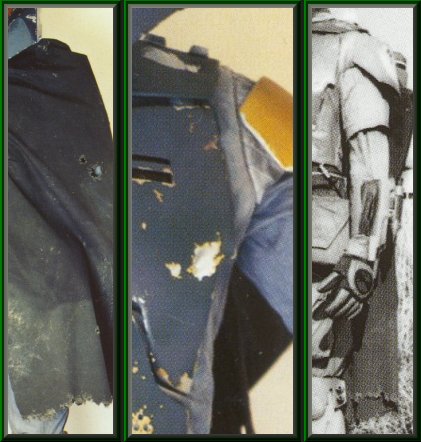
These pics, from the 'SW chronicles' Show the different capes for the preproduction costume.
|
Pre pro 1 |
Pre pro 2 |
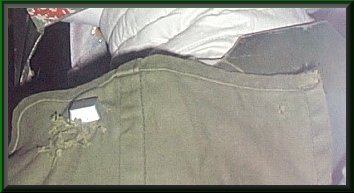
Pre pro 3 |
Pre pro1 has a hemed edge and appears to be made from a
single piece of material, w/ no center seams.
Prepro2 has a center seam and is quite possibly the same cape, later used for RotJ.
Prepro3 appears to be the same solid piece as used in the first preproduction.
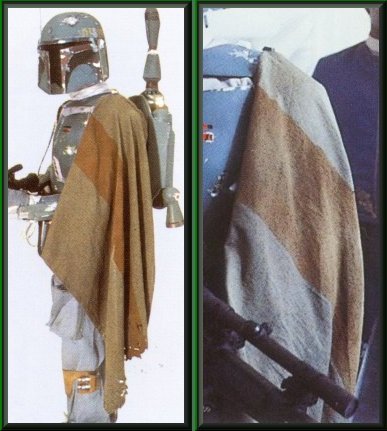
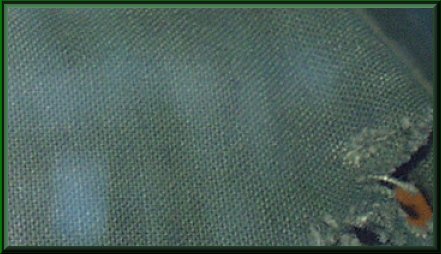
The ESB cape appears to be made of a lighter weight material.
It is a light tan, with a vertical orange -brown stripe.
Little is know of the exact origin of this cape.
It closely resembles the civil war 2nd issue/emergency blanket.
Or, was quite possibly a saddle blanket.
Alternatively, it could have been an original creation.
One Suggestion, to create the ESB cape:
A nice looking cape can be created by
First, using light brown flannel (or similar lighter weight material)
The shading and exact color of the cape appear to change, with the different
lighting situations in the film. You will need to study available reference
photos and decide on a shade you feel comfortable with.
You can use color remover or darker color dyes, to lighten or darken, as needed.
Alternatively, you can obtain a white material and dye it to your desired color.
Some suggested colors combinations, are Rit brand
Pumpkin, Tan, Golden yellow & Cocoa brown. Use the Rit color recipe chart
and determine your proper color.
Now, after you have your material dyed to your chosen base color,
it is time to add the center stripe.
Liquid dye (or a powdered dye bath) placed into a laundry spray bottle,
is suggested for this step. This will allow you to mask off the side areas and
spray only the desired center area.
Be sure to test all the base color and stripe dyeing on scrap pieces of
the material, before dying your final piece.
Finally, Three sides of the cape appear to have a hemmed edge.
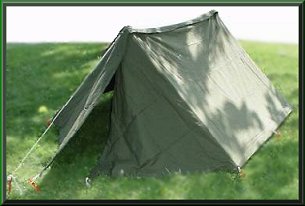
The half tent shelter is made of water & mildew resistant cotton - rayon duck cloth.
It has triangle shaped flaps at both ends.
Because the shelter half serves as a stand alone angled shelter,the tent is
usually found for purchase, in half sections only.
Each half is 7ft. x 5ft. & will include a three-section tent pole, a tie line, and five tent stakes.
When two shelter halves are joined (by snaps), a complete two man shelter is formed.
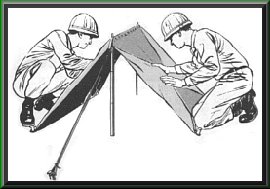
It takes two half tents to make a complete tent.
These shelter halves are available new and used from many online sources.
Including Campsurplus , Coleman's Surplus and Armygear.net
Half shelters will also be found with a quick search on ebay.
You may also, check with local military surplus stores.
The cape is cut from only a small section, of the shelter.
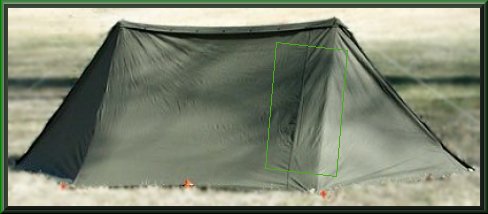
Be sure to cut the cape from the correct area, of the shelter, and the
seams are in the correct locations.
Then, hem around the cut edges.
Because of the size of the piece and the location of the seams,
the tent will allow only one cape, per half.
Although, if you are willing to perform some additional sewing, to join the remaining pieces
while creating the proper seams, a second cape is possible.
An Alternative to using the shelter, is to create your own cape.
Used duffle bags and tarps, from the military surplus store, or even
finding a proper material (possibly denim), from a fabric store.
Then, remove or add color, as needed.
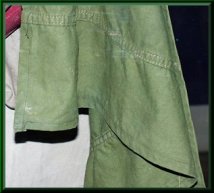
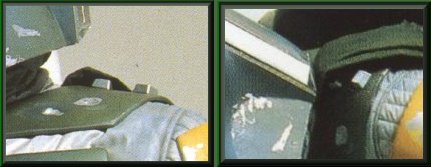
Close up of the cape in the 'Magic of Myth' Display.
*Note:
When comparing the 'Magic of the Myth' & the Art of SW- UK reference pics, you will see that although both capes are from RotJ, they are turned opposite of one another.
When looking at the two lines of stitching that divide the cape (one wide, one narrow)
The MoM suit has the narrow band at the bottom, while the AoSW-UK cape has the wide
band at the bottom.
 MoM Narrow band |
 AoSW Wide band |
* It would also appear that the stitching and seams, on the AoSW- UK cape,
are displayed inside out.
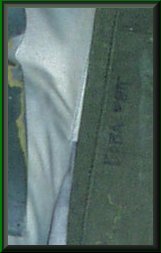
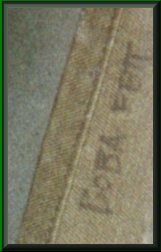
The name tag and hemmed edges
are visable, on the AoSW display.
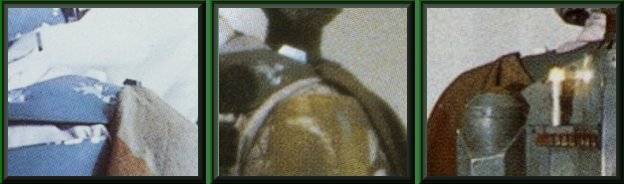
RotJ cape from the 'SW Visual Dictionary'
The ESB cape is not as stained as the other capes. It looks to have only some
minor darker areas. Again, Look at the abundence of reference photos available and
decide on what you feel is the proper amount of weathering.
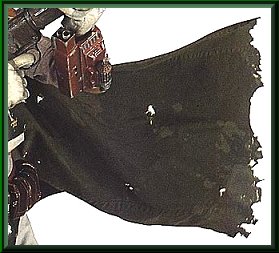
The cut edges
By looking at reference photos (including above) You will notice all of the capes
have a torn and frayed bottom edge.
The olive versions, of the cape, have damaged areas across the entire surface.
This can be done with the use of a Dremmel tool, utility knife or scissors.
Try not to create an excessive amount of tears.
You will want the cape to show damaged areas, but not to the point that it begins to
look like a rag, rather than a cape.
You must also remember, when washing the cape, not to place it in a dryer.
Doing so will cause the frayed holes and edges to fluff up.
Attaching the cape
As with many of the costume elments, the method of attaching the cape, altered as the design progressed.
There appears to be just as many attachment methods, as there are different styles of capes.
The First pre production cape is attached to the right shoulder with a locking bracket.
The other end then draps over the left shoulder.
(See first pic at the top of this page)
When not connected to the right shoulder, the cape is hung from the jetpack harness strap. Much like the pre-production3 cape.
The Prepro1 cape is unique as it has a buckle style cape attachment on the right shoulder.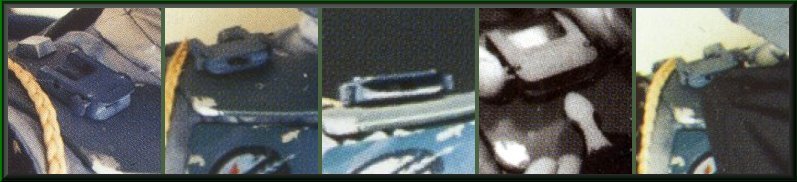
This attachment allows the cape to drape across the chest and over the opposite shoulder,
creating an appearance reminiscent of the early concept drawings.
It is believed that the original clasp is a half dismantled, late model, auto seat belt buckle.
An alternative to this buckle is to use plastic locking clips, found at most fabric stores.
Attach one half to the cape and the other to the collar armor.
The Second pre production cape is laid over the shoulder plate and
tucked into the collar armor, near the neck line.
The third Preproduction cape appears to be the same as the first, with the cape hung
from the jetpack harness strap.

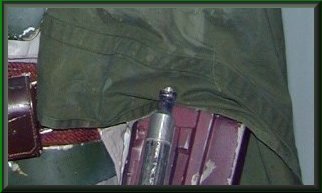
The ESB cape is attached to the collar armor by the outer collar bolt.
In the first pic, you can see the esb cape is attached to the top of the shoulder.
The second and third pics show that while the cape is still attached in the same location,
is now draped up and over the collar bolt.
The RotJ and Display capes are also attached with the collar bolt.
The 'Magic of the Myth' display has two additional screws, holding the
cape to a small mounting plate. Although unclear, this plate is quite possibly the remains of the secondary cape attachment,
as seen on the Prepro1 suit. If so, the corner originally designed for the right shoulder, is now moved to the left side.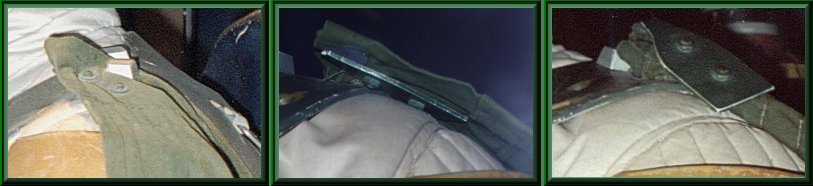
The AoSW- UK cape looks to be attached with the shoulder bolt only.
 Boba Fett Main Page |

Return Home |
