
Ordered the wing assembly kit, more to follow.
O.k. I know that was short, but it has come time to update things
a bit. I received my wing assembly kit after a few weeks waiting,
and shelling out 80 bucks for shipping costs. It came in a 90
pound, twelve foot long box. I was suprised, but elated at the
same time. I extended the workbench four feet by bolting on a
half-sheet of plywood. For a straightedge I used two pieces of
aluminum channel.
The wing spars go together really fast. In about three hours I
was able to assemble both front spars. It is cold in my shop, and
the glue got really thick really fast. To improve on things I
mixed it in front of the heater, and it again worked as it should
have. TEAM says any temperature suitable for the builder is
suitable for the glue. I don't think they figured on people
building stuff in a forty degree shop. My little heater is a bit
underpowered for the task.
I expected to finish the rear spars after the holidays, but I was
able to complete all four spars in about six hours. I cut and fit
the parts for the rear spars all at once, and then glued the
together. Before the glue could dry, I went ahead and glued the
plywood web on one side. The spars look kind of like long thin
ladders covered with wood on one side.
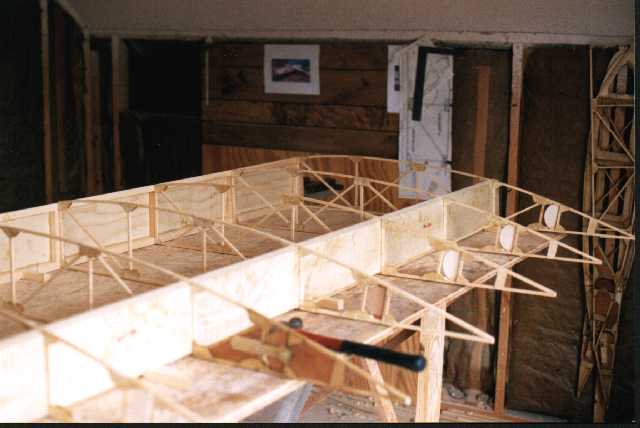
After a month or so, I have been able to almost complete one
wing. The ribs slid on easily and did not take long to glue up.
The biggest problem so far was fitting the compression braces and
diagonals. After inventing a few new swear words the task was
complete. TEAM neglected to include these swear words in the
plans, and since they make assembly so much easier I will be glad
to E-mail them to anyone who asks. The wing was swung around and
the trailing edge glued on. One irritating problem I created was
gluing on the root rib prior to notching it out for the bracket
which will hold the wing to the fuselage. I had to drill a line
of small holes and notch the rib, but the aluminum fits well now.
Gluing the compression braces in the second wing was much easier.
Doing it once taught me how. I learned a simple method: Block in
the rear spar, so it is forced forward towards the front spar.
Cut the brace there approximate size and angle, and slide the
rear spar to one side about six inches. Put the brace in place
and slide the rear spar back into position. If the fit is too
tight, remove the brace and try again. If you try all three
braces at the same time, you will know which to sand first, until
they all come out the same length. The key is to place the hold
down blocks in the right position. When done right they will not
try and rotate on you, pushing the spar out of whack. You will
just have to experiment, until it comes out right.
The ailerons are easy to complete, and when I finish the inner
structure, I expect cutting them loose from the main wing will go
rather simple. About four more months And I should be able to
begin work on the fuselage. Maybe by Sun-N-Fun 2000 I will be
ready to attend in my own aircraft there!
It has indeed been a loooooong time since I edited this file, so
I will give a brief synopsis of the rest of the wing
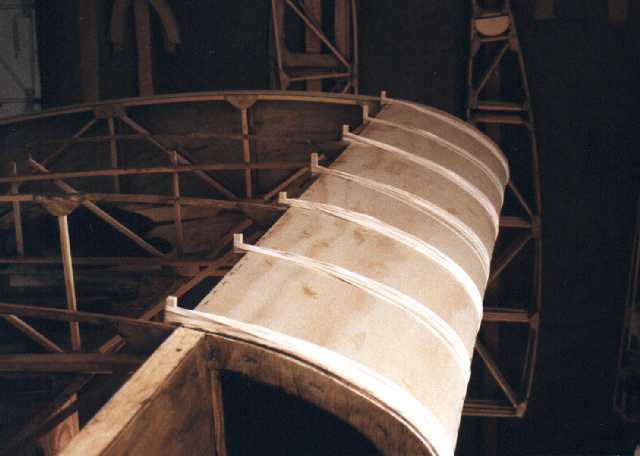
construction. The Leading edge ribs are a pain in the tail.
Sanding sanding and more sanding to get them all exactly the same
size. I really learned to appreciate the usefulness of the dremel
tool for this sanding job.

They glue on fast and then came the job of wrapping the skins
around. The leading edge skin wraps very easy if some water is
squirted on them with a sprayer, and allowed to soak in a bit.
Use lots of rubber bands to hold in place, and staple staple
staple.
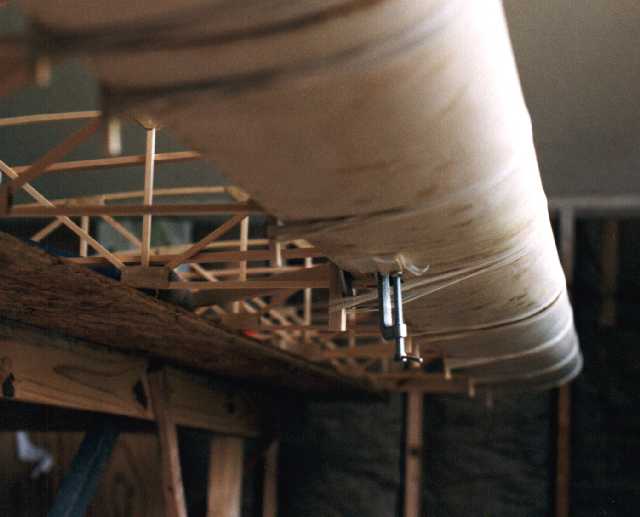
The trailing edge simply cuts away, and after some sanding and
fitting, and sanding the spots where the edge sticks, the aileron
skins wrap around easier than the other skins.


Then comes lots of paint. Paint, dry, flip wing, paint dry, flip
wing, repeat twice more and you're finished. The wing is rather
unwieldy, but suprisingly light. It gets easier to flip after the
ailerons are cut off. One person can do it. Simply stand in the
middle, grab the compression braces, lift up, flip, and CAREFULLY
sit it down. I supported the structure by the front and rear
spars on small blocks, while upside down. That way the weight of
the wing was not sitting on the curved top surface of the ribs,
which could crack them. I could then put a lot more pressure on
the wing when sanding or painting, without it rocking back and
forth on the rib caps. Repeat entire process once as necessary to
construct other wing. Oh yeah! Make sure you make one of each,
right and left wings. And before you ask, no, I got it right the
first time. I hung both wings on the wall to get them out of the
way, and then I built the landing gear.

![]()
![]()
