
Step by StepThis is a step-by-step description of how I went about the pose-render-print-hand draw-scan-postword process on a simple profile. The entire process took me two hours, but over an hour and a half of that was fighting with my computer (I'll break down the actual time on each part of the process in each step). Since I still can't find any of my old stuff, I figured it'd be better just to do a new one. Enjoy, and let me know what you think. Remember, though, that I never claimed to be any good.
|
 Render and Print (5 to 10 minutes)
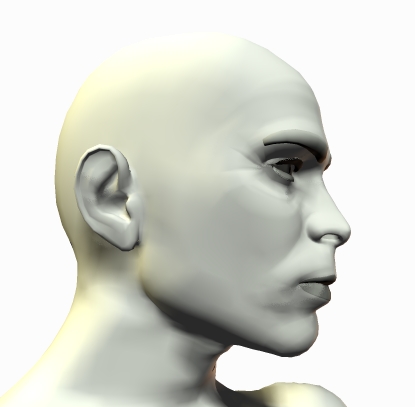
For this picture, I rendered a simple model in Poser 4, playing with colors to make sure that I'd be wasting as little ink as possible to display the greatest amount of contrast. After settling on the pose and the lighting- which is very simple here, but can be far more complicated- I rendered and printed. |
 Hand Drawing (15 minutes)
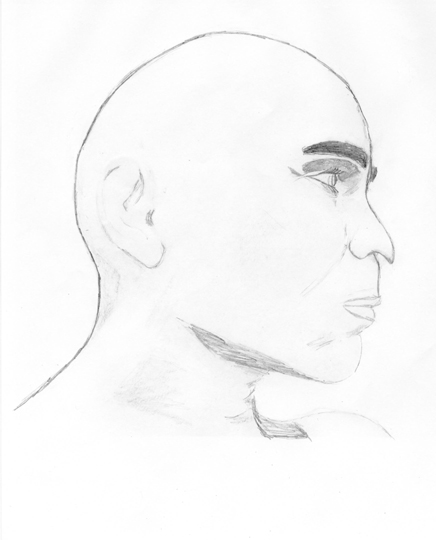
For this step, I got myself another piece of printer paper (which is surprisingly easy to use) and just stapled it over the printout. I stapled it in one corner, to let me flip back and forth, but for the most part, I just traced as best I could. I did some ink work on the original printed copy, but that was to make up for the lack of backlighting, which can usually be done with a calligraphy set up, or a blank computer screen, or even a window during the day, if you're willing to put up with any of it. You'll notice that the hand drawing looks rather different from the original. This is because I prefer not to be constrained by the model I'm using, especially if I don't know for sure what it is I want to put in the picture. In this case, I decided to go a little more feral and animal like than the original model, so I softened the lines on the ears somewhat, and carried the curve of his nose down into a sort of beak. If you're going to try this technique, the important thing to remember at this stage is that you can always start over if you don't like what you get in the end, and there's no reason not to explore the possibilities a particular "mistake" might reveal. That's how I got the "beak," and I'm not complaining about the final product at all. |
 Scan and Post-Render (10 to 15 minutes)
After scanning the image- I scan at double the size to get as much detail as possible, and then lower the size of the image later, for best resolution- I opened it in Photoshop and tweaked it a bit. First, I darkened the picture for better clarity, which both enhanced the lines and showed some inadvertant shadowing. Going with the bird-like appearance I began with the beak nose, I feathered the visible eyebrow, and softened the contrast on the ears somewhat, to make them look more evolutionary and less human. I probably could have done more with color or other Photoshop effects, but I wanted to show what could be done in a short period of time, from a very simple render. |
