further shadow modifications..
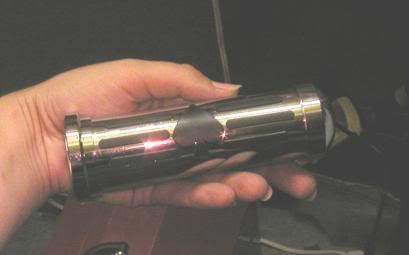
so the grips came in from avon on july 19th, but arrived with the stock rounded end caps installed instead of the chrome spike ends that we had ordered. no worries, though - the spiked ends were included! just had to change them up, which i did on july 20th.
time: 2 minutes
tools needed: #2 phillips screwdriver, loctite
instructions: insert the screwdriver into the grip, and seat the tip in the head of the screw that holds the end cap on. thread it out until the stock cap lets go, then put loctite on the threads, but leave it in the grip. then thread the cone end cap on, tighten, and you're done!

(apologies for somewhat poor picture clarity - trying different things so you could see the grip without it being just a mess of flash).
now the grips are ready to be installed, but we plan to have a shop do that.
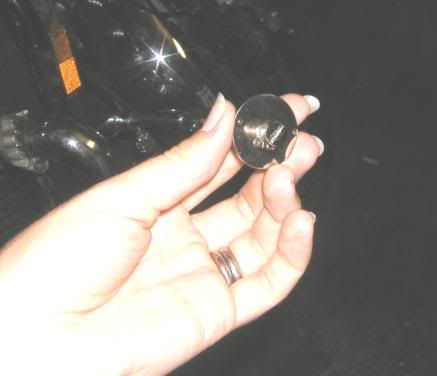
we did put some chrome badges, purchased from talisman leathers of london, ontario, onto his biker's friend bag end pockets on july 20th. here's the bag before:
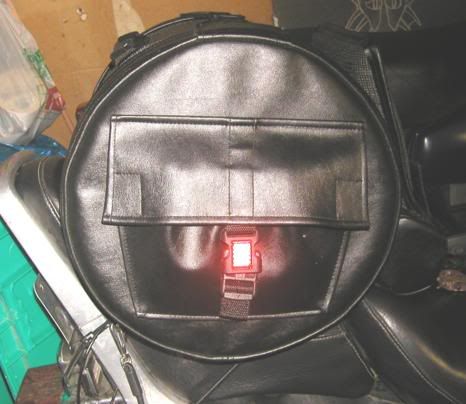
and here's the chicago-screw back of one of the badges:
time: 10 minutes
tools needed: flat bladed screwdriver, leather punch, loctite
instructions: punch holes in pocket top flap with the leather punch. remove the screw from the back of the badge, and push the internally threaded post through the hole you punched. put loctite on the threads of the screw, then thread in and tighten using the screwdriver. voila!

then on july 29th, we took his bike up to zdeno cycle in kitchener, and had his grips installed for the whopping sum of $15. i would have done it myself, but the easiest way to get an old grip off is to fire compressed air between the grip and the bar, and i don't have a compressor! we also need to re-use the throttle sleeve, so i didn't want to risk damaging it.
they look really sharp on the bike, though, and are really very comfortable. much better than the disintegrating foam on his old ones!
we also got him a tank panel that looks really slick, but i need to get a good photo of it. will try to do so soon!
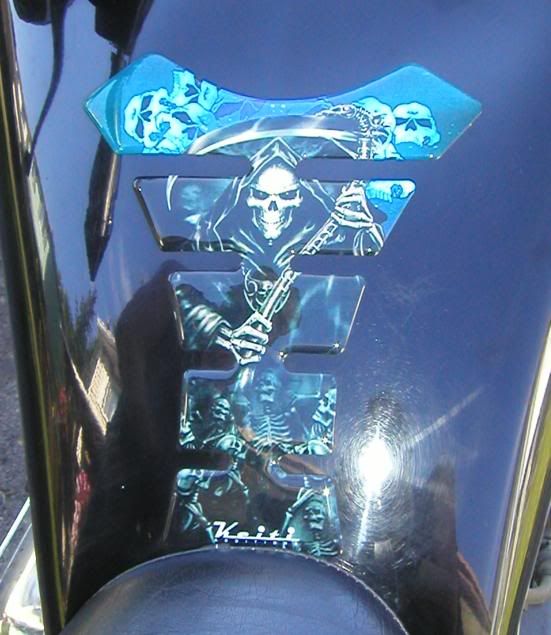
here's the tank pad - pretty sweet, no?
mostly doing maintenance stuff now in preparation for our holidays - motor oil changed on monday, august 14th, 2006 - will post more as things develop!
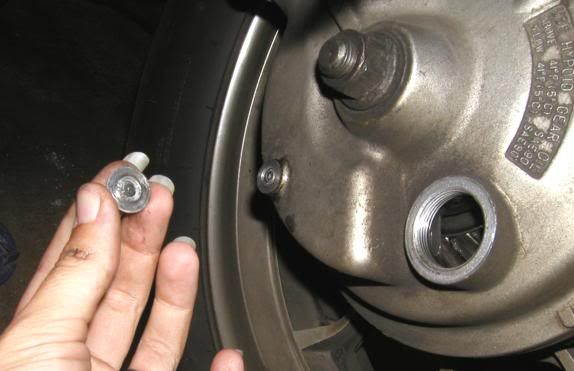
well, this is maintenance that turned into a mod! i went to change the final drive oil on tanker's bike on friday, august 18th, 2006, and look what happened!
time: 10 minutes plus 40mins at home depot
tools: 75W90 gear oil, 10mm wrench or socket, 17mm wrench or socket, ratchet, rubber washer, M8 x 0.125 x 5/8" 13mm hex head bolt, power drill with 3/16" hardened bit, flat bladed screwdriver, mallet
instructions: use 17mm wrench or socket & ratchet to remove fill plug from final drive unit. place pan under final drive and use 10mm wrench or socket & ratchet to remove oil drain plug bolt from bottom of drive unit. allow all oil to drain, then thread oil drain plug bolt back into bottom of unit by hand. give several turns to tighten with wrench or 10mm socket or ratchet, and have your jaw hit the floor when this happens:
try to look as cute and lovable as possible while showing tanker what just happened. try not to show surprise when he doesn't snap you in half over his knee, but instead calmly asks "ok, so what now?". run to other toolbox, grab screw outs, power drill, hardened steel bit set. chuck in 3/16" drill bit. attempt to drill hole in piece of bolt stuck in threads for use with screw-out. panic slightly when snapped off bolt starts spinning as drill bit is applied, threading even further into hole. try reversing drill to no avail. have moment of inspiration - go get very small, sharp-ended, flat-bladed screwdriver and mallet. put end of screwdriver against snapped off bolt, and freakin' wail on it with the mallet. use flat bladed screwdriver to carefully thread out snapped off bolt.
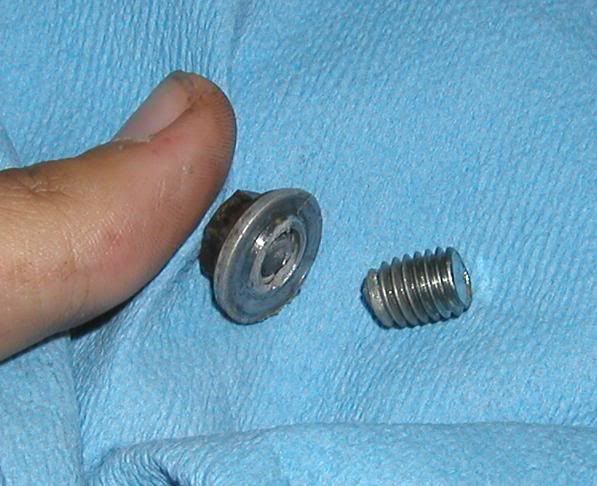
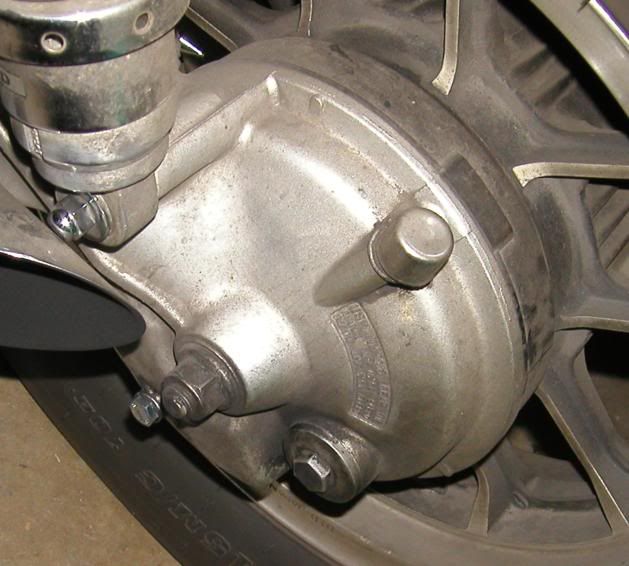
breathe sigh of relief, and begin heartily cursing weirdos that use aluminum bolts in final drive units. run to home depot with snapped bolt and pliers in pocket. use pliers to grip bolt piece while testing size and thread pitch at home depot, find a hex head bolt, realise that bolt alone will vibrate loose and spill final drive oil on the rear wheel. conider metal flat washer, or lock washer. settle for rubber washer instead. pick up $40 of stuff completely unrelated to the task at hand, because you were dumb enough to wander into the tool corral. fail to pay for bolt and washer. return to house, thread new bolt in by hand, use 13mm wrench or socket and ratchet to tighten. fill final drive unit with gear oil until it seeps out of fill hole, and thread in fill plug. use 17mm wrench or socket & ratchet to tighten, and give a big "ta-da!" when you're sure that tanker's bike will now hold final drive oil!
one week left until we leave on holidays, and the bikes are running great! i'm more excited than a kid in a candy store, and can't wait to be on the road!
go back to page 1 - or - go back to page 2 - or - go to back page 3 - or - go to k's mods

