
FrontPage Tutorial
Making a site with frames using FrontPage 2003
To make a website using FrontPage either buy Microsoft FrontPage and install it, or open it up from your program files on your computer.
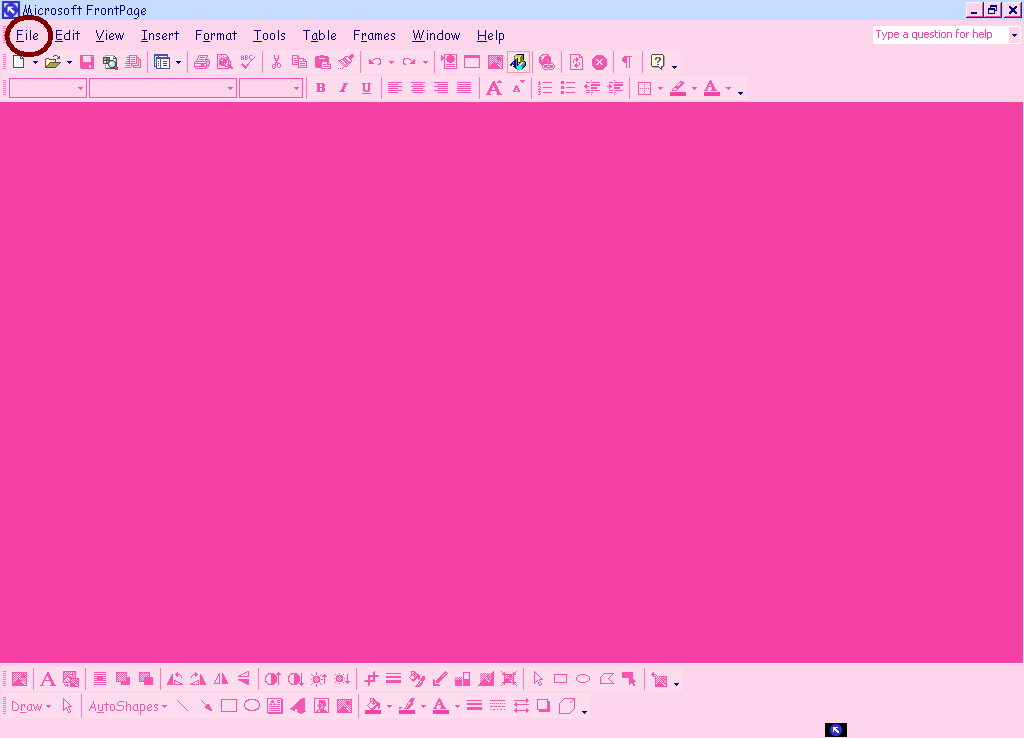
After you have the screen up that looks the one below click the file button located in the top left hand corner (circled in red below).
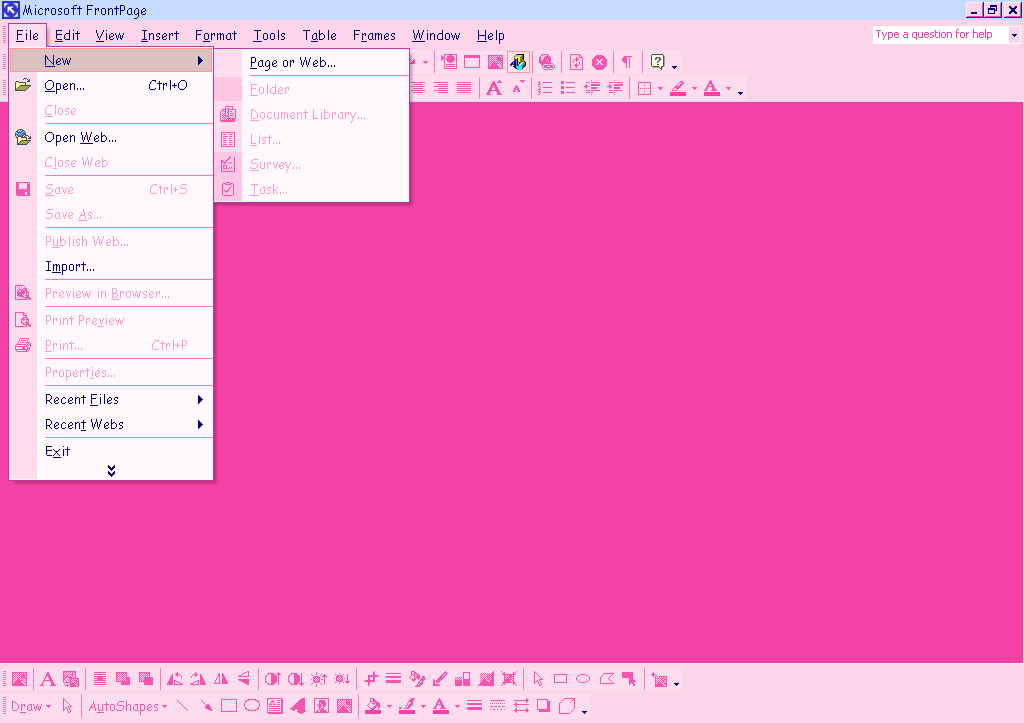
In the file menu click new then click page or web.
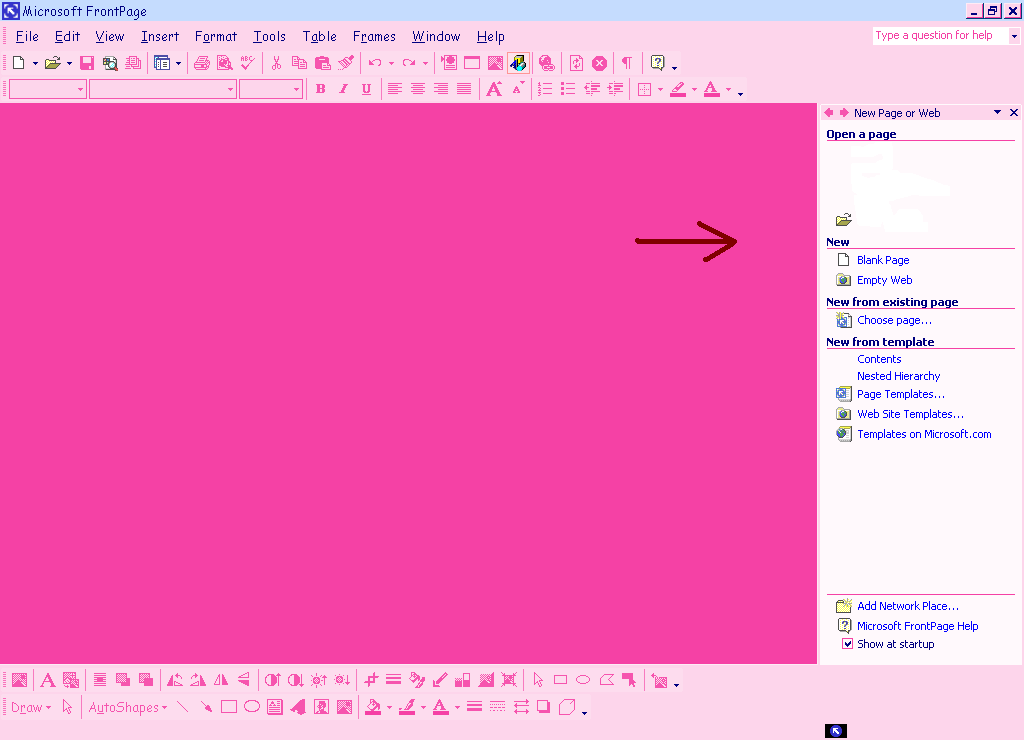
A menu will appear in the left side of your screen (arrow pointing to it below).
Now click page templates and a pop up menu will appear called page templates.

In this window there will be three tabs click frames pages.
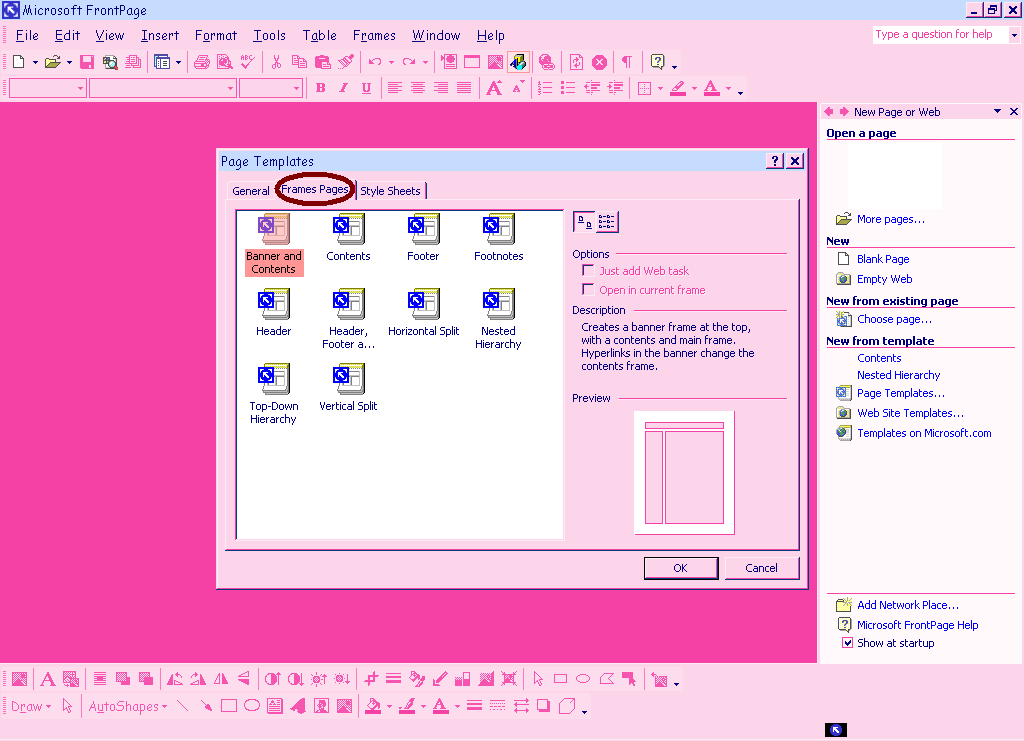
Select the type of frames you would like by double clicking the icon or clicking ok (I will be using the contents frame selection)

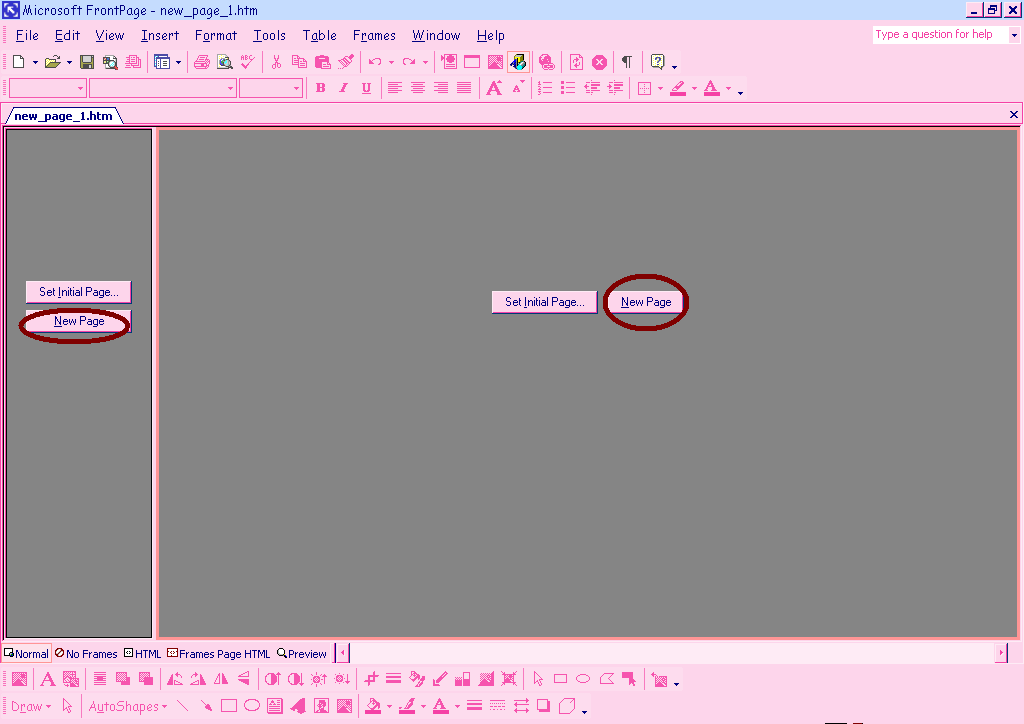
We will assume that you do not have a page to start with so in the frames click new page instead of set initial page.
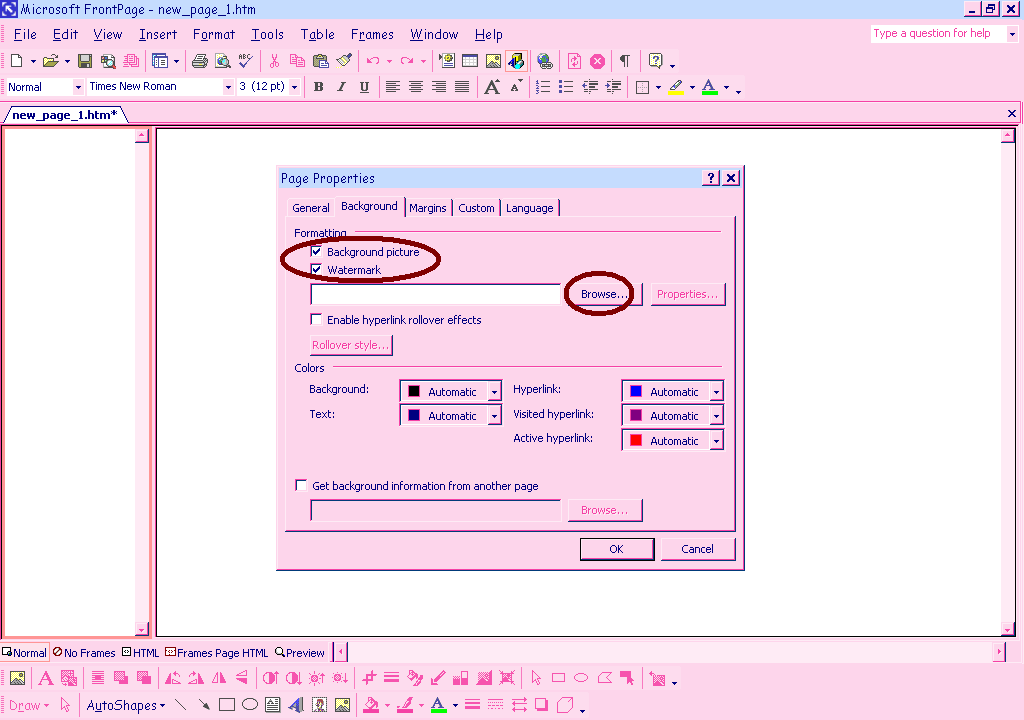
Now that you have made it this far I will go on to tell you how to insert a background. Make sure you click inside of the frame you wish to set the background for first (the cursor will flash). Now select format from the menu in the top of the screen. In this format menu click background.

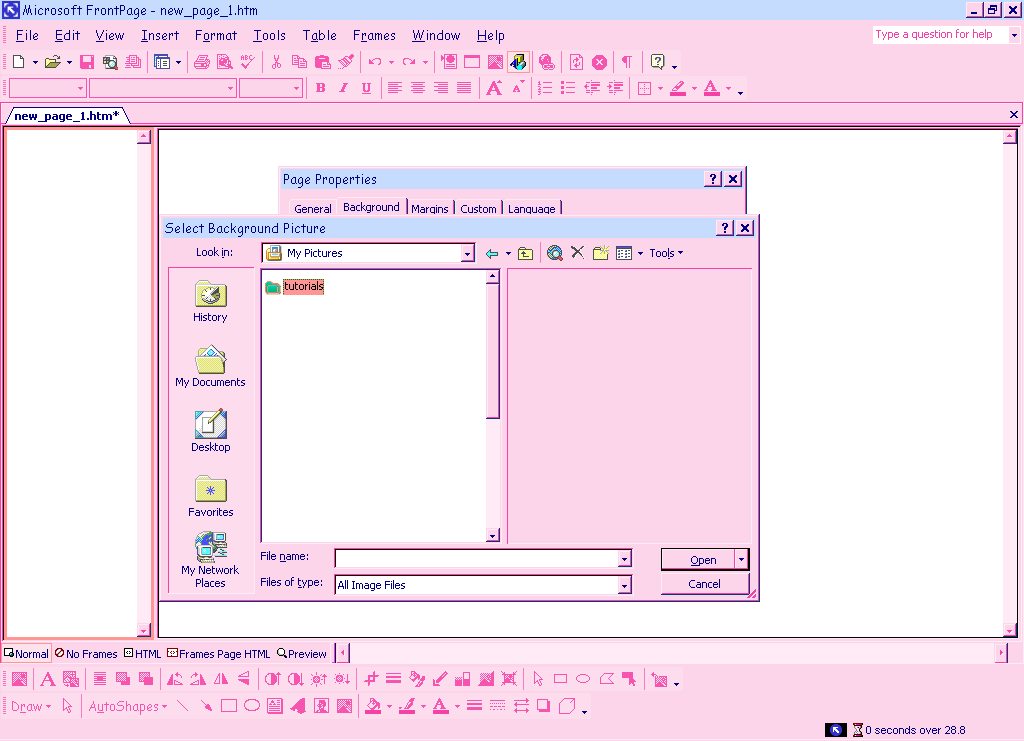
The page properties window will appear. First check the background picture box, then if you want it to look like the background doesn’t move as you scroll down the page check the watermark box Now click browse and a window with all of you picture files will appear.
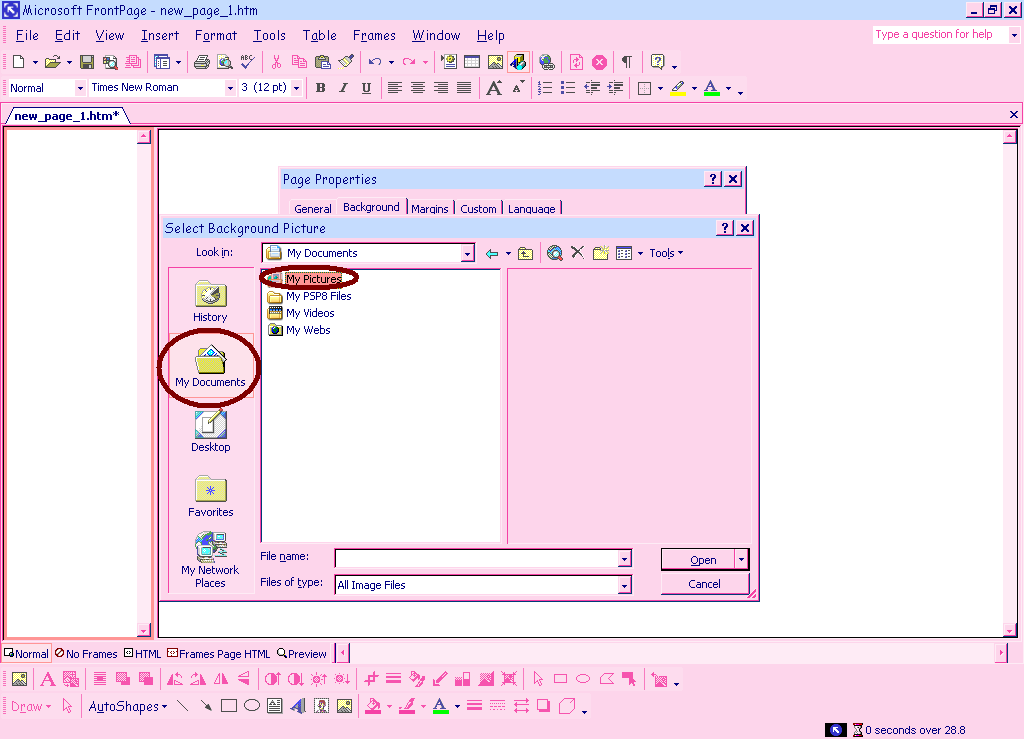
If the picture that you want is located in your pictures click my documents on the side (circled in red) and then my pictures.
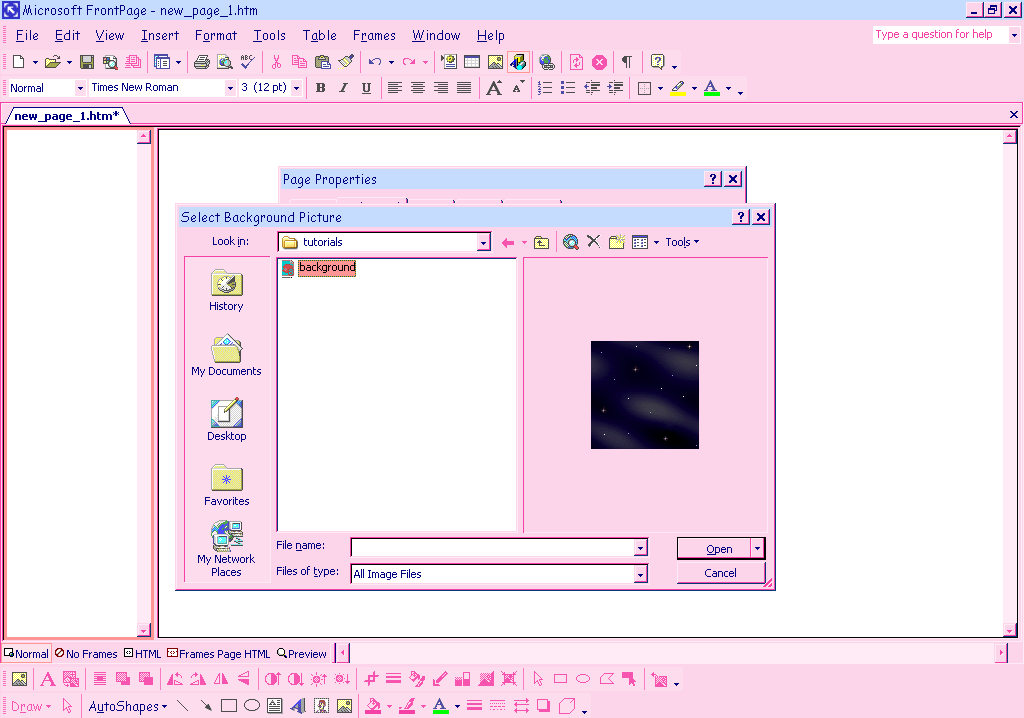
If you have a folder that the picture is located in, click the folder and double click you picture and then click ok.
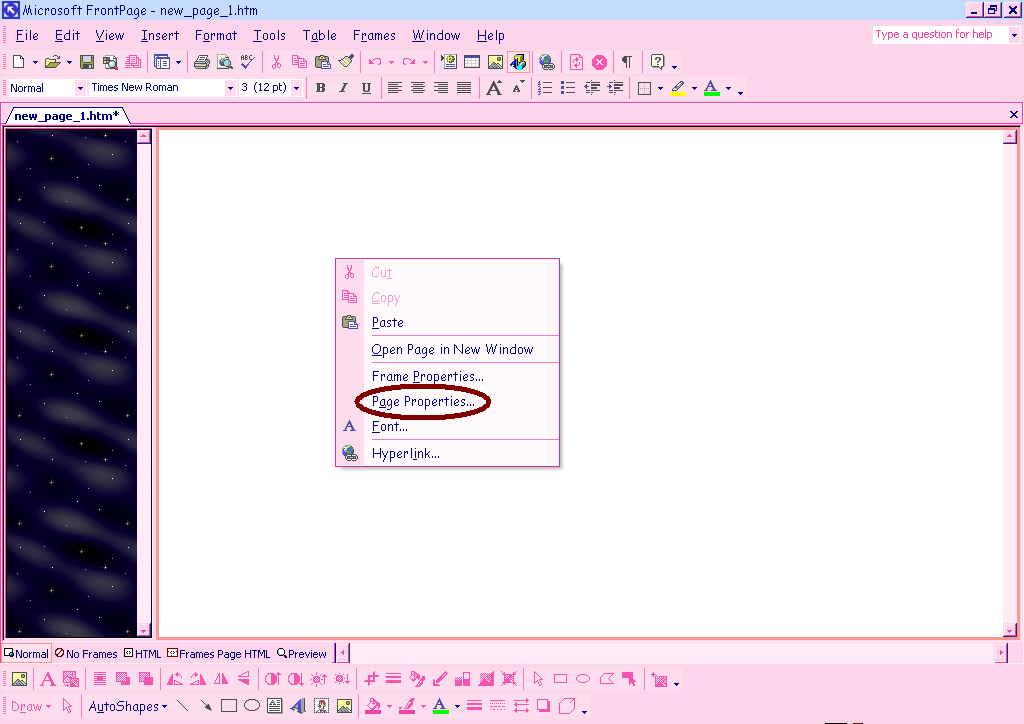
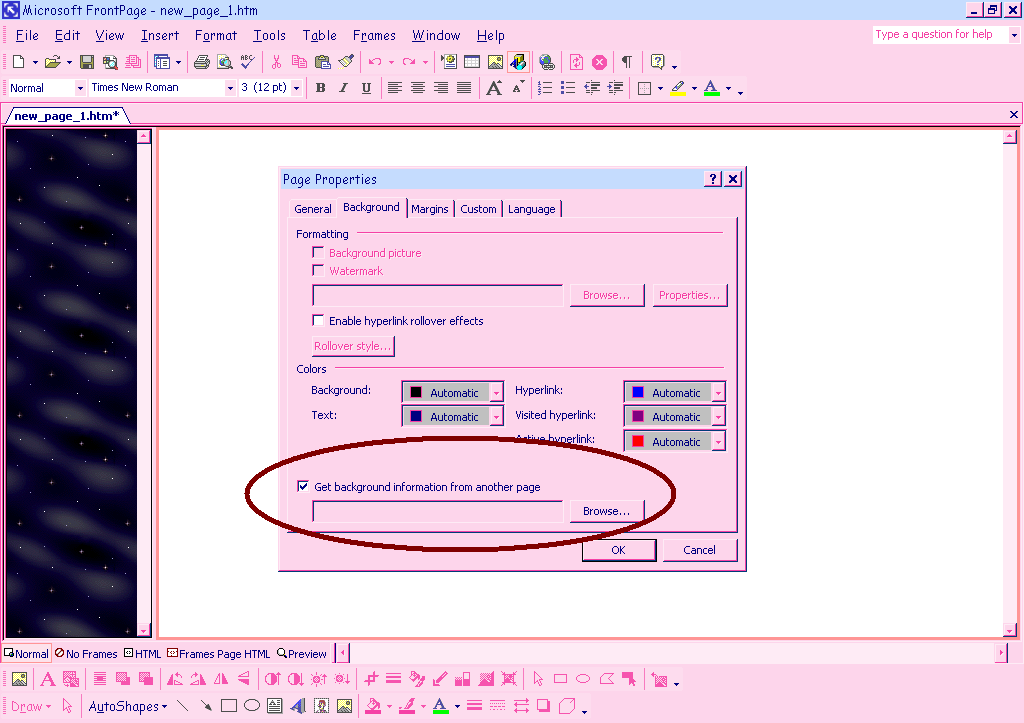
Repeat all of the background steps for the other frame, or right click the other frame and click page properties then click background and begin the background steps above again. If you want the same picture in both frames check the get background from another page (in the page properties window) click browse and then select the page you want the background for (getting a background from another page only works if you have a page saved) .
Now that you have a background for both frames, click save so your work is not lost.
Note: when saving you page be sure to pay attention to which frames are being saved so you name them properly. When using two or more frames you must save each page separately under different names and then save the pages collectively under one name. Example: Side from is named menu.htm Main from is named main.htm Both frames collectively are names NewSite.htm. When you open NewSite.htm you will see both frames. Htm will automatically be after your page name, you do not have to write it or you page tag will look like this NewSite.htm.htm
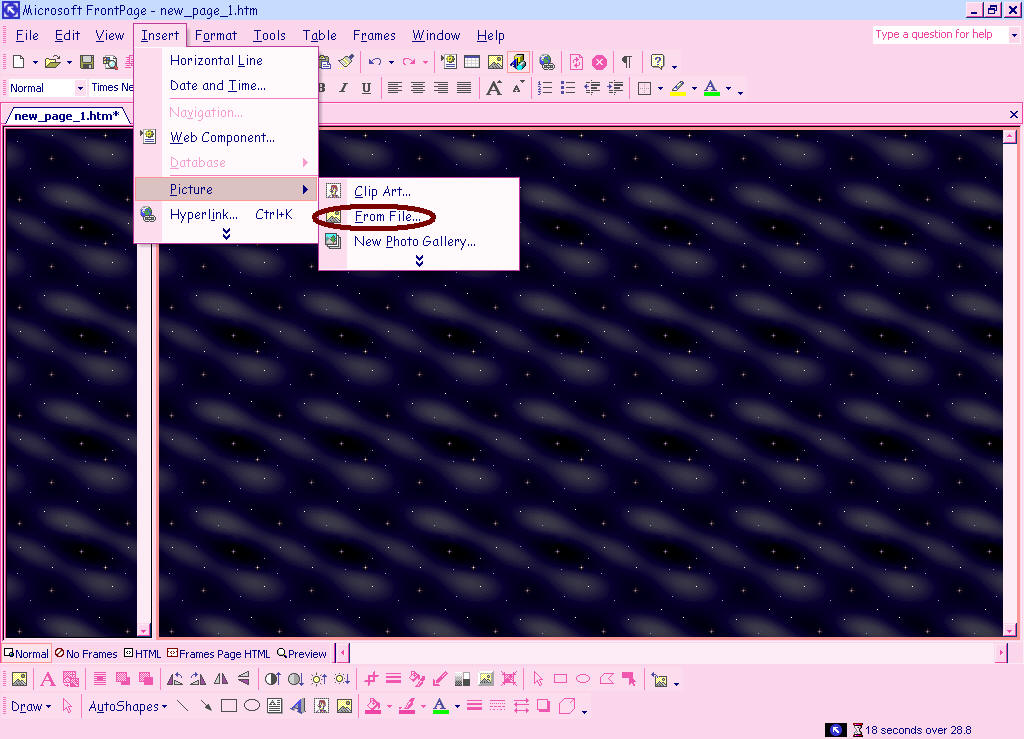
Now that everything is saved you can begin to add pictures. To add a picture to your page, click in the frame that you want the picture to be in. Next go to insert in the top of the screen then click picture then click from file.
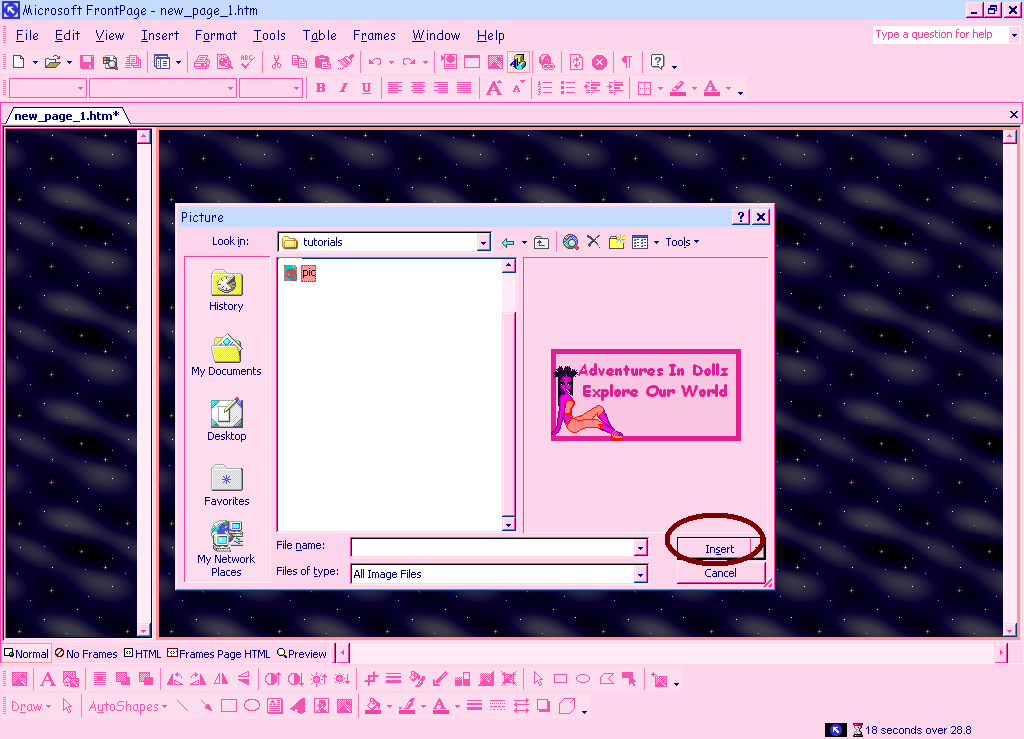
If the picture is located in your pictures in your documents click my documents then my pictures and select the picture you wish to insert. Double click the picture or click it once and press insert.
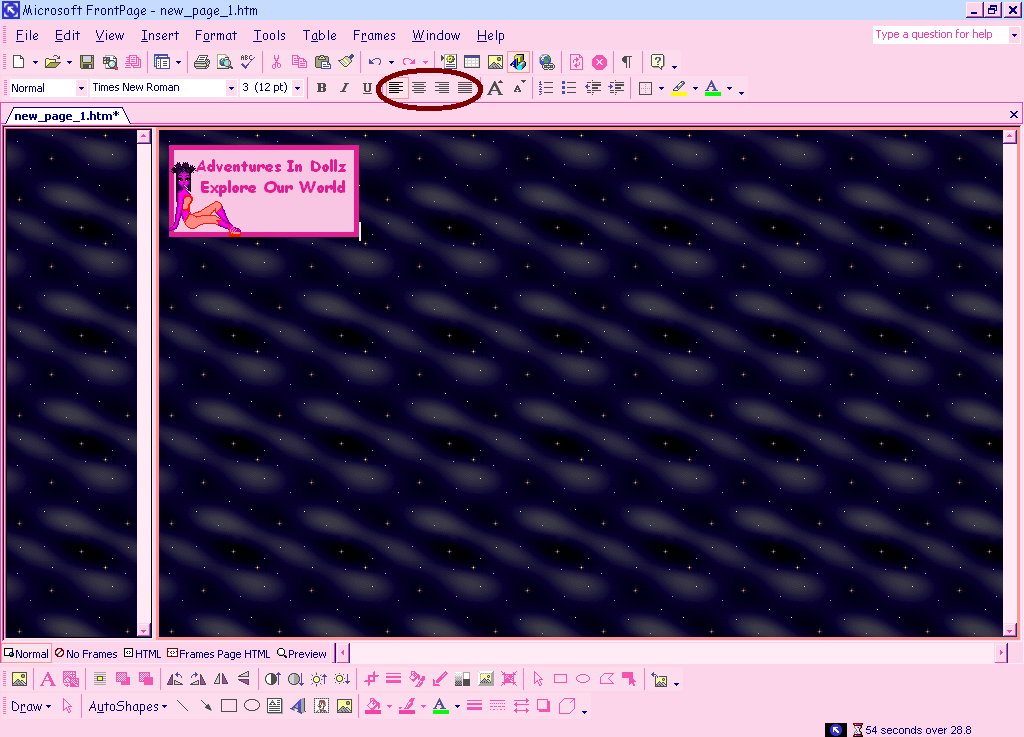
If you want this picture centered left aligned right aligned or etc. click the buttons circled in red below.
Now, to add text just type and select the color and font and style the same way you would in any other program.
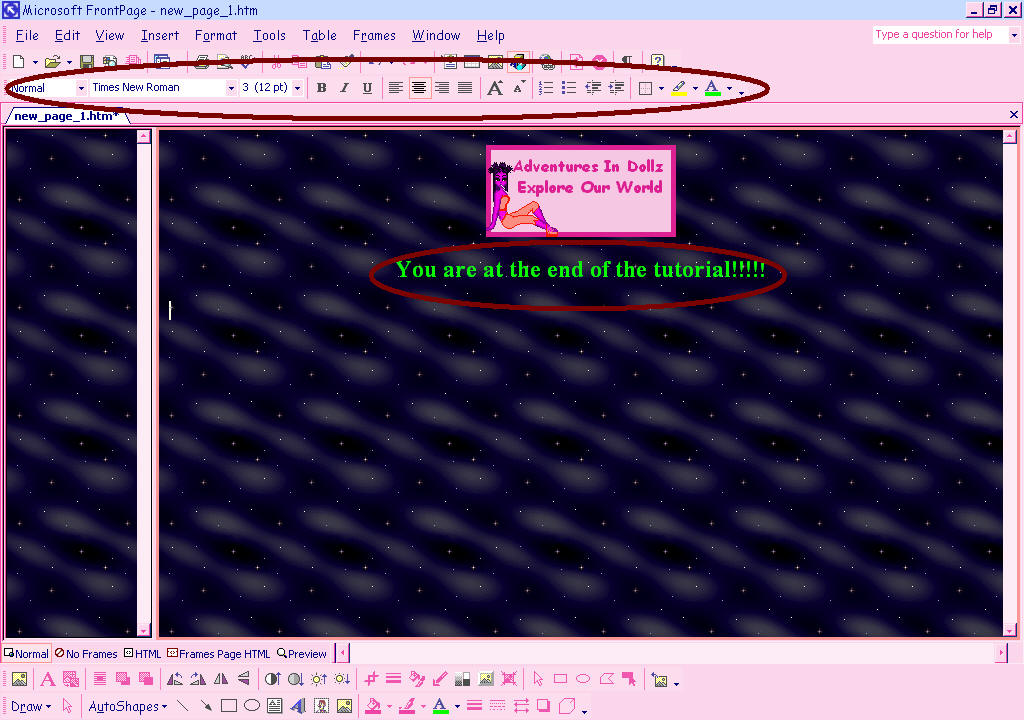
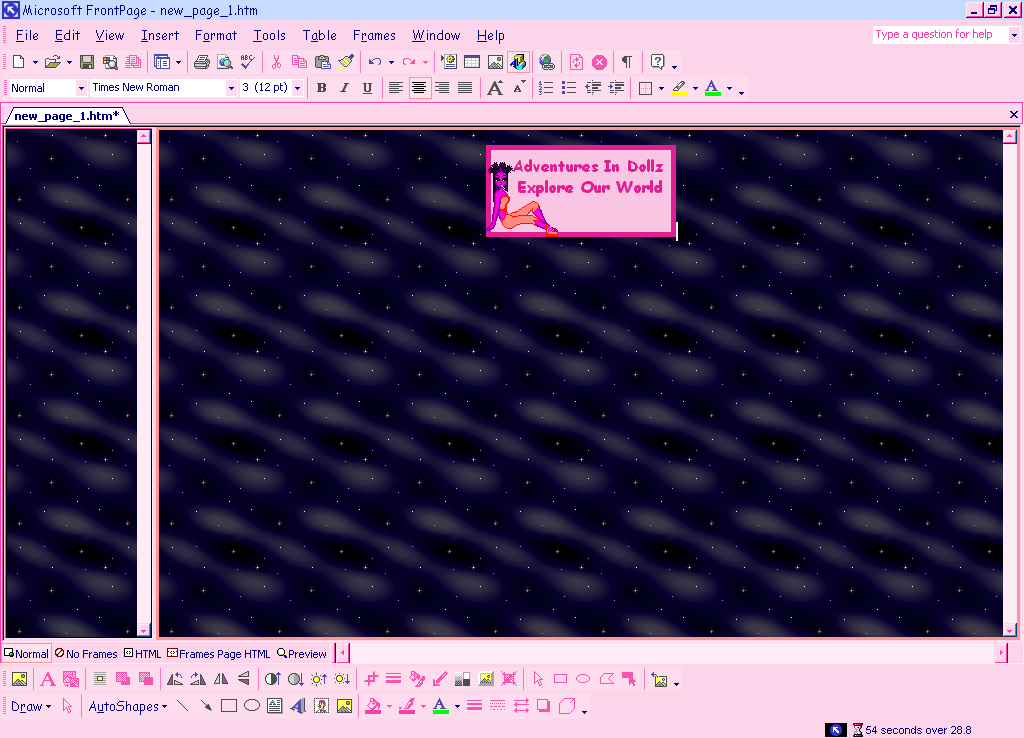
This is what you page could look like!

If you would like to make several pages being linked from your newly created web page go to the hyperlink tutorial.

©Adventures In Dolls
