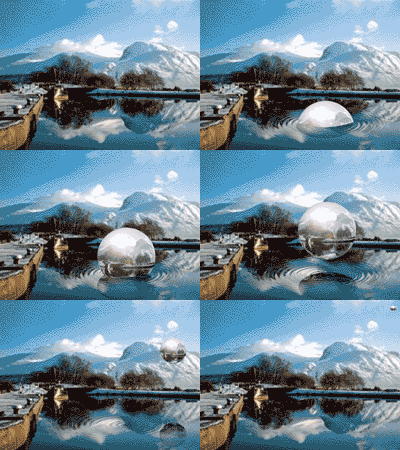
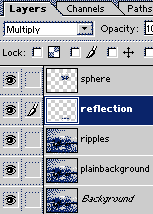
1. Starting with the Product of this tutorial, Name your layer with the sphere SHPERE, the layer with the reflection REFLECTION, Layer with ripples RIPPLES, and DUplicate the background and call that layer PLAIN BACKGROUND.
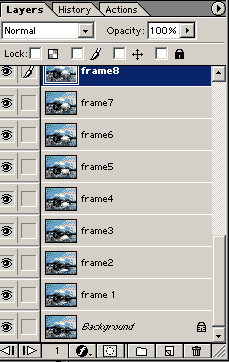
2. Click on the background layer and insert 14 layers by clicking the "new layer icon" on the bottom of the layers panel.
Name these frame 1- frame 14.
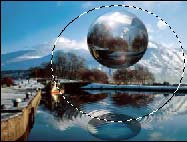
3. Highlight the sphere layer and click the mask button at the bottom of the layers panel. Use the elliptical marquee tool to draw an oval that is of fixed size 400 wide by 300 high.
4. With the marquee tool, move the marquee so that the bottom of the ellipse is about 10 pixels below the center of the ripples in the water.
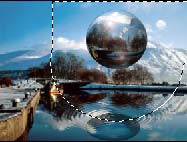
5.Using your rectangular marquee , holding the shift key down, add to the selection by drawing a rectangle from the widest part of the oval to the top right of your canvas.
6. Click Select inverse. Hit your D key, followed by your x key to set white as your foreground color. Select your fill paint bucket and fill. Click Select =>Deselect
7. Unlink the mask from the sphere by clicking the chain link between them.
8. Click on the mask on the sphere layer and right click on the mask and select "add layer mask to selection."
9. Click select inverse. Click on the reflection layer. Hit your mask. Unlink the mask from the reflection image by clicking the link between the mask and image.
10. Creating the frames used in your animation
Frame 1:
* Click on the sphere image on the layers panel and move it so that a small arch is above the mask.
* Click on the reflection image and move it so that only a small arc is below the mask.
* Click on frame 1 layer and hold down the ctrl, alt, shift keys and press E.
Frame 2:
* Move the sphere up about 20 pixels,
* Move the reflection down to match the outside diameter.
* Click on frame2 layer and hit ctrl, alt shift E.
Frame 3.
* Move the sphere up about 20 pixels,
* Move the reflection down to match the outside diameter.
* Click on frame3 layer and hit ctrl, alt shift E.
Frame 4- 8 or 10 continue moving the sphere up and reflection down to match. Create the frame by highlighting the appropriate frame layer and ctrl, alt, shift E.
The rest of the frames involve removing the ripples and using the plain background as tyou move and shrink the sphere over the mountain.
11. Animating in image ready:
Click the jump to image ready button at the bottom of the tool bar.
* Turn off all your layers except the one called frame 1.
* On the animations panel, set the time for frame 1 to 0.2 seconds.
* Add a frame. On the layers panel, turn off frame 1 and turn on frame 2. The time should be 0.2
* Add a frame. Turn off frame2 on the layers panel and turn on frame 3.
* continue adding to the animation in the same manor, until you have used all your frame layers.

