Using SL Clothing Templates with The GIMP
| This is just a simple tutorial on how to make clothes for Second Life using the GIMP |
Step 1. Open the Template in GIMP.  |
Step 2. Delete ALL layers EXCEPT for Overlay, UV Map, and Background.
These 3 will just act as guides for your clothing. |
3. In the Center Window (the one with your template), Select FILE-> Open As Layer then select the texture you're importing.
|
4. If the Texture is too big, in the TOOL panel, select SCALE LAYER OR SELECTION (CTRL+T). Scale the texture either by typing in the required size or by clicking on the image and scaling by hand.
|
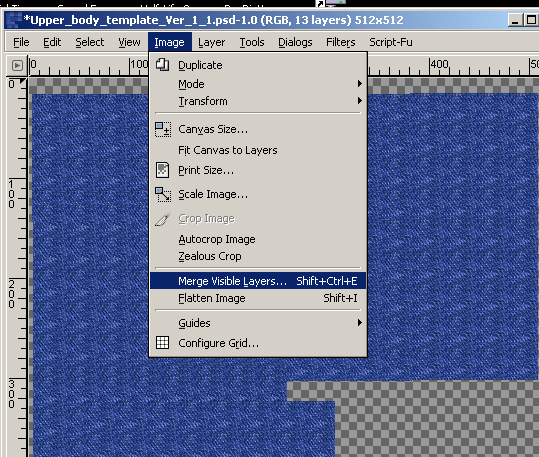
5. Duplicate the now smaller layer to fill in the needed areas. Now, with all other layers hidden, Select IMAGE-> MERGE VISIBLE LAYERS . |
6. Use the Eraser tool to clean up any areas where you don't want the texture.
|
7. Repeat the Open As Layer step to add more textures. Use the various tools & filters to get the desired results.
|
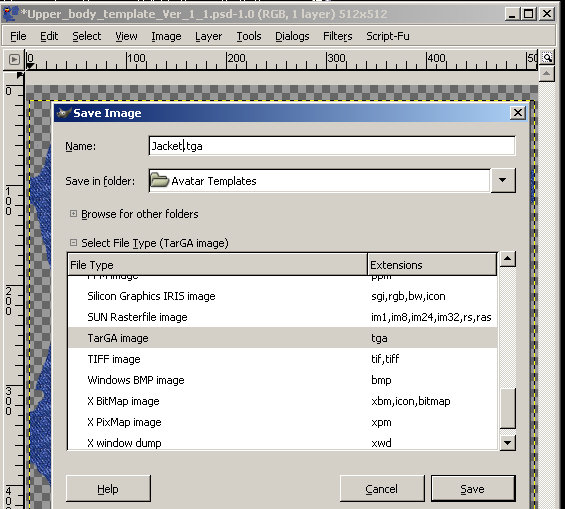
8. To Save your work, delete the Overlay, UV Map, and Background Layers. 9. Select File-> Save As (type name of file). Then Expand the Select File Type By Extention. Select TARGA.
|
|
Uncheck RLE COMPRESSION and ORIGIN AT BOTTOM LEFT
|
10. If EXPORT FILE box appears, you can either select EXPORT or go into CHANNELS and look for and delete any extra Alpha Channels.
|
| Top ranked mba degree schools. |