Misc Craft Patterns from Members
*Cast Paper Ornament
For the Bath:
*Fizzing Bath Bombs

|

Scrap Paper (NOT newspaper!)
1. Begin by tearing your scrap paper into small strips or squares. If you have access to a paper shredder, they work very well. Place one or two handfulls of paper pieces into a blender, cover with water.
2. Let soak at least 15 minutes.
Add one teaspoon of laundry starch to the water and blend for 15 to 30 seconds
until the paper pulp has the consistency of cream.
3. Pour pulp into sieve to drain off excess water.
Spray mold with vegetable oil and rinse lightly under cool water.
4. Pour pulp into mold.
Use a towel or sponge to press out as much water as possible. It is very
important to press the pulp as firmly as possible.
Let the mold dry over night. When dry, seperate paper from mold.
Suggested mold is use a candy mold.....They work great, add a liquid scent and all done! Thanks SANDY for this idea!
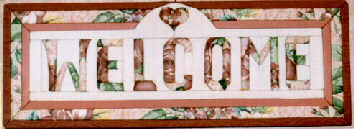
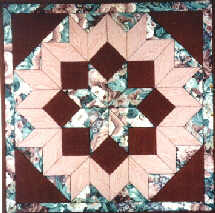
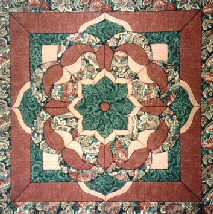
These wall hangings can be made to any size desired, using one or more traditional quilt block patterns or design your own or you may also design a crazy quilt.
3/8" to ˝" foam core board cut to size of desired wall hanging (size of wall hanging determined by size of quilt block(s) plus borders
For Questions ask Busyfingers!
Once you have decided which quilt block you will be using, you need to draw your quilt block plus borders onto your foam core board with pencil or pen.
Once your pattern is drawn on your foam core cut the excess foam core off. You should have the exact size of your wall hanging = quilt block plus borders.
For demonstration purposes we are using the Card Trick block.
The Card Trick block is called a nine patch block and for ease of instruction we will work with 1” increments. Each “patch” in the block will be three inches. So our block is 9” x 9”. We will add two inch borders all around, giving us a finished size of 11” x 11”. Therefore, your piece of foam core board should be 11” x 11”.
You will now score your pattern lines on the foam core board using a sharp utility, craft, exacto knife or razor blade. You only want to shallowly cut through the layer of paper and into the foam core. You do not want to cut through the entire foam nor into or through the other side of the foam core.
We are creating “channels” into which we can push the Ľ” fabric borders on each piece.
I generally start in the middle and work my way out.
After creating your templates and cutting your fabric and batting pieces, you will take one piece of batting cut from Template C. Place it over one of the center triangles, you may glue the batting down to keep it from shifting. Place a piece of Fabric A cut from Template B and place it directly on top of batting, centering it and you will use your butter knife or artist’s spatula to push the edges of the fabric into the channel cut into the foam core. Do not press to much fabric into the channel as you will loose your “puffiness” on your quilt.
Once all pieces of your block have been done you will do the borders in the same fashion.
You can square off your corners or mitre them. You must provide an extra two inches of boarder fabric to wrap around the back of the foam core board and glue in place to finish.
You can also cut a piece of fabric with ˝” seam allowance to cover back of work, press seem allowance and glue to back covering and finishing backside. You can hang your wallhanging using small picture hanging hooks and wire or you can create a very large bow with tails at least one foot longer than wall hanging. Attach wallhanging to the bow’s tails using glue and hang the entire wallhanging by the bow. The tails of the bow should hang down below the wallhanging.
Found some more pattern idea's on web, so thought you might like for a pattern Idea!
NEED: 1 c. simmering liquid potpourri; 2 pkg. knox gelatin; decorative jelly jar; plastic wrap; lace fabric or doily; satin ribbon.
HOW TO: Heat 1/2 c. of the potpourri in a medium saucepan. Stir in the gelatin until dissolved. Remove from heat and stir in the remaining liquid potpourri. Fill the jelly jar with the mixture, then refrigerate for about 2 hours. Remove and cover with plastic wrap until ready to display. Keep your scent away from direct heat.
For display purposes, remove the plastic wrap and cover the top of the jar with a circle if lace or doily and tie with satin ribbon. The lace allows the scent to dissipate.
We chatted about this project one night and all agreed that you could use any type of glass or jar you'd like. However, when you use the jelly jar with a doily, it looks like a jar of real jelly. For gift giving you might like to add a decorative canning label with the scent name ( to resemble a jar of jelly even more), but also add a tag that gives directions, and lets the user know it is not a food product! Just leave some potpourri in the store for us to buy! Have Fun!
*Another great idea someone got was to pour the liquid in empty film canisters, chill to set. Then decorate the canisters if desired, and punch holes in the lid, then place the little scent in a drawer or under a seat of your car for an easy and cheap little freshner for your dresser or car.
Freezer paper.....26 in length
lay freezer paper on work surface and hold down with masking tape
cut a 20x28 piece white tissue paper in half and put aside for paper (two pieces size 14x20 each)
pour white gesso 2-3 tblsp onto shiny side of freezer paper and spread thinly to cover paper using a brayer of a paint brush till evenly coated. No puddles so get it smooth, go back and forth up and down, sideways till its totally covered cept an inch on outside edges
lay a piece a tissue paper on top this and gently pat down to gesso, paper will feel damp to touch and look wrinkled and leathery but thats what ya want.
repeat step 3......using gesso to coat the tissue paper. Use the black gesso for a darker paper if desired. Making sure its coated evenly as before and no puddles. Tears of tissue paper at edges can be touched up with gesso to lay flat...
Dry over nite
Mist paper totally with water bottle till wet
get the acrylic's you chose for accent colors and drop/splatter them lightest to darkest now on paper, letting colors overlap till all colors are pretty much all over paper, tilting paper to make colors run together works good.....can spray mist as many times ya need to get effect you want, but not too wet
lay seran wrap over paper ( use two pieces) and press down on paper, squishing, pinching, sliding wrap around till you see design you like..
set aside for four or five hours to dry, looks wet when dry but dont be fooled, but min time will be 4 hrs to dry, depending on how wet it was
peel pastic wrap away when dry
add accent colors if wanted now for texture, like a large rubber stamp of leaves in a gold or whatever, or use sea sponge and dab a color you'd like, not covering paper but to add a finished texture to paper
Peel Tissue paper from freezer paper and your all done. Use any way your imagination takes you.....and feel good cuz you made it yourself!
IDEA'S...You can tear peices and use a matte finish to deco a stro ball for a ornament, or use a medium matte finish and adhere with matte to a clean picture frame, making a beautiful frame, or whatever! Have Fun!!
I cant take credit for this, its Carol Duvall's episode 712 :-) You can see a picture frame there used by this paper on her website at hgtv.com, just remember the episode # to view.
....non edible ..Thanks Lori for this!
Here's a no bake, non edible recipe for Cinnamon Christmas Ornaments.....
8 oz. cinnamon
Mix well with fingers and let set at least one hour. Roll out "dough" to 1/4" thickness and cut with cookie cutters. Make holes in ornaments for hanging. Place on baking rack and let dry for several days. Paint heart, stars, whatever on them if desired and spray tops with clear matte sealer. Hang with homespun fabric, ribbon, cording...........and ENJOY!!!!!!
You need the really thick tacky glue
Edible Paint
*egg yolks
Mix two egg yolks with 1/2 tsp water. Place a small amount of the mixture in several paper cups or small bowls.
Chalk
*3 tbsp plaster of paris
Mix well in a waxed paper cup or styrofoam cup. Let dry completely; then peel the cup away and draw.
Fun Clay Pots
You will need:
Instructions
1. Once you have your napkins picked out, cut out the design and
peeloff the back layers of the napkin. You only want the layer with the design on it.
2. Select paint colors that go with the napkin and sponge paint the pot inside and out (using a paintbrush leaves lines, so I use a sponge). Depending on the color you may need to apply 2-3 coats of paint.
Let the pot dry, 1 - 2 hours.
3. Figure out how you want to arrange the napkin designs on the pot, and then lightly dab the paint where you will be putting the first piece. Lightly apply the napkin, dabing lightly with your finger.
Be careful not to push too hard or the paint will bleed through the design.
Once you are done decorating your pot let it dry overnight. Then spray it with a sealer. They look just like you painted on the napkins design.
These make great gifts for baby showers, wedding showers, graduation, birhtdays, etc.
|
|
2 Tablespoons Citric Acid ( Available Drug Stores and Health Food Stores)
-Place all dry ingredients (first 3) into a bowl and mix well. -In a small glass bowl melt the oil then add fragrance and colorant. -slowly add oil mixture to dry ingredients and blend well. -Take truffle size scoops of the mixture and shape into balls. Balls should be about 1 inch in diameter. -Let the balls rest on a sheet of waxed paper for 2 to 3 hours. Gently reshape if needed. -Let the ‘bombs’ (balls) dry and harden for 24 to 48 hours. Store in closed (airtight) container.
Bath Bombs
1/8 cup epsom salts Combine ingredients and roll into balls and let dry. Another Bath Bomb Recipe
1 part citric acid Combine and roll into balls and let dry.
2 c. Epsom salts
Place salts in a covered cont. and add coloring. mix well. dribble the oils down the side of the container. seal and shake until well mixed. allow to set up for a week or two to blend the scents and the salts. place salts into jars. mix or match colors, using one color per bottle or layer different colors in one jar.
2 1/2 c. baking soda
Mix well by shaking in an airtight cont. and store covered. You can also place smaller amounts of uncolored mixture into separate containers. Add different colors of food coloring to the containers and layer the mix in the bottles.
2 ounces distilled water
Mix food color with water, stirring/shaking thoroughly. in separate container, mix essential oil with carrier oil. pour colored water into bottle, then add oil. the oil will rise to the top , creating a layered effect. shake before using. add a few T. to each bath.
2 cups powdered milk Mix and put in air tight container
Bath Crystals
3 cups epsom salts combine all in a bottle until well blended and cover tightly!
This works for very sensitive skin and can be used on both your face as well as your body. Marcus Recipe 1:
3 parts oatmeal ( the raw kind from the healthfood store) Recipe 2:
1 cup Raw oatmeal (ditto)
Mix ingredients together well and place into sachet. Method: In warm water soften the sachet - its ready when it emulsifies and distributes a fine 'milk', gently pat and work into the skin. (Don't be harsh!)It'll make a soft 'lather' - not like soap but as effective. Rinse well. Leave sachet to dry. Wet mix version should be refridgerated. Will last one week without spoiling. Remove wash sachet and reuse with fresh mix. ** Very expensive but does good things for your skin. Sensitive, dry hands:
Palm size of white sugar Rub hands together mixing sugar and oil. Scrub gently. Rinse off under running hot water. Cleans and conditions at the same time. Hope this helps a bit. Best,Marcus.
|


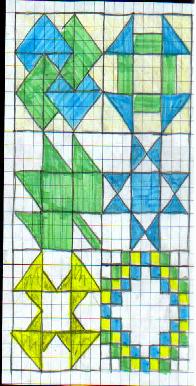 examples of designs
 cardtrick