

|
|
|
This is the Ripple Overlay Applet......my own invention. It is
one of the more difficult applets to prepare. For this
applet you will need the RippleApplet.class and Ripple.class
files which are available for download at our Yahoo
Group page in the files section.
Step #1
For this you will need an image with water in it. Make a nice
frame for it the same size as your origional image. I use
Paint Shop Pro for most of my images, but you can use your program of
choice. You could make a copy of the origional image, and use it to
make your border, sizing it down somewhat to allow for the
edge. Then select the inner part of the image, click on
selections/invert and copy and paste it as a new image. This would
give you a border with a transparent center. Your goal here is to
have the origional and the bordered image the same size exactly.
Simply sizing it down after adding the border, will change the size of the
inner part of the image .
What i usually do is select an area in the image for the main
part, then click on selections/invert and your border is selected right
out of the image. It is easy then to clear the border for a main
color. Then what i do is copy and paste the border as a new
image. now you have a border, the same size as your image, with
transparency in the center.
However you can accomplish this is fine.
My way works for me, you may prefer another.
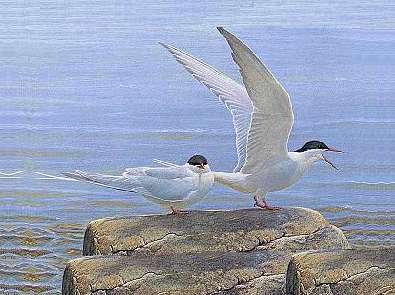
This is what my main image looks like.
 Step #2
You will need to do some preparation for the water image as
well. I prefer making a copy of the main image, with all changes to
it being made . Then i copy and paste the border to the
image i am going to use . I make a new transparent file
the same size as my main image and paste my copy
precisely on top of it. If you use the numbers at the very
bottom and match them up, you can place it directly on top.
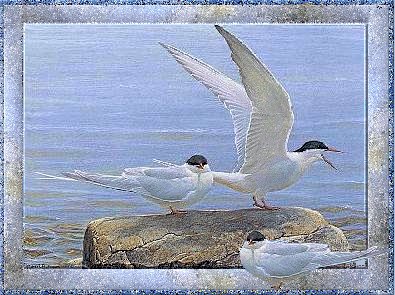
This is what i have now.....
 Step #3
Then i proceed to use the lasso tool to select and clear
out the water from the image. This is what my image looks like when
i am done.
 I added the gull in the foreground for dimension.
Step #4
Having prepared the images you will be using.......
you are finally ready for the script part of the applet. I have
hightlighted the changes you need to make in red below.
For webpages :
<CENTER><APPLET code=RippleApplet.class width=395 height=295><PARAM NAME="initimage"
VALUE="true"><PARAM NAME="nwaves" VALUE="10"><PARAM
NAME="delay" VALUE="120"><PARAM NAME="frames"
VALUE="20"><PARAM NAME="percent" VALUE="15"><PARAM
NAME="image" VALUE="your website addy/your
main image.jpg"><PARAM NAME="imagemask" VALUE="your website addy/your cut out water
image.gif"></APPLET></CENTER>
For stationery use :
** Notice the difference between the two tags.
You must use the codebase when using the applet
in a stationery or the applet will not work.
<CENTER><APPLET codebase="your website addy/ "
code=RippleApplet.class width=395 height=295><PARAM NAME="initimage"
VALUE="true"><PARAM NAME="nwaves" VALUE="10"><PARAM
NAME="delay" VALUE="120"><PARAM NAME="frames"
VALUE="20"><PARAM NAME="percent" VALUE="15"><PARAM
NAME="image" VALUE="your website addy/your
main image.jpg"><PARAM NAME="imagemask" VALUE="your website addy/your cut out water image.
gif">
</APPLET></CENTER>
You will be able to make changes to the Values in the
applet
for a faster or slower effect. I hope
that you were able to
follow what i have done and will soon be making
beautiful
ripple overlay applets of your own.
Hugs,
Karen
|
