Creating a Plain Text Signature and Saving as a GIF Image With a Transparent Background
Open the Corel Photo-Paint program and then open a new document.
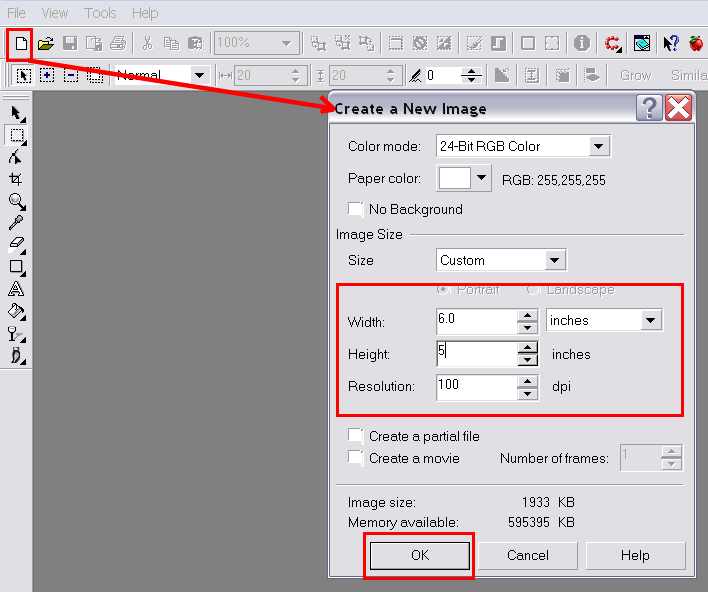
The dimensions of 6.0 inches wide and 5 inches high are arbitrary for the most part. To do a signature it gives plenty of workspace and the image will be cropped eventually. Paper color is somewhat important. I usually use a white background, but have checked the No Background and used that. If you know that you will be using the graphic on a colored background (such as a New Discussion message box for the MSN groups <yellow>) you can chose the background color to match. Here, we're just going to stick with the basic white. Click OK.
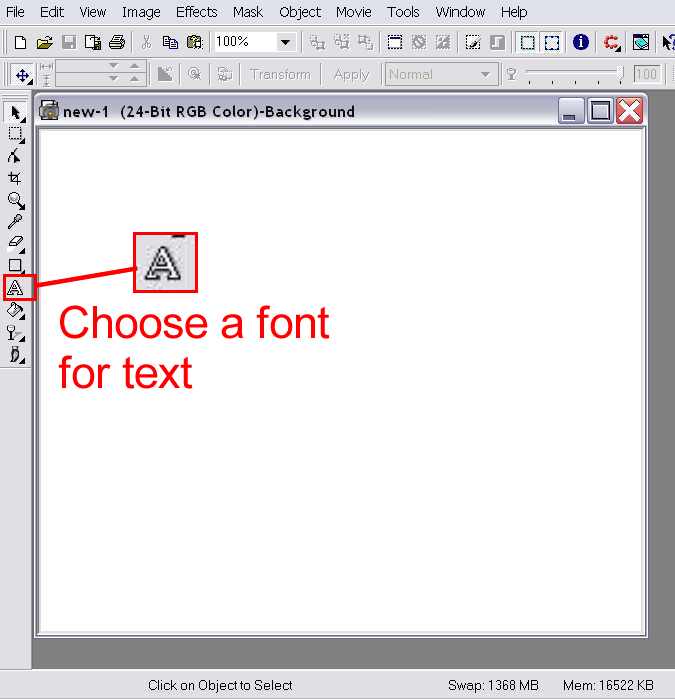
Now that you have the new document opened, the next step is to select a font for your signature text. Click on the text icon "A."
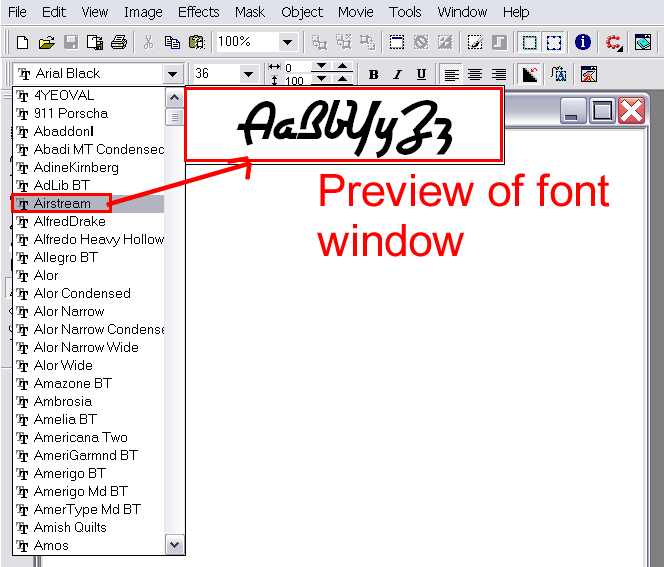
The top tool bar changes to reflect the action taken. Click on the down arrow of the font menu. The menu will drop down and show you the list of the fonts you have available to you. When you downloaded the Corel Draw program, you added quite a few fonts to your font selection. You can also surf the Internet for more fonts and dingbats and add them to your collection. (Note: You list isn't going to look just exactly like mine does. Some of the fonts listed on the above graphic are ones that I have added by downloading font files off the Net.)
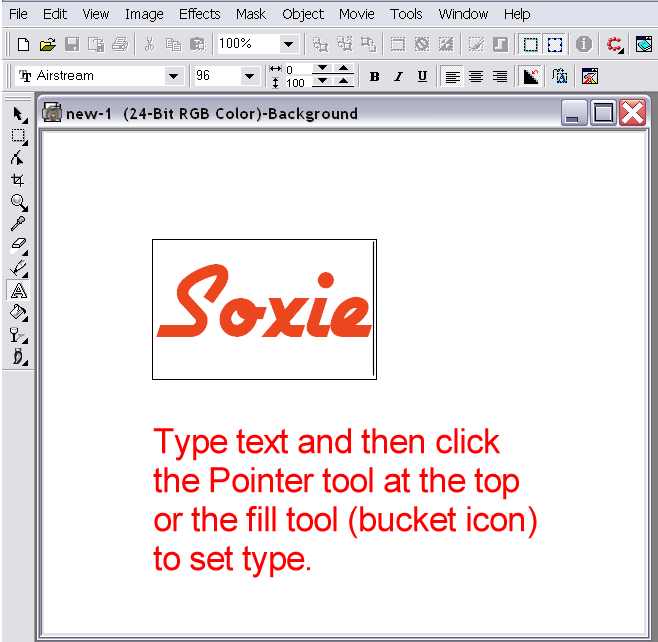
To make this particular signature, I selected the font called "Airstream." Its not a personal favorite, but suitable enough to demonstrate the process.
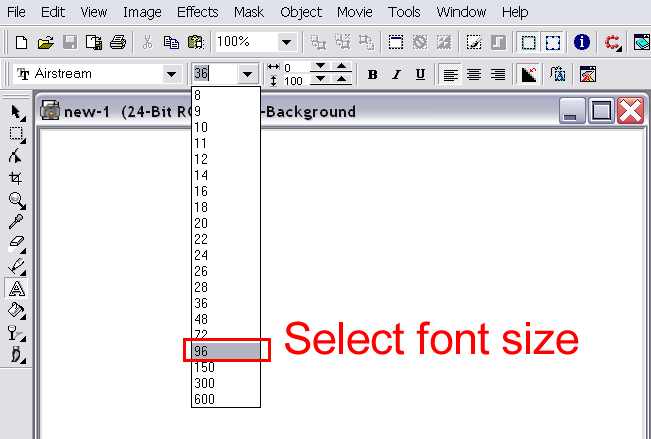
Now, you select the font size. 96 is a good size to start with, however, it depends on the font itself. The 96 font size may be small for some fonts, and then quite large for others. You can start to type your text to see how it looks and then adjust the size setting to your liking.
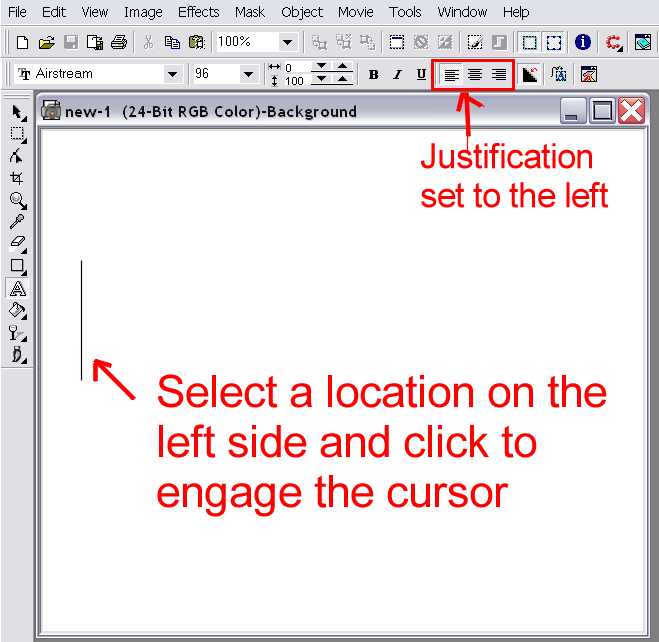
When doing a simple text signature, you can chose to either start on the left or in the center. I usually just select the left hand justification for signatures, even when I'm using a picture graphic to go with it. In that case, I do the picture graphic first, and then do the text to the right of it.
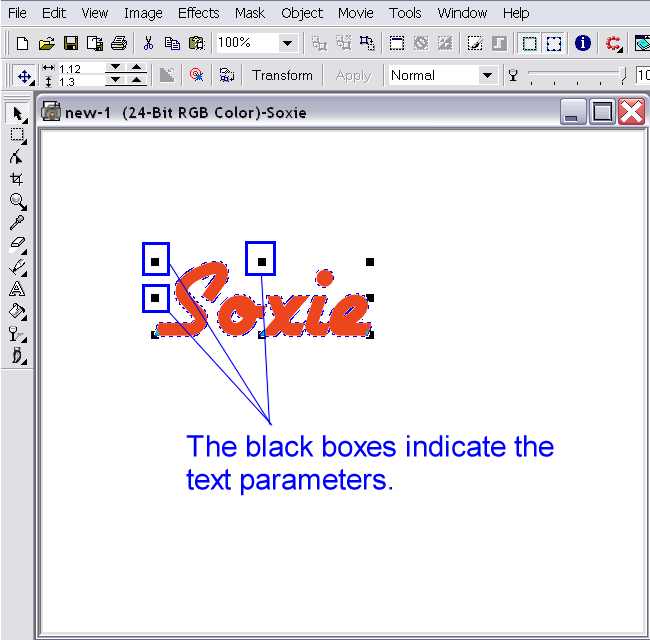
Notice the 8 little black boxes that surround the text. If you hold your mouse down on the upper middle one, and drag upward, it will stretch the text upward. Likewise, if you hold your mouse down on the middle box on the side and drag to the left it will stretch it lengthwise. If you click on the corner box and drag at a diagonal upward and to the left, it incorporates both aspects. If you click on the text itself, the boxes change to other functions. One is outward pointing arrows at the corners. If you click on one of the arrows and drag outward, it skews the text in that direction (that is how I skewed the Welcome to Omelette on the front page to fit the scroll).
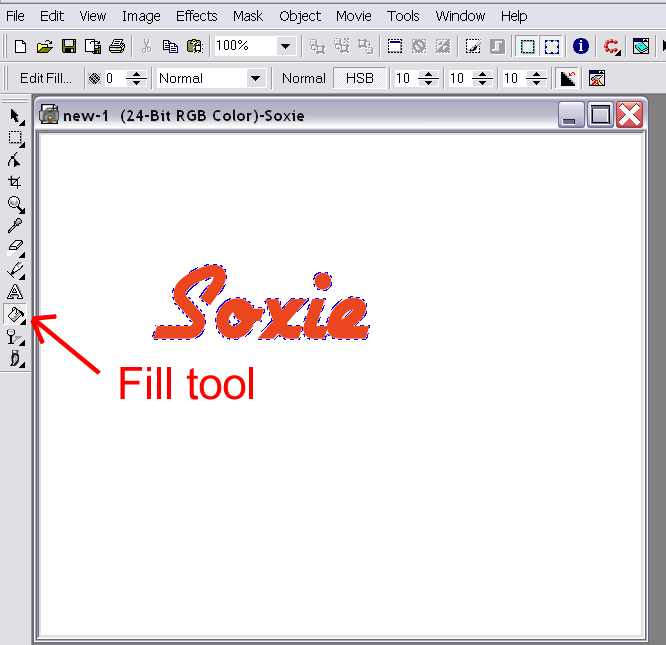
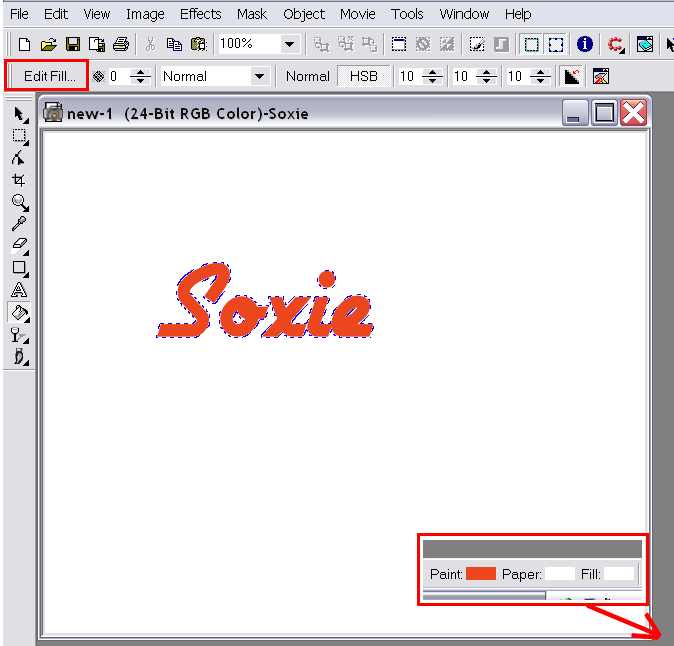
Its not absolutely necessary to fill the text, but by doing so, it adds interest to the signature. When you click on the fill tool, again, the top tool bar changes to reflect the action. There are two places on the workspace by which you can access the Edit Fill dialog box... Edit Fill on the top tool bar, or the Fill at the bottom right hand corner of the workspace. The program comes with pre-installed fills. (I make my own fills and add them to the selection... that is a whole different tutorial by itself.)

I could do a whole different tutorial just on this by itself. I spent hours upon hours with this, learning the pre-sets that were available to use. Notice that the third one is selected. That is the fill selection that I use the most. To change the fill, click on edit.
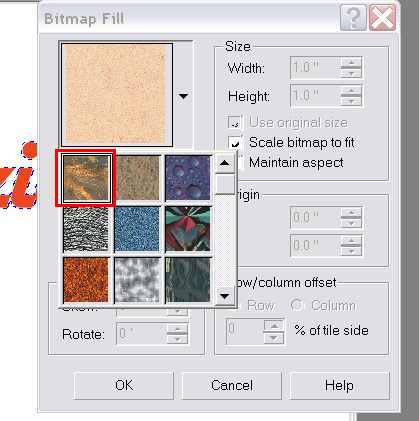
When you click Edit, this dialog box appears. Click on the down arrow to display the pre-installed fills. For this tutorial, I select the first available pre-set.
 Click OK.
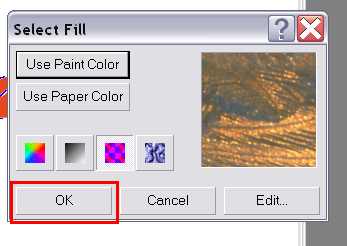 It goes back to this dialog box... click OK.
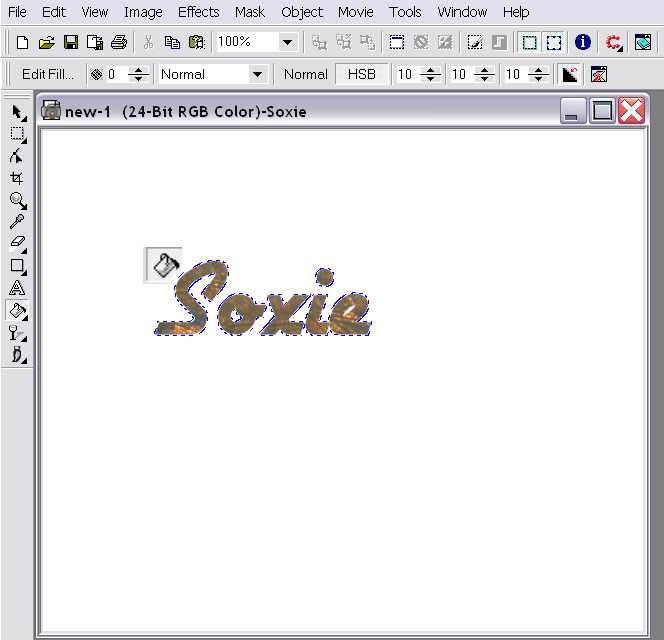
When you have selected to use the Fill tool, the little paint bucket becomes your mouse cursor. Notice the "paint" spilling over the edge of the bucket. The tip of that paint has to be on the object. I have flooded the entire background on some graphics I've done because I did not have the tip of the paint exactly on the object I wanted to fill. With text like this, though, it is easy enough to fill without flooding the background. (If you do flood the background, you can either do the keystroke command Ctrl-Z, or go up to the Edit menu at the top and select Undo.)
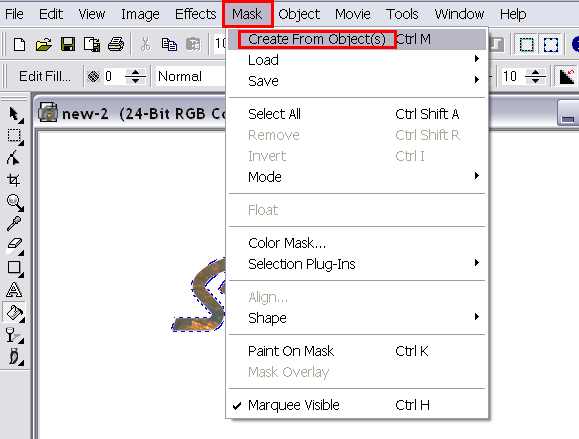
If you want to give the text a 3D look, go up to Mask, and then select Create From Object. Then you go over to Effects and select 3D Effects, and then The Boss.

When you have selected The Boss, a dialog box appears.

The relevant settings are outlined. Since I use the Mesa style all the time, Last Used shows in the Style field. Width, Smoothness, and Height are the dominant features of this process. Using the settings that I last used, I Preview the text:
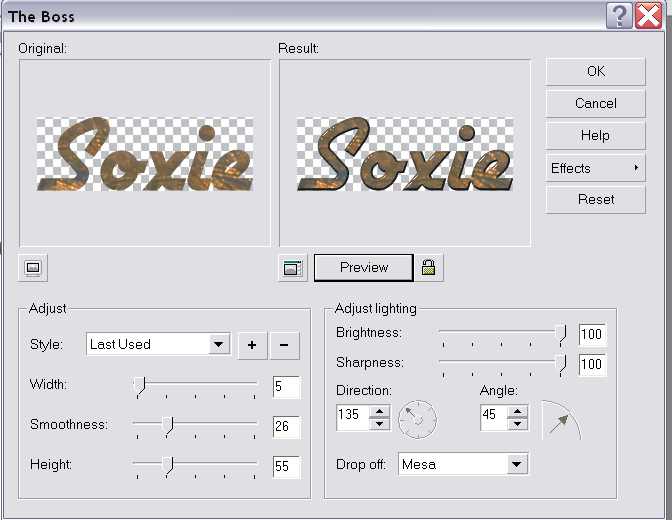
There is some change noticeable, but not as much as I would like. I change the variables for Width, Smoothness, and Height
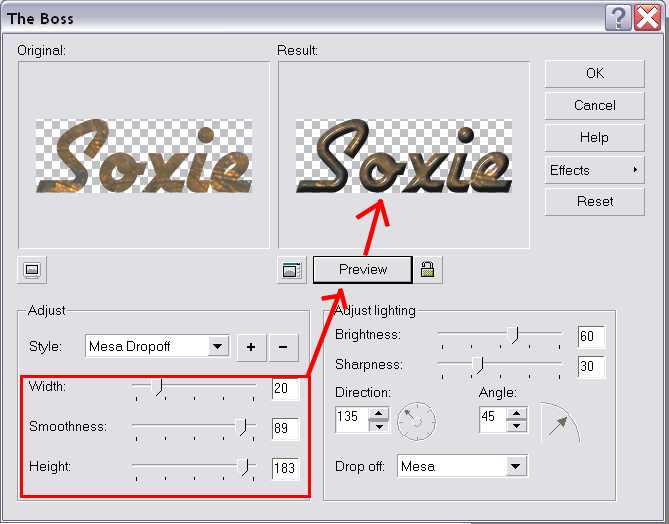
Adjusting the settings made a drastic difference. The result is sufficient and I click OK.
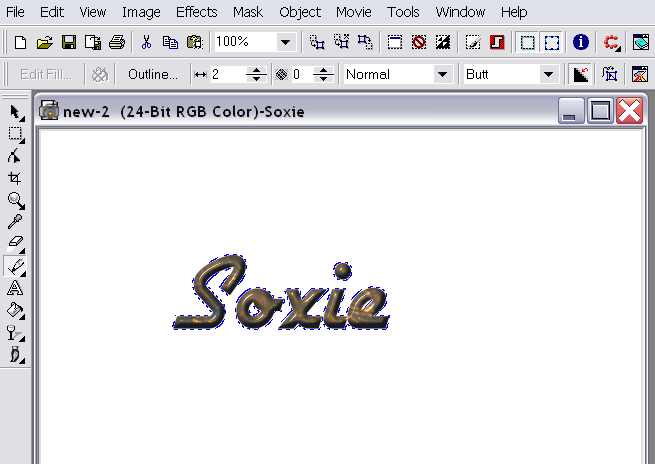
The next step is to crop the image. This is achieved the same way as in the other tutorial. Select the Rectangular Mask icon and select a point to the upper left hand corner of the text... click and hold down the mouse button and drag to the right and down to encase the text.

Click on the Crop icon and complete the function.


To reduce the size of the image, you would go to Image then Resample as before in the other tutorial. I'm going to leave as is, though.
To make this a GIF image where the white background is not visible (transparent), the image has to be converted from 24 bit to 8 bit paletted. Go to Image - Convert To - Paletted (8 bit)
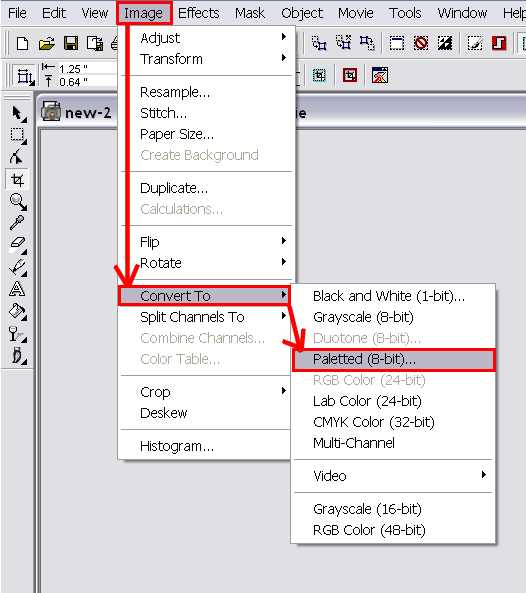
(The grayed out RGB Color (24 bit) indicates that the image is in that format.)
When you select to convert to the 8 bit format, you will get this dialog box:
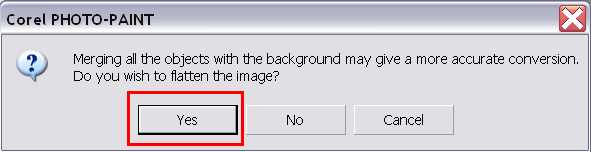
Click Yes.
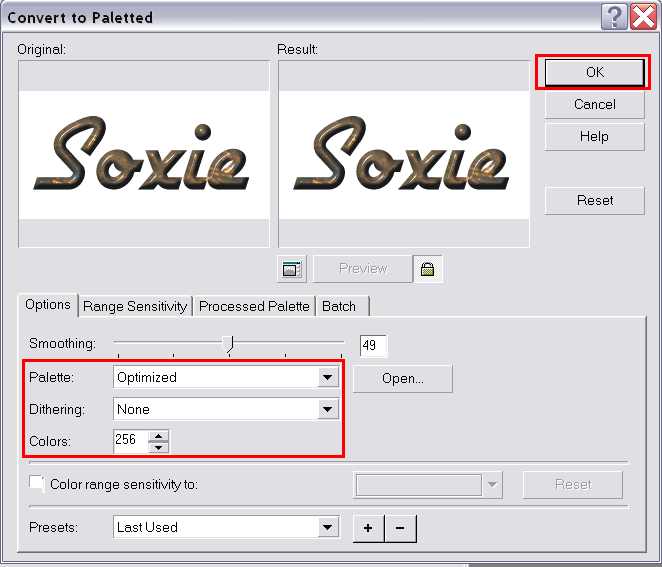
The default settings may not be as shown above. Its been so long since I downloaded the program, I can not recall if I had to change these settings... but seems like I did. If yours does not look like this, then you need to change them so that they do. Click Ok.
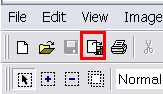
To save the image as a GIF image, click on the Copy As icon next to the Floppy disk icon at the top (just like in the other tutorial).
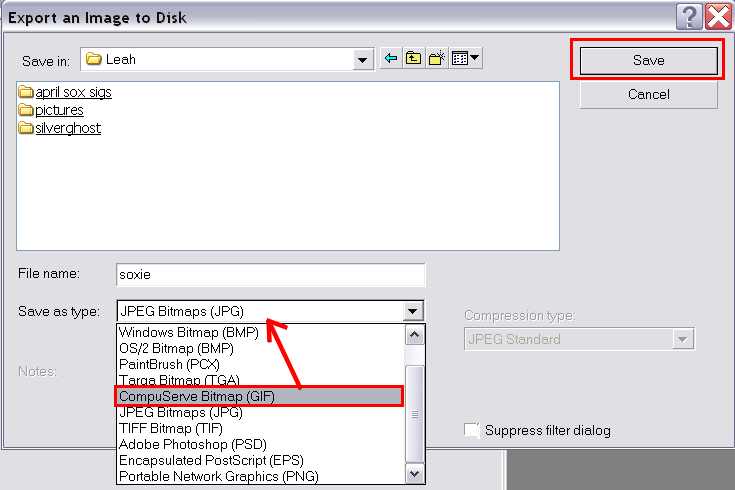
Select CompuServe Bitmap (GIF). Name your graphic and click Save.
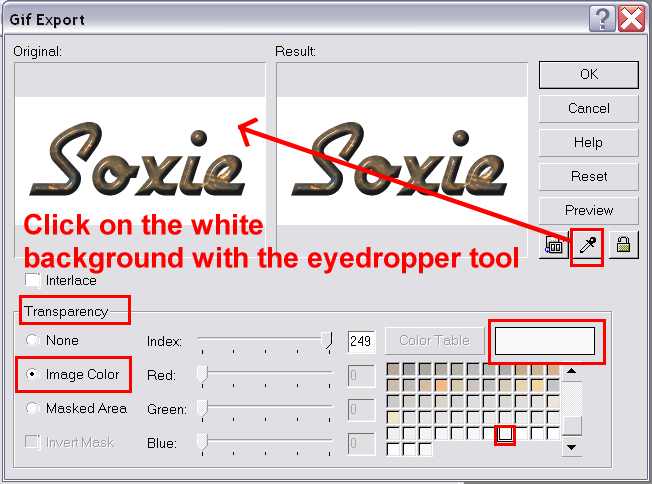
The GIF Export dialog box appears. You want the background to be transparent, so you select Image Color. Then you click on the eyedropper tool and click on the white background of the Original image side.
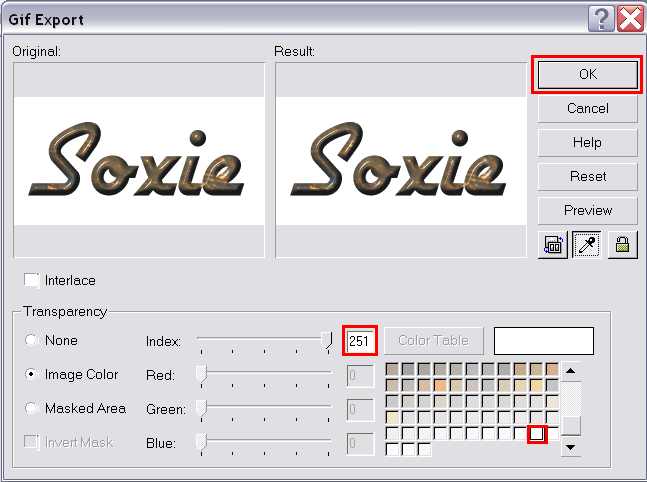
Notice the changes. The index color changed from 249 to 251 and the highlighted color on the palette moved over two spaces to the right. Click Save.
The image as it would appear on a white background;