
Instructions for Using "Pictures"
When you click on the Pictures link, the page changes to where members of this community has created “albums” in which they place the images that they want to share with the rest of the community.
Under the Pictures title there is a very small linking button that says, “Create a new album.”
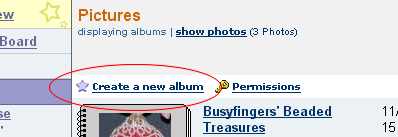
Click on that.
After clicking the "Create a new album,” you will go to another page.
Here, you will:
1. “Name your album”
and
2. Set the album permissions... Where there are 3 choices as to how you restrict other people useage or viewing of your particular album.

Click on “Create Album”
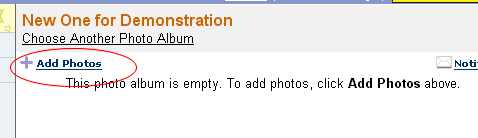
(I created an album called "New One for Demonstration.")
Click on “Add Photos”
This will take you to “Install the MSN Photo Upload Control” page. You may have to install this every once in while; especially after you clean out your Temporary Internet Folder.
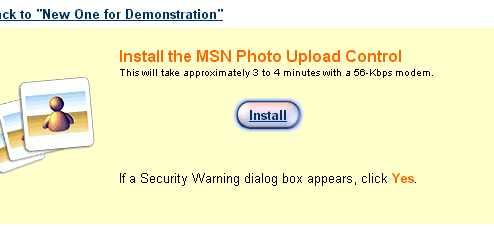
Click the “Install” button.
The next page is where you will find a grey table that is divided into 2 sections.
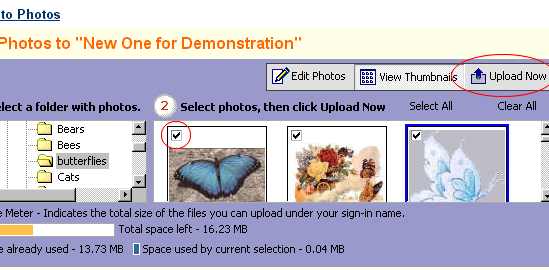
At the top of the table, there are 3 buttons:
“Edit Photos”, “View Thumbnails”, “Upload Now”
By default, the “Thumbnail” button is already highlighted. Do not change it.
On the left side of the table (#1), you will find the “Tree”. That is, how your computer is divided up into relevant sections. This is where you locate the images that you want to upload.
Locate the image(s) that you want to upload. When you open the folder that they are in, they will appear on the righthand side (#2) of the table as thumbnail images.
When you click on the thumbnail image itself, a check mark will appear. This means you have selected this image for uploading.

When you have selected all the images that you want to upload, click the “Upload Now” button.
You will see the upload dialog box appear. It takes a few minutes for the transfer to complete but when it is done, it will automatically take you back to your album where you will see the thumbnail image(s) and the image information.
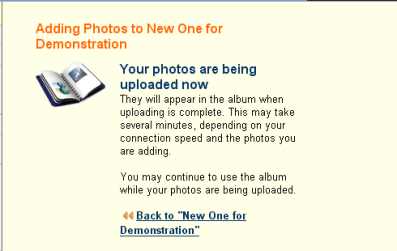
When the uploading is complete, the page will change and you will be in your photo album.
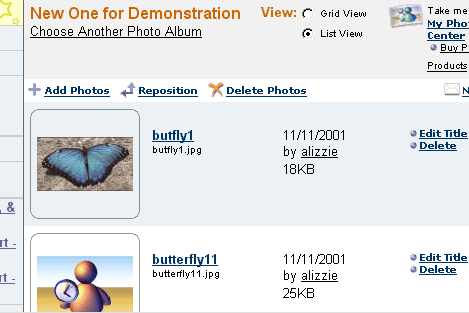
Click on the thumbnail image to see the larger image. Above the large image, you will find an “Edit the photo” option. When you click on that, it will change pages again, but here you will be able to add a description of the image or make comments.
Thumbnail images are not always generated right away.
To print out this page, hit the Ctrl key and then P on your keyboard, simultaneously. It will print out in approximately 5 pages. Please note: EVERYTHING, on the page will be printed out including the advertisements.
