
To Open An Existing Image for Cropping and Saving
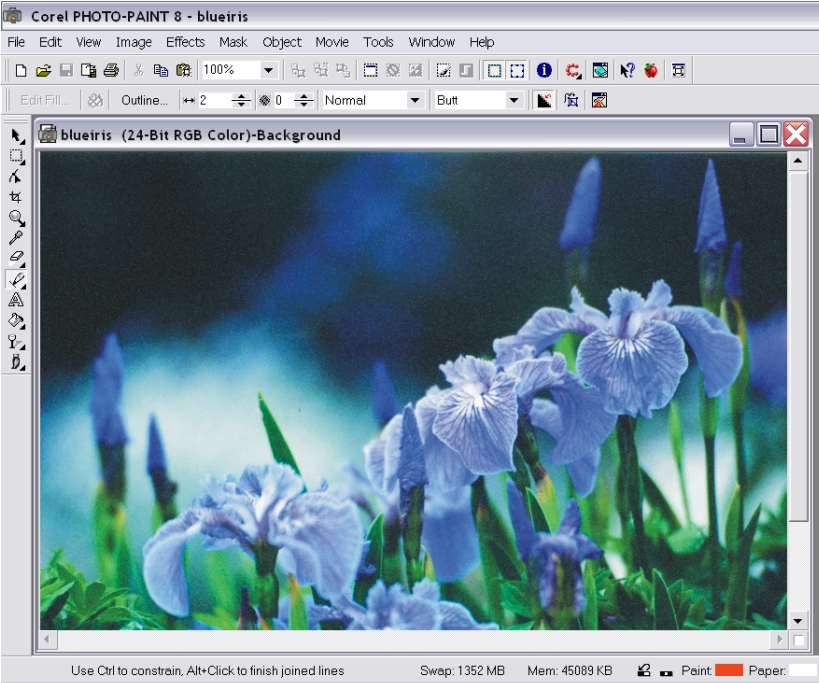
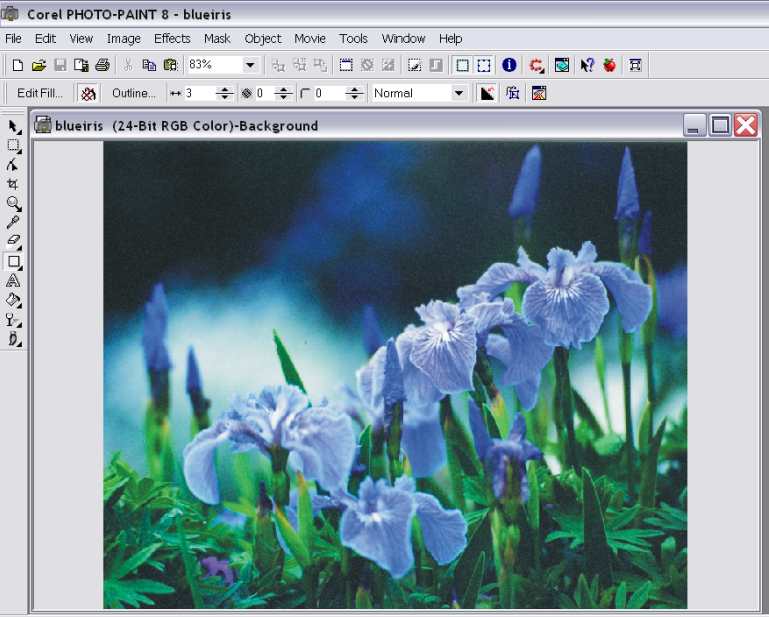
The opened Corel Photo-Paint 8 Workspace
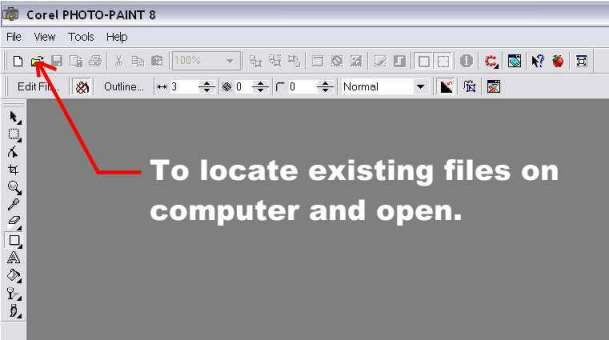
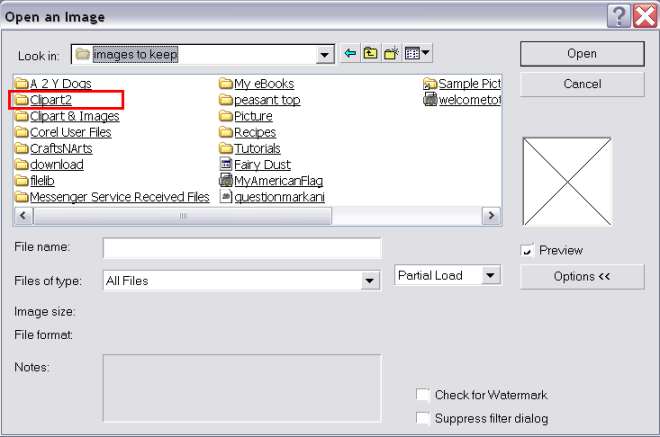
To locate an image for manipulation click on the shortcut icon that looks like a yellow file folder.
(For demonstration purposes, I use my computer, of course. I keep all my images in my D:\ drive.)
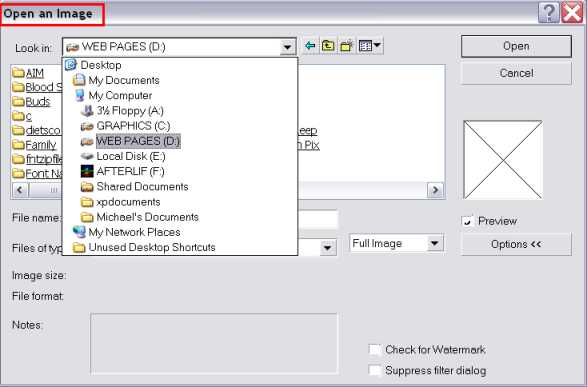
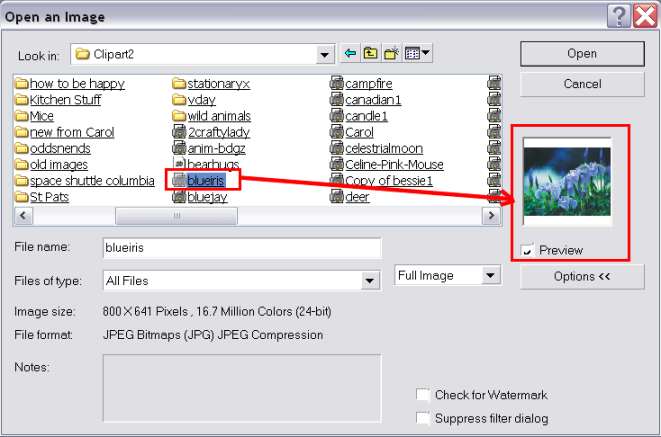
When you locate the image you want to work with, a preview of the image is shown as above.
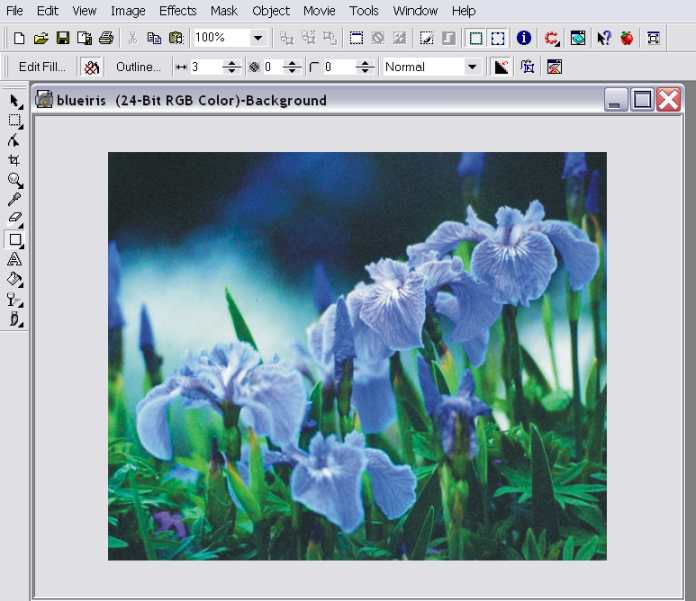
Here, I have chosen the file "blueiris" to work on.
As you can see, the image is quite large and has a great deal of background at the top of the image. I want to crop the excess background away from the flowers.
To get a full view of the entire image, I select "To Fit".
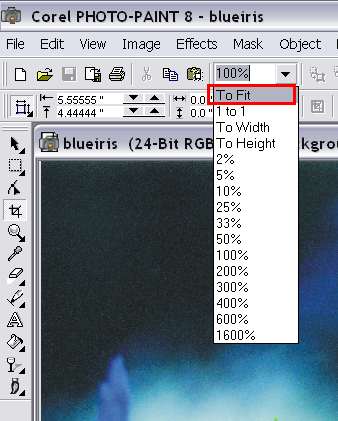
To fit the entire image onto the workspace screen, the program reduces the image's size to 83%.
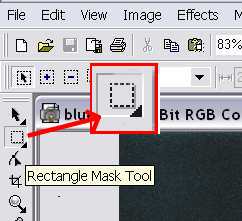
To crop the excess background from the image, the Rectangle Mask Tool is selected.
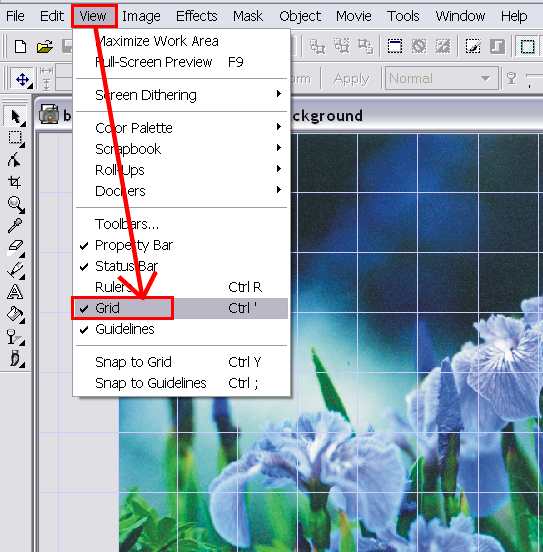
On an image such as this, sometimes it helps to have a grid to go by to gauge where the mask needs to begin.
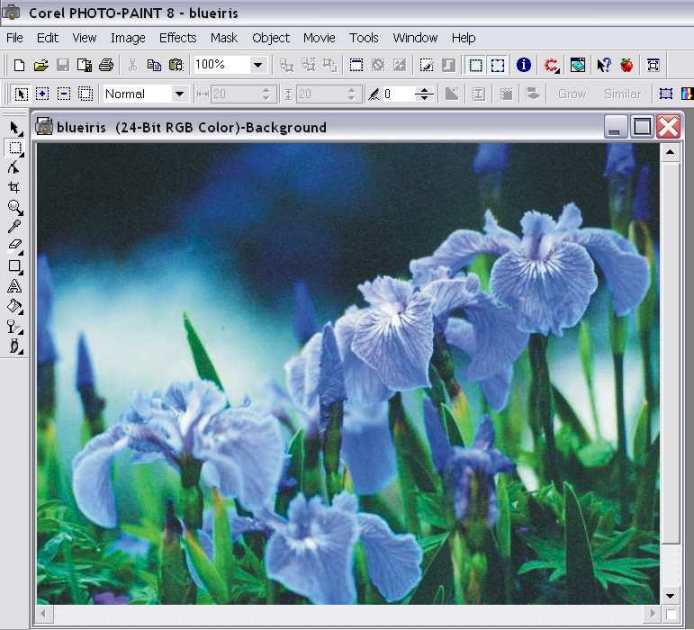
The rectangle mask is drawn around the portion of the image that I want visible. To draw the mask, you click on an area that would be the upper left hand corner of the cropped image. While holding down the mouse button, you click and drag to the right and down. After the mask is drawn, select the Deskew Crop Tool on the left and then the green outlined crop icon above the image.

The excess is cut away.

The image is still 83% of the cropped image and should be changed back to 100% to get the full size of the image.
The image is still quite large and I want to reduce the size of the image.
To accomplish this, I go to Images and then Resample.
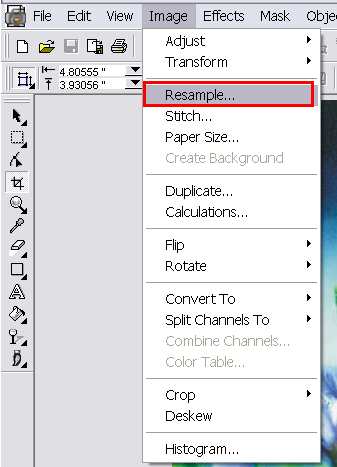
The Resample dialog box appears.

Notice the size of the cropped image. It is 9.6 inches wide and 7.9 inches high. (The dropdown menu where the inches is includes several aspects of measurement. But for now, we will just concentrate on the percentages more that the type of measurement.)
It takes a little practice to get the feel of working with the percentage aspect of an image. Generally, I start with 90% and then continue to reduce as needed. Sometimes its obvious that a 10% reduction is not going to be enough and then I will begin with 75 or 80%.

You only need to change one of the numbers. The Maintain aspect ratio function will automatically the other number to match the requirement. When you click the OK button, the width and height in inches numbers will change.
The resampled image.
To view information about the image document, select the blue circle with the "i" on the far right hand side of the upper tool bar.
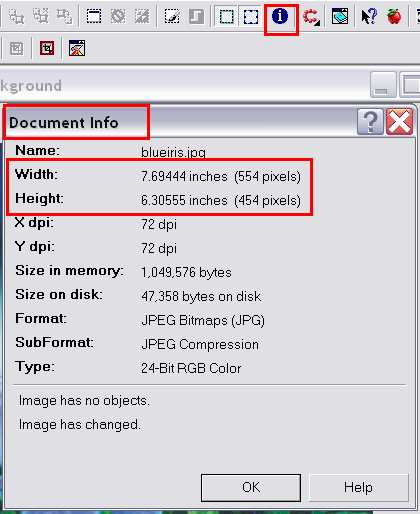
Here you can see what the image's size is in inches as well as pixels. The Size on disk: number 47,358 bytes on disk translates into approximately 47.4 (rounded off) kbs (kilobytes). Click OK to exit the Document Info dialog box.
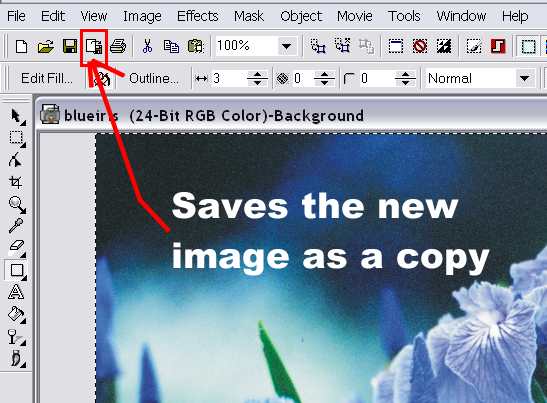
Now the image is reduced in physical size as well as file size and is ready to save. Most of the time, I like to save the original image as is, and opt instead to save the worked on image as a Copy of. To save the worked on image as a copy, the Save as copy icon is selected.
If you would rather not keep the original and just replace it with the worked on image, you would select the Floppy disk icon to the immediate left of the Save as copy icon.
I've chosen to put the image in a folder named "Flowers".
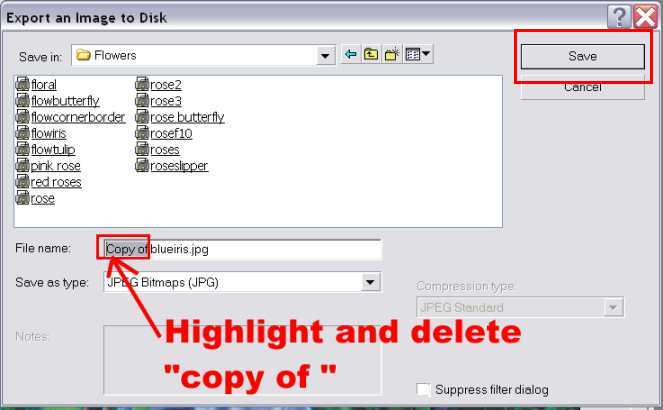
I highlight and delete the "Copy of" to just give the image the same name as the original. If I had chosen to save the image to the same location as the original, I would be prompted to "replace." Since I'm saving it to a different location, thats not an issue. (Deleting the Copy of can also be accomplished by clicking at the beginning of the Copy and just hitting the Delete button until it is all erased.)
When you click on the Save button, a Warning dialog box will appear. All its really telling you is that the rectangular mask that you drew around the image will not be saved as part of the new image itself. Click OK.

In the image below, the major components are outlined in red.
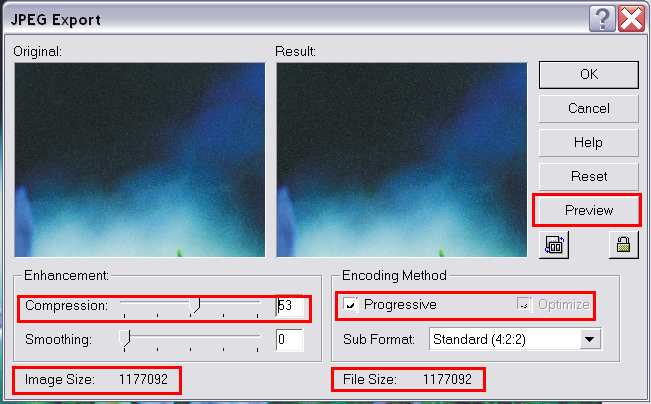
Compression should be set around 50. Smoothing at 0. Notice the file size before compression. Both the Optimize and Progressive boxes should be checked. However, to check the Optimize box, the Progressive box needs to be unchecked. The Preview button will be explained in the next image.
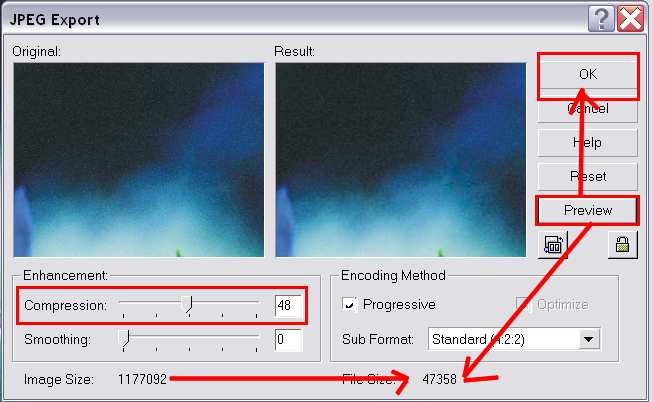
I changed the Compression to 48. Notice the Image Size and the File Size. If you just clicked on the OK as in the previous image, the program would compress the image anyway, but by clicking on the Preview button, you get to see what the resulting compression would be before you click OK to save it.
