
Angelfire Web Shell Tutorial
The following is a very basic lesson in working within the Angelfire Web Shell editor.
I recommend creating a folder in your �Favorites,� name it Angelfire, and saving the URL address of the Angelfire/Lycos page shown below to it.
http://angelfire.lycos.com/index.shtml
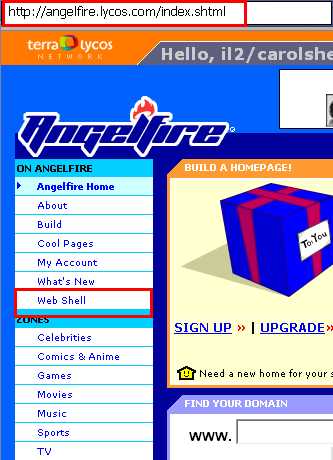
OR� Click on the Web Shell link on the Angelfire navigation bar and save it. Whatever your preference is.
Here is what the Web Shell Sign In looks likes.

Your member name is whatever your page�s main identification is; here, I�m signing in as on3/stormyday58. Once you have entered in your member name all you have to do is click on the member name field and a drop down list will appear and you select your member name from there.
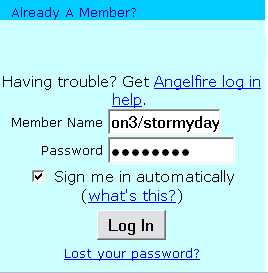
Type in your password, check the �Sign me in automatically� box. When you click on the Log In button, you will get a pop up like this:
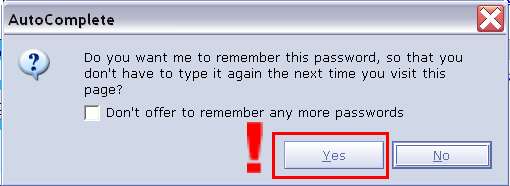
I DO NOT recommend checking the �Don�t offer to remember any more passwords� box.
This feature saves time. By all means, click Yes!

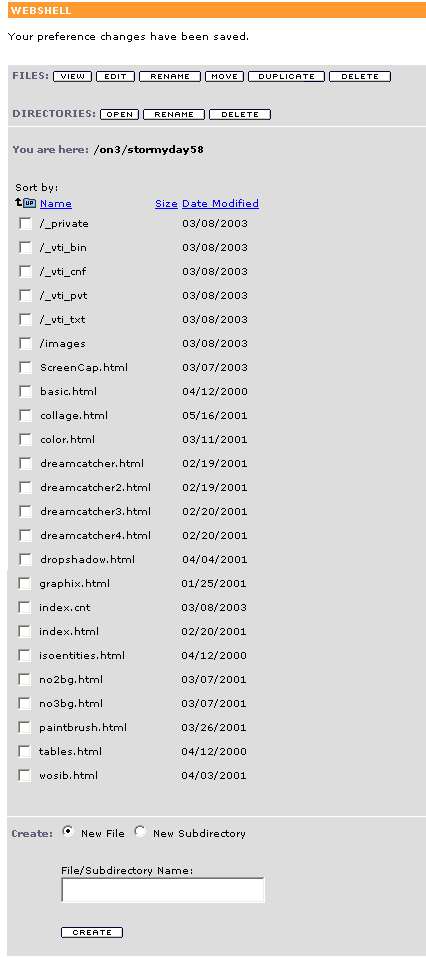
This is the web shell.
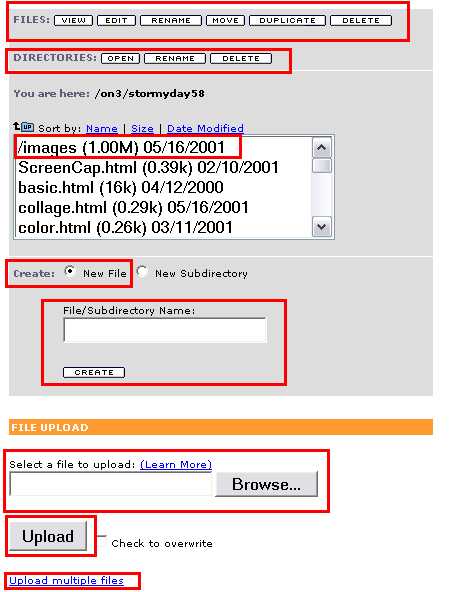
This is the portion of the web shell editor that you will use the most.
The URL of the main page of your website will always end with index.html
Look at each section that is outlined in red and familiarize yourself with them. Each button and field has a very distinct function.
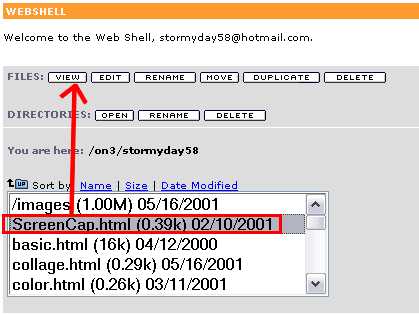
For this tutorial, I will show the functions of the �View,� �Edit,� and �Delete� functions for managing the file components of the web site. I will only show the �Open� function for the Directory component.
I�ve selected a page of my web site to view and will click on �View.�
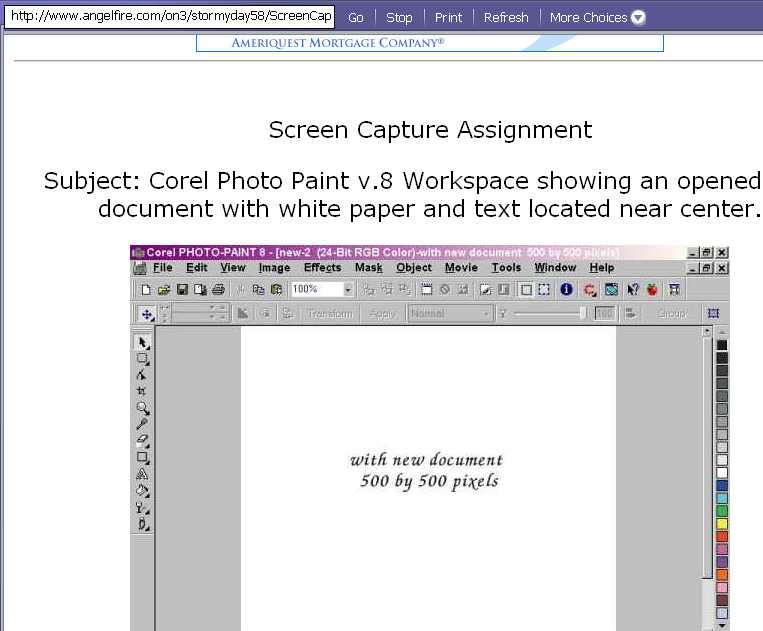
This shows the image that is on the page. It was a �screen capture� assignment for the Creator�s Garden of WOSIB (Women of Strength and Inner Beauty) webring that I once belonged to.
To go back to the web shell editor page, click the Back arrow.
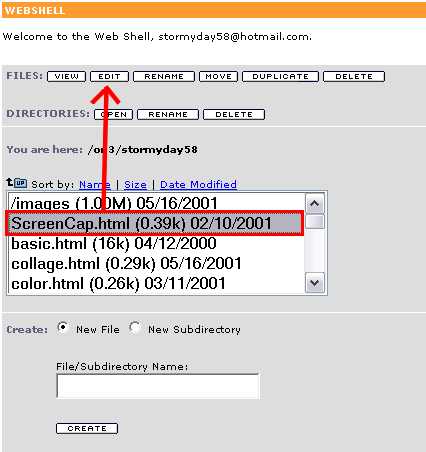
To make changes to a web page, you click on the �Edit� button.
This is the �guts� of the web page� and is where all the codes are for creating the page�s look and contents. I have pointed out the <html> and <body> and their corresponding elements </html> and </body>.
For nearly every element of the page, there are beginning and ending parameters (some of the exceptions to this rule is the <hr> and the <br>). <html> and <body>(and their ending elements) are absolutes� they must be in codes in the positions indicated. This is called �nesting.�

Below, I have outlined the body contents of the page shown above.

I�ve separated the 3 main sections of the page and outlined them.
The first set of codes is the title of the page, the second, the text portion; and third, the image of the screen capture.
Notice the <p> and the </p> nests. There is a nest missing on this page� it�s the </font> that should have gone before the </p> in the text section of the page. If I added more text to the page, say below the image, it would be formatted as the rest of the text is. The text formatting won�t stop until I�ve added the </font>.
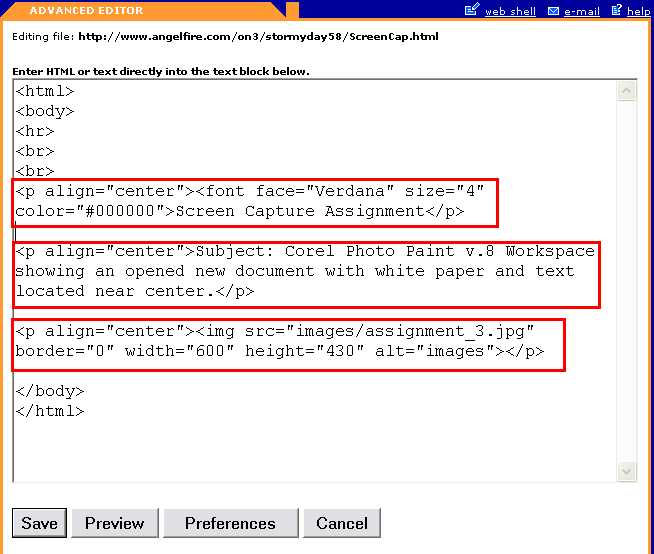
The <p align=�center�> tag centers everything within its parameters on the page. The parameters for the <p> can only be one of three options: left, center, right. The <img src=� �> tag adds the image that is uploaded into the images directory. To keep from having a blue outline around the image, the border is set for �0� (zero). Width and height dimensions helps the server to load the images faster by setting the images parameters� as does the alt=�images.�
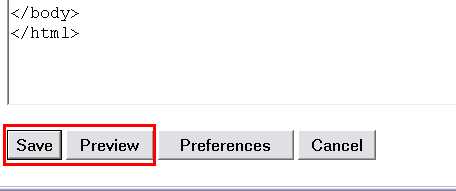
You can preview the page before saving it.
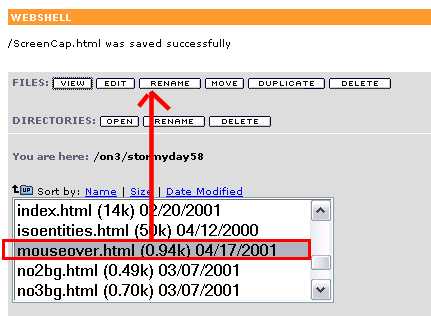
Below, I have highlighted a page for an assignment that I didn�t accomplish. I�ve selected that page to demonstrate the Rename function. You may rename pages. Highlight the file and click the Rename button.
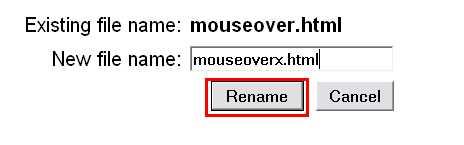
When you click the Rename button, it changes to another page as shown below.

I�ve changed the name of the file to �mouseoverx.html.�
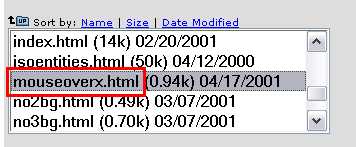
When I clicked the Rename button, it changes back to the web shell editor page. The new file name is on the list of html files.
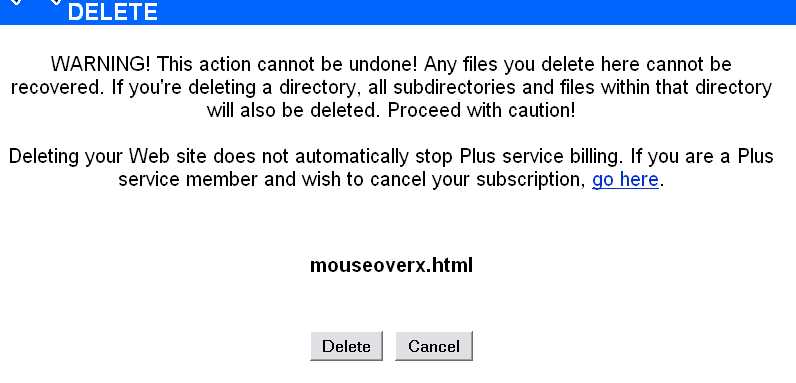
Since this page was never completed, I want to delete it. I have highlighted the file and then clicked the Delete button.

As with the Rename, it changes to another page. Here, the web shell editor is warning me that if I delete the file, the action cannot be undone. I know I want to delete the file, so I click on the Delete button.
The web shell editor confirms that the file has been deleted.
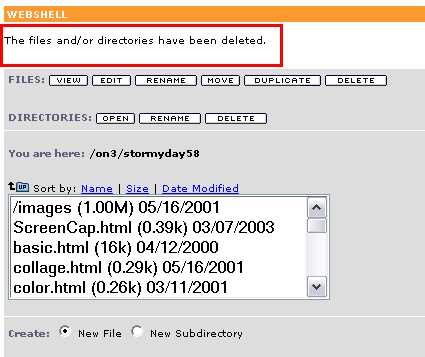
Now on to the images directory.
/images is a directory specifically for uploading your images to. The purpose of having an image directory to separate your html pages from the images. It�s a matter of keeping your files organized so that locating them is easier. Highlight /images, and click Open.
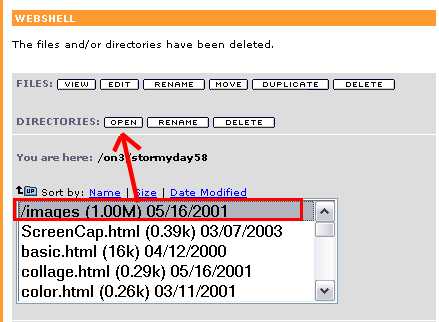
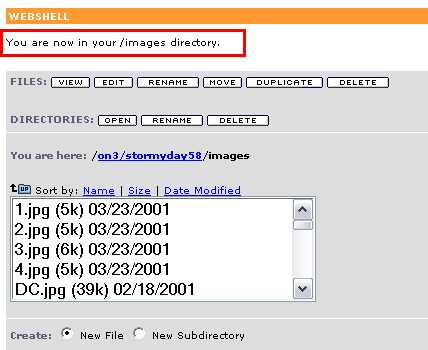
Image files have to be uploaded into the images directory. To do this you locate the files on your hard drive by clicking �Browse.�
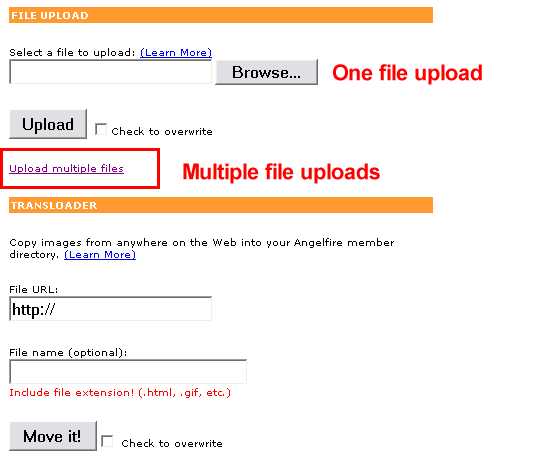
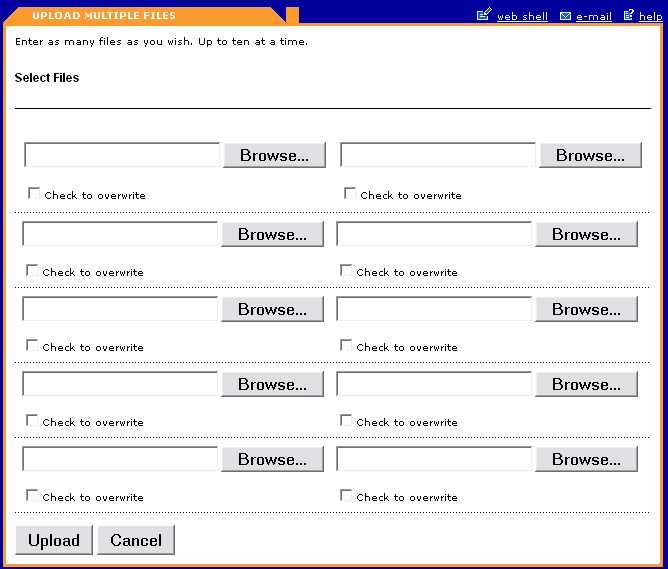
You have the ability to upload up to 10 images at a time. To do this, you click on �Upload Multiple Files� as indicated on the previous image. This is the section to do that from.
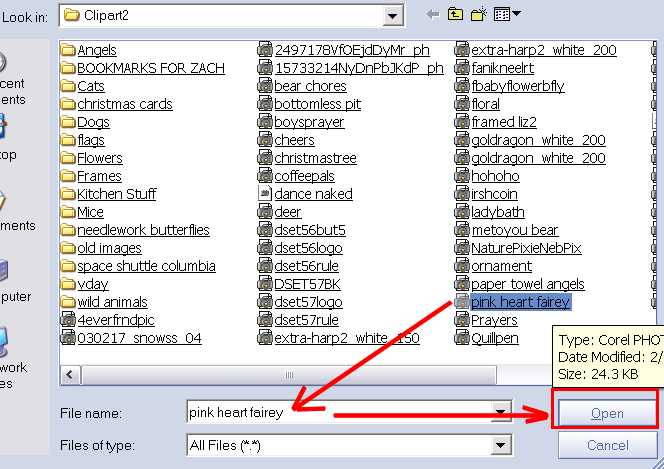
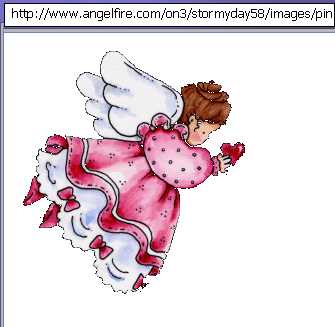
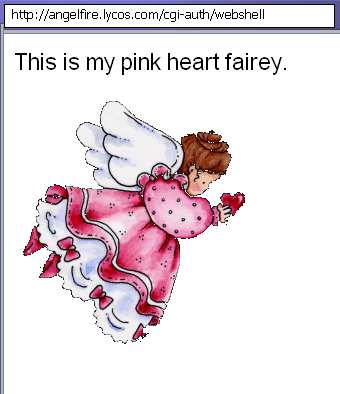
When you click on Browse, another window appears and you locate the folder the images that you want to upload are in. Here, I�m only going to upload the one image �pink heart fairey.� Click Open, but you have the option to double click the file and it will be added to the upload list.
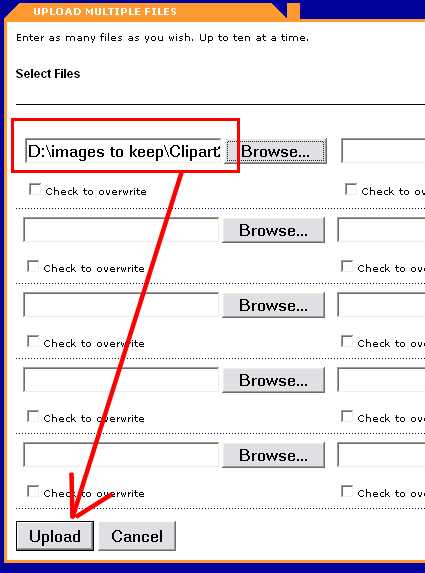
The location of the file on your hard drive is written in the field. Since the file�s location is a long pathway, only the first portion of the pathway is noticeable in the field provided for it. Once you�ve selected your file, click Upload.
The file was uploaded successfully.
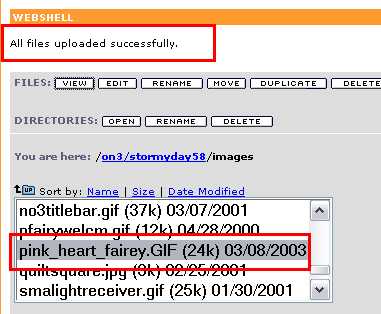
I clicked the View button to see the file that I uploaded.
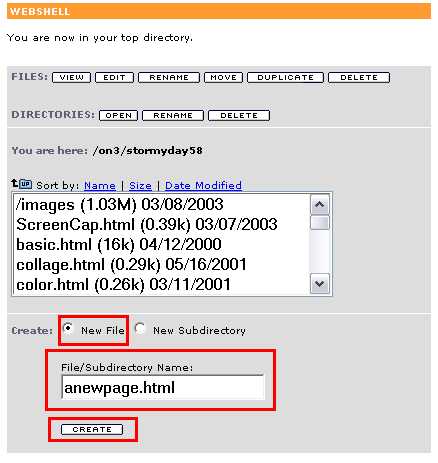
Now I want to go back to my main directory. I click on the small blue folder with the UP on it.

I am now back in my main or top directory.
Now, I want to create a new page for the site. I do this by selecting "New File" beside "Create:" and then typing in a name for the page (it is important that you realize that the .html needs to be a part of the name of the page). Then, I click the "Create" button.
Another page appears where you submit the new page.
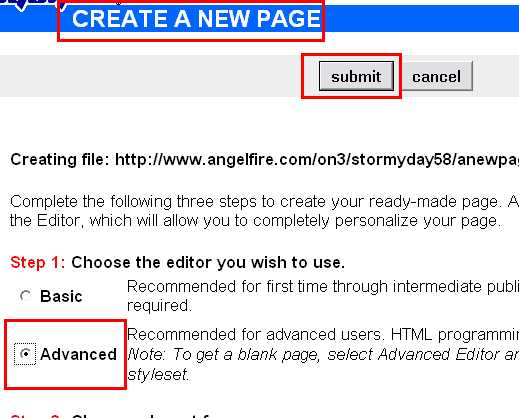
The new page is created.
![]()
Lets say I want to put the pink heart fairey on this page with a little bit of text. This is what the editor would look like:

I click on the Preview button to check the codes to make sure that they do what I intended them to do... here is what the page looks like:
All is well and I click on the Back arrow to return to the editor and save the page.
Used to, Angelfire had the account preferences on the main web shell editor page. Now they have it on the editing pages. If you click on Preferences, it will take you to this.

To change how the web shell editor looks (you would do this to accommodate your own preferences), click on "Web Shell appearance preferences."

You can change the appearance of your editor. I prefer the Expanded File Listings. It does make the page longer, but it helps you to see all the files at once.
Below is the list of basic HTML codes that�s used. I�ve highlighted the ones that you would use the most in dark red.
Basic HTML Codes
Basic Tags
<html></html>
Creates an HTML document
<head></head>
Sets off the title and other information that isn't displayed on the Web page
itself
<body></body>
Sets off the visible portion of the document
Header Tags
<title></title>
Puts the name of the document in the title bar
Body Attributes
<body bgcolor=?> Sets the background color, using name or hex value
<body text=?> Sets the text color, using name or hex value
<body link=?> Sets the color of links, using name or hex value
<body vlink=?> Sets the color of followed links, using name or hex value
<body alink=?> Sets the color of links on click
Text Tags
<pre></pre>
Creates preformatted text
<h1></h1>
Creates the largest headline
<h6></h6>
Creates the smallest headline
<b></b>
Creates bold text
<i></i>
Creates italic text
<tt></tt>
Creates teletype, or typewriter-style text
<cite></cite>
Creates a citation, usually italic
<em></em>
Emphasizes a word (with italic or bold)
<strong></strong>
Emphasizes a word (with italic or bold)
<font
size=?></font>
Sets size of font, from 1 to 7)
<font
color=?></font>
Sets font color, using name or hex value
Links
<a href="URL"></a>
Creates a hyperlink
<a href="mailto:EMAIL"></a>
Creates a mailto link
<a
name="NAME"></a>
Creates a target location within a document
<a href="#NAME"></a>
Links to that target location from elsewhere in the document
Formatting
<p></p>
Creates a new paragraph
<p
align=?>
Aligns a paragraph to the left, right, or center
<br>
Inserts a line break
<blockquote></blockquote>
indents text from both sides
<dl></dl>
Creates a definition list
<dt>
Precedes each definition term
<dd>
Precedes each definition
<ol></ol>
Creates a numbered list
<li></li>
Precedes each list item, and adds a number
<ul></ul>
Creates a bulleted list
<div
align=?>
A generic tag used to format large blocks of HTML, also used for stylesheets
Graphical Elements
<img src="name">
Adds an image
<img src="name"
align=?>
Aligns an image: left, right, center; bottom, top, middle
<img src="name"
border=?>
Sets size of border around an image
<hr>
Inserts a horizontal rule
<hr size=?>
Sets size (height) of rule
<hr width=?>
Sets width of rule, in percentage or absolute value
<hr noshade>
Creates a rule without a shadow
Tables
<table></table>
Creates a table
<tr></tr>
Sets off each row in a table
<td></td>
Sets off each cell in a row
<th></th>
Sets off the table header (a normal cell with bold, centered text)
Table Attributes
<table
border=#>
Sets width of border around table cells
<table
cellspacing=#>
Sets amount of space between table cells
<table
cellpadding=#>
Sets amount of space between a cell's border and its contents
<table
width=# or %>
Sets width of table - in pixels or as a percentage of document width
<tr align=?>
or <td align=?>
Sets alignment for cell(s) (left, center, or right)
<tr valign=?>
or <td valign=?>
Sets vertical alignment for cell(s) (top, middle, or bottom)
<td colspan=#>
Sets number of columns a cell should span
<td rowspan=#>
Sets number of rows a cell should span (default=1)
<td
nowrap>
Prevents the lines within a cell from being broken to fit
