HOW TO ADD A GLITTER BORDER
*I am using Paint Shop Pro 9 and Ulead Gif Animator 5 for this tutorial*
1. Open the image you want to add a border to.
2. Copy ALL items. You can do this by going to EDIT -> COPY MERGED. Or simply press Ctrl+Shift+C.
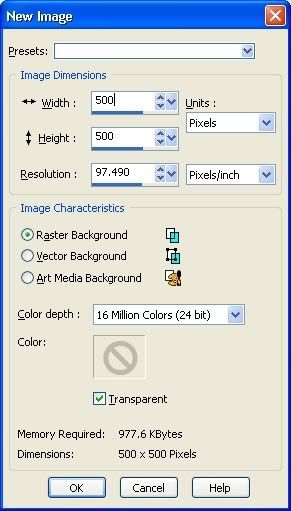
3. Open a NEW transparent document of any size, just make sure its big enough to allow room around your image. I usually just keep my settings at 500 x 500 and its plenty.
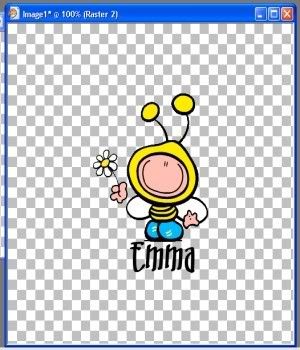
4. Paste as a new layer. You can either press Crtl+L or go to EDIT -> PASTE -> AS NEW LAYER. Your image will look like this:
5. Select ALL. Either press Ctrl+A or go to SELECTIONS->SELECT ALL. You will now have a dotted border around the edges of the entire picture.
6. Now you need to FLOAT the select. You can press Ctrl+F or go to SELECTIONS->FLOAT. Your dotted line will now be around the graphic only.
7. Now you need to DEFLOAT it. You can press Ctrl+Shift+F or go back to SELECTIONS->DEFLOAT. Nothing will change on the graphic.
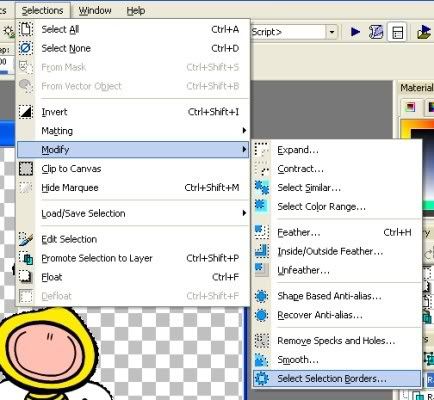
8. Go to SELECTIONS->MODIFY->SELECT SELECTION BORDERS
9. A pop up window will open, you need to set your border. You will have to play with the value to get it to your liking. Make sure you have Anti-Alias checked and the OUTSIDE radio button selected.
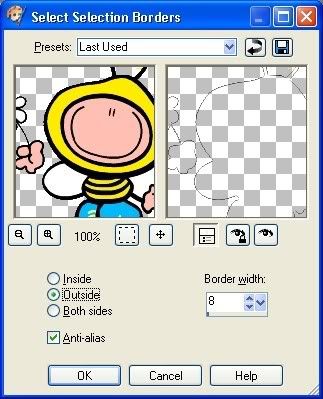
10. Click ok. If the border isn't to your liking click UNDO and try again until you are happy with the result. Your graphic will now look like this:
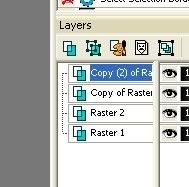
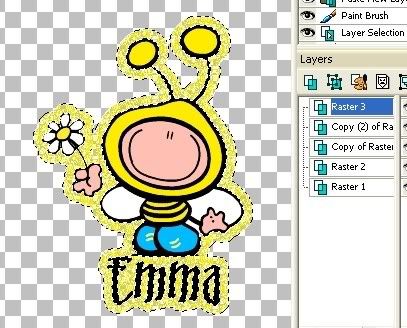
11. Now you will need to go to the Layer Manager and select duplicate. Duplicate it as many as times as you need/want to. Your layer manager will now look like this:
12. Now you can choose the Flood Fill tool or the paint brush tool. I personally use the paint brush as its tons faster and more accurate in filling the areas needed.
13. Fill the area for each layer, being sure to select each layer each time.
This is what it will look like with a solid fill color
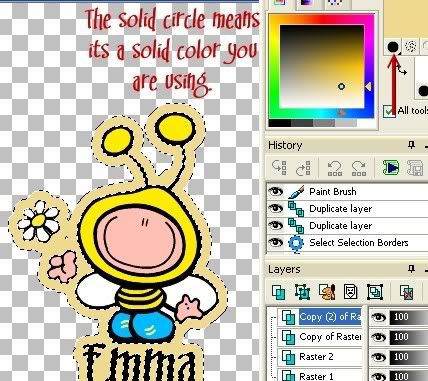
14. To use a glitter fill select the checkered circle and a popup screen will appear.
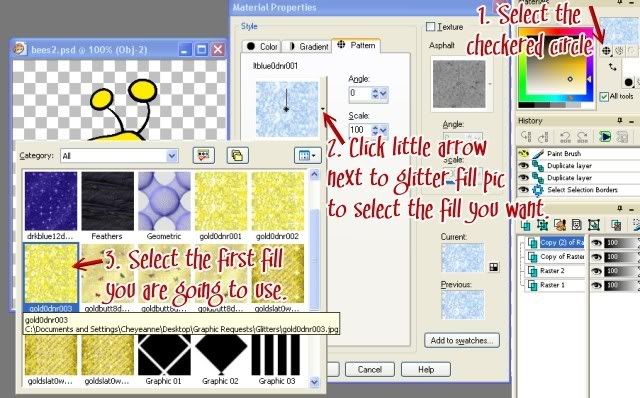
Repeat the fill steps for each layer, being sure to select the different layers as you go!
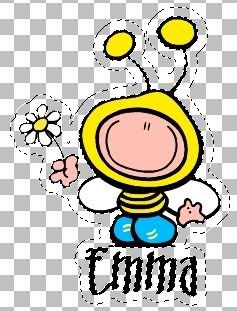
15. When all layers have been filled you image will look like this:
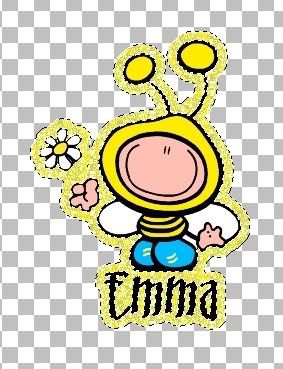
NOTE: Notice some of the finer details are no longer visible. IE- the stem of the flower. To bring them back simply press ctrl+L again to add the new layer or go to EDIT->PASTE->AS NEW LAYER. Then be sure to drag that layer to the top of the layer manager. You graphic will now look like this:
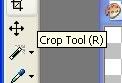
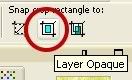
16. Now to crop it! Select one of your layers that has the border and then check the CROP tool

17. Click the crop with Layer Opaque option, you will now have a selection around your graphic.
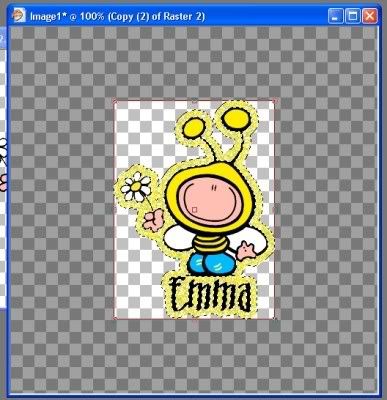
18. Double click in the area that is selected.
19. Go to FILE=>SAVE AS, change the TYPE to .PSD and close.
20. Now follow the tutorial for using the gif animator to animate your image. Just be sure to keep the layers raster image on top for each and every frame so that your details will be visible.
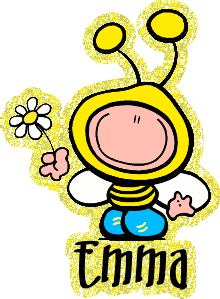
This is what your finished project should look like:
Created: 05/22/2008
Email
Home

