


Preparation for Netting. - Take a piece of fine string or strong cotton, and knot it to make a stirrup, to go over one foot, and come up to a convenient distance from the eyes. Or a shorter one may be pinned to the knee, or to a lead cushion. Having filled the needle, fasten the end of the thread in a slip-knot on the stirrup, and you are ready to begin.
No. 1. Plain Netting. - Pass the thread thus joined to the stirrup over the fore, second, and third fingers of the left hand, the forefinger being close to the knot, and the mesh held under the thread, and straight along the finger. Pass the thread under these fingers, and catch it up with the thumb. Leave it to hang over the hand in a loop, pass the needle up through the loop over the fingers, under the mesh, and under the foundation thread or the stitch to be worked. Draw the needle through; in doing which you form a loop, which catch over the fourth finger of the left hand. Gradually let the thread off the three fingers, and tighten it into a knot, to form itself close to the mesh. Then gradually tighten the loop still over the fourth finger, taking care not to let it go until it is nearly drawn tight. This is the elementary stitch in netting - the only one - from which every pattern is compounded. If well done, the stitch will just be tight enough to allow the mesh to slip from it, and the knot will be quite close to the mesh. It forms a diamond.
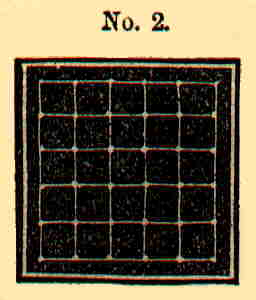
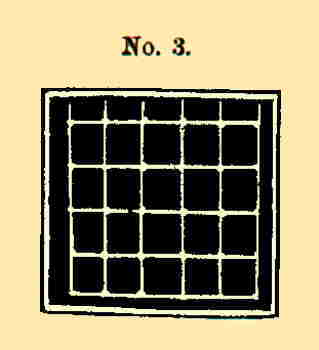
No. 2. Square Netting. - To produce a piece of netting, which shall be square, and in which the holes shall be of the same shape, begin on one stitch; in this net two. Turn, and do one stitch in the first, and two in the last. Turn again, and work a stitch on every stitch but the last; in this do two. Continue until you have, along one side, as many holes but one as you require. For instance, if in your pattern you have thirty-six, you want thirty-five only. Now do a row, stitch for stitch, without any increase. This makes the corner square. After this, net the last two stitches of every row together, until you have but one.
No. 3. Oblong Netting. - This term is applied, not to the stitch, but to the shape of the work when done, the stitches being square, as in the last. Proceed as for square netting, until you come to the plain row; after this, decrease at the end of every second row, but in the alternate ones increase, by doing two in one, until, up the straight long side, you have as many squares as your design requires, less one. Do another plain row; and then decrease at the termination of every row, until you net the two last stitches together. To prevent the possibility of mistaking one side for the other, when alternately increasing and decreasing, put a bit of colored silk on one side to mark it.
To make a piece of Netting of six, eight, or ten sides, working from the centre. - Begin with half the number of stitches that you mean to have sides - three for a hexagon, four for an octagon, and so on. Close into a round, and do two stitches in each stitch. You have now as many stitches as sides. Do two again in each one: you will thus have, alternately, a large and a small loop. Work round and round, with one stitch in every long loop, and two in every small loop, until you have the required size.
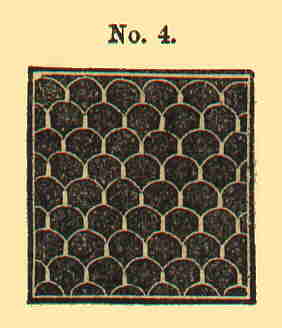
No. 4. Fancy Stitches - Round Netting. - This stitch is particularly strong, therefore especially suitable for purses, mittens, &c. From the mode of working it contracts considerably, and will require at least a fifth more stitches than plain netting with the same mesh, to make any given length. Begin as for plain netting, but draw the needle completely out from under the mesh, without inserting it in the stitch; then pass it through the loop on which you are to work, turning the needle upwards and towards you. Tighten the stitch, as in common netting.
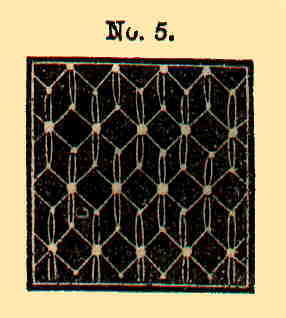
No. 5. Honeycomb Netting. - This requires four rows for a perfect pattern, and must have an even number of stitches.
1st row. - Miss the first stitch, and net, instead of it, the second; then the first; now net the fourth, and afterwards the third. Repeat to the end of the row.
2d. - Plain netting.
3d. - Net the first stitch plain, then miss one; net the next; net the missed stitch; repeat, until you come to the last stitch, which net plain. (This row, it will be observed, is exactly like the first, but with a plain stitch at the beginning and ending of the row, to throw the holes into the proper places.)
4th. - Plain netting.
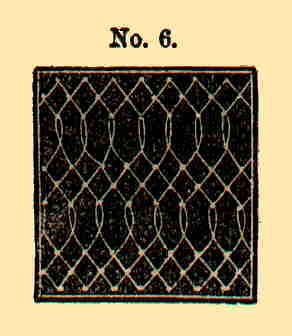
Repeat these four rows alternately.No. 6 Long Twisted Stitch. - Do a row of round netting with a fine mesh, a plain row with a mesh double the size, and then another row like the first. (Very useful for purses.)
No. 7 Grecian Netting. - For this, two meshes, one seven sizes larger than the other, are required. Thus, 6 and 13; 10 and 17; and so on. Do one plain row first with the large mesh.
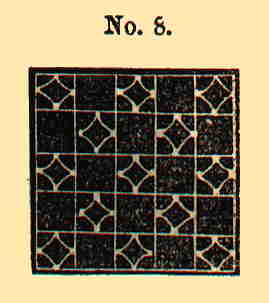
2d. - Small mesh. Draw the needle quite from under the mesh, without inserting it in the loop; then put the needle in the loop, in the usual direction, and slip it on to the second, which draw through the first. Bend the point of your needle down, to take up the first loop again which runs across it; and which you will take up by pointing your needle downwards and then towards you. Finish the stitch. There is a small loop then found at the side, which you net plainly. The alternate repetition of these two stitches forms the row. The third row is in plain netting, with the large mesh. The fourth is the same as the second; but, as in the honeycomb stitch, one plain stitch must be worked at the beginning and end of the row.No. 8. Ground net. - This requires an even number of stitches.
1st row. - One stitch, plain netting, one with the thread twice round the mesh alternately to the end.
2d. - A long stitch (that is where the thread has been put twice round the needles) a plain stitch; alternately.
3d. - Make a double stitch, and draw the needle entirely from under the mesh; insert it in the right-hand hole of the last row but one (that is, in the line of holes immediately under that last made). Catch up the first loop of the last row, and draw it through that of the previous row, and net it; this will cause the second loop of the last row to be also partly drawn through. Net this, which is a very small stitch, in the ordinary way.
Repeat these two stitches throughout. The next row is like the second; the fifth like the third, except that a plain stitch is done at the beginning and end of the row.
