THIS PAGE UNDER CONSTRUCTION

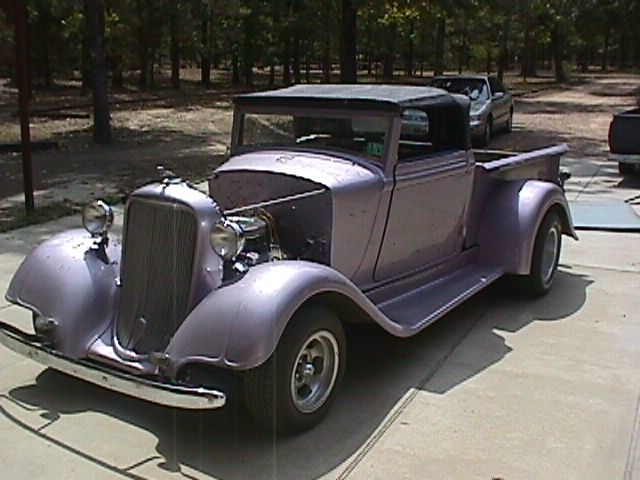

Well I had to put the Street Rod back together for room in my shop so I thought I would include the rebuild and a new Top building process.
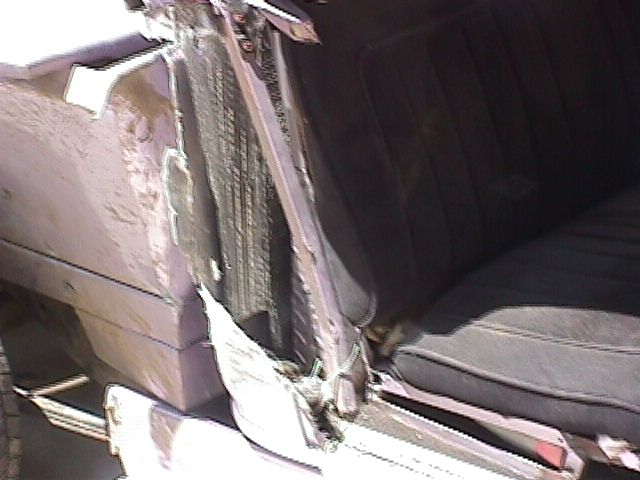
Stripping Cab Steel & Grafting the new Cab Corner on.
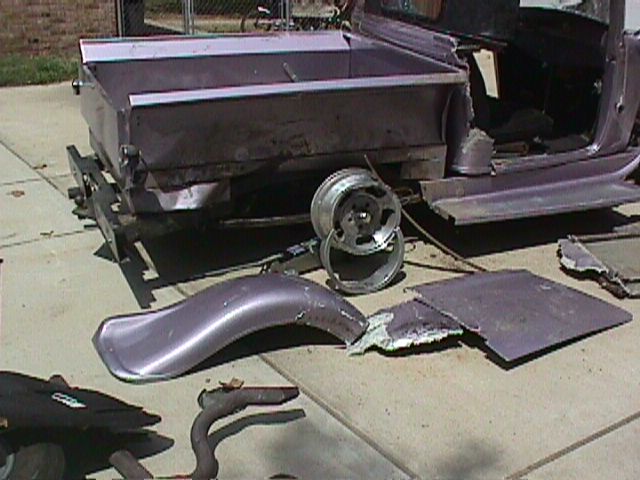
Off the frame
Evaluation
Contemplation
Work Started
Stripping out steel.
Ready to refit when measuring and cleaning is complete.
Cleaning & fitting.
New Corner I made from the origonal mold.
Corner ready to glass in place.
New Glass Body I had made from the origonal mold.
Truk1Bare Cab. Working on windshield header.
Truk2Stripping the supports from the doors.
Truk3Starting to put all parts in primer
Truk4Fenders
Truk5Grill shell (using milk jugs again for the glass work).
Truk6Welding up the header joints.
Truk7Installing the power window motors and tracks.
Truk8Building the "caps" for the body that the top is made off of.
Truk9Building the window openings. This is my buddy Roy. You have seen his 41 GMC in other parts of my site. He is a big help!
Truk10I picked up valley pan used on a roof from the hardware store. Vise to shape it. Tin Snips to cut it.
Truk11Alignment checked.
Truk12Header primed.
Truk13 Dave with BEAR FIBERGLASS left me several sheets of aluminum when he moved. I used them to form several sections of the top.
Truk14The mold release works perfect on the aluminum. I didn't even wipe it off.
Truk15I formed a flange at the top edge to make the aluminum rigid enough to lay up against in place.
Truk16Once the top is stable it can be removed for clean up.
Truk17And you can glass small areas that are hard to get to. Just a little at a time.
Truk18Put it on and off several times.
Truk19Check it from different angles.
Truk20The cab corners were made from my kids basketball, wraped with a walmart bag and stuffed in a bucket to keep it from rolling. Hey, They weren't home and never knew it.
Truk21After pieces were made they were trimmed with a die grinder to but the seams together. Blocks of wood on one side (they were walmarted too) and small blocks on the side I was working on allowing me room to glass the seams.
Once the top is complete I baby powder down,cover up good, surgical gloves, respirator on and face shield. Grind the inside and finish glassing. I will put mounts in to lock the top down when its all finished.
Truk22This is the latch set up I made for the tailgate.
Truk23It utilizes Slam Latches, Flat washers, 5/16 rods and 2 springs.
Truk24The Latches are 1 inch wide, 3/8 inch thick and 1 3/4 inches tall. Spring loaded and will not open. Only latch. The rods have to be drawn out to open the tailgate. No rattles.
Truk25 This is the custom side marker I carved into the bed stantion. I cut up some old tail light lenses, bent some thin aluminum to form a box and used side marker sockets from a 87 Grand Prix. I hot glued all the parts together except the socket and countersunk into the stantions. Looks real nice when they light up.
Truk2This is my favorite custom addition to the truck. I will retain the secrect I used to make the tail light but with 8 bulbs I WILL BE SEEN!
Working on the glass motors,tracks,fit and alignment before skinning the doors.
Note the fit of the glass at the top around the opening and the angle the glass was cut on each side at the bottom for support since the glass has no perimeter frames. I had glass tempered because of space limitations inside the doors. I also had 1 extra piece made for a spare just in case one gets broke.
Now we are making progress
I started to paint it white.
But my plans changed.
I wanted to be different as always.
Then I started to paint it blue.
But I am an extream person.
So I came up with something I have not seen yet.In the photos it looks black but this close up shows the real color!
I have not built the hood hinges or latch assembly as of yet.
Cab alignment on the frame has not been done yet so I have not had Eric put the doors on.
So after I have Eric tare it down 1 more time, ( I have already got him started) to rub it out, I will have him reassemble it with the doors. It should be finished in the next 6 weeks.
Home

