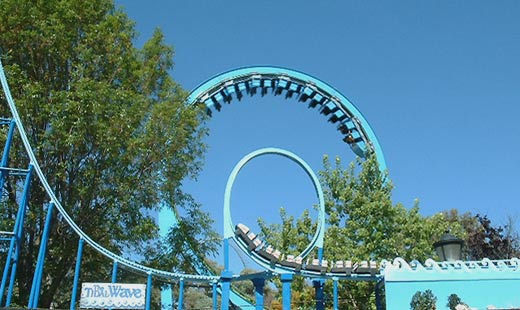
In April 2002 I was contacted by California's Great America about their upcoming 25th anniversary for the Tidal Wave shuttle coaster. Having ridden the one in Illinois more times than I could count I jumped at the chance. Launched coasters are everywhere today, and this was one of them that started the craze. While relatively short rides, you simply couldn't beat the rush of the launch, backwards loop and dead end track at both ends. A great family coaster that allowed young riders to tackle their first loop.
Over the next 2 months I dedicated my spare time to construction of a 1:160th (that's N scale for you model railroad nuts) static model of the Schwarzkopf classic. I was fortunate to attend the anniversary event which took place Monday July 8th, 2002. Having the model featured on a live TV segment was a thrill, along with getting several rides for that morning's segment. The model is on display at the park's public relations building. As for the coaster, it has since been dismantled and was used for parts on its twin at Kentucky Kingdom until that one was removed for the 2014 season. It was fitting that both Marriott Tidal Waves were "united" in the final years.
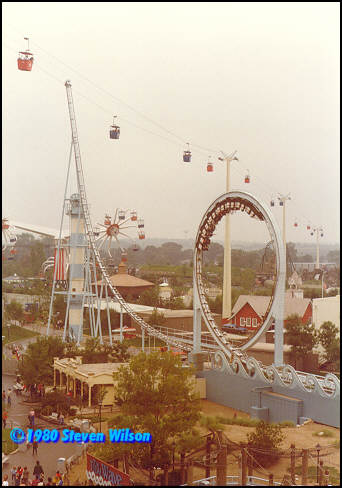
Here is the one I mentioned above in Gurnee Illinois. It went on to Six Flags in Atlanta before finishing its career in Louisville Kentucky as Greezed Lightnin. Thanks to Steven Wilson and Great America for their help with archival photos.

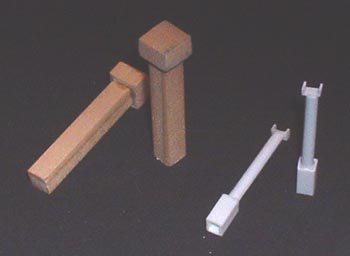
4/15/02: Early drawings and measurements accompany the board upon which the model will be constructed. The large tubing is for the tower. Whew! Can I get this done in time?

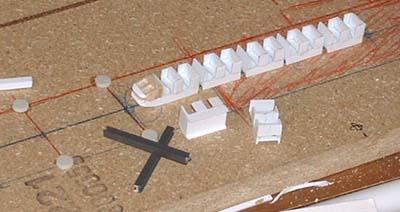
4/27/02: Parts of the train, track and foam footer (made with my hole punch idea - perfect for this scale). The main track uses taller square footers, which were made from square styrene tube.
 -
- 
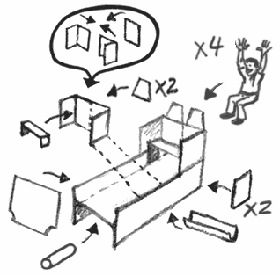
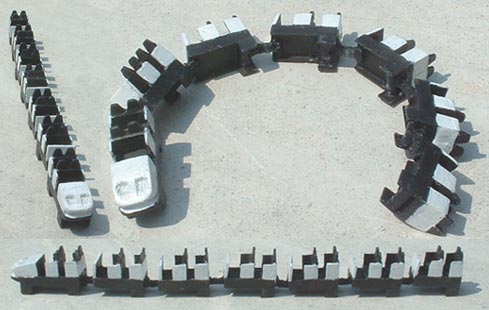
A diagram of the train assembly. Each of the 7 cars are made from no less than 22 pieces and is 3/4" long! These are all styrene pieces cut by hand, except for the horizontal I-beam used for the flooring. The seatbacks and sides had to be made out of 2 L-strips because the U channels available from Evergreen weren't wide enough. Right, the entire train awaits headrests and couplers. The lead car's nose is shaped basswood. The cars are connected by a leather cord, which is flexible, but rigid enough to allow the train to be pushed.
 -
- 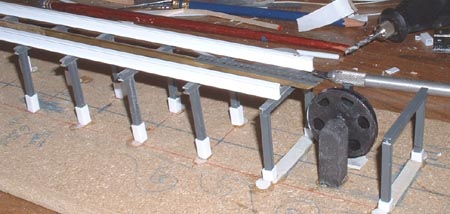
On the left, large supports for the loop out of wood, and thinner support beams which are made from sticking a styrene tube into a square beam, which gives the illusion of a footer once painted. The track spine sits in the U-shaped piece at top. These are found between the loop and spike. On the right, the launch track structure (Plastruct gray ABS I-beams) and head end pulley wheel (made from a 35mm film cannister lid and a hole-punched paper backing). The white I-beams will contain the brakes.

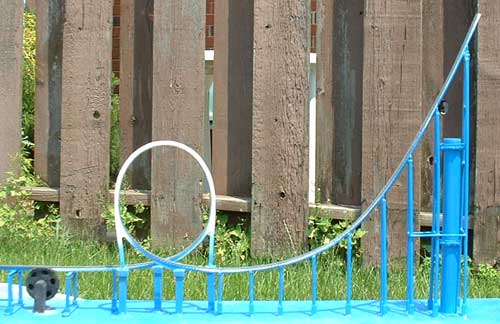
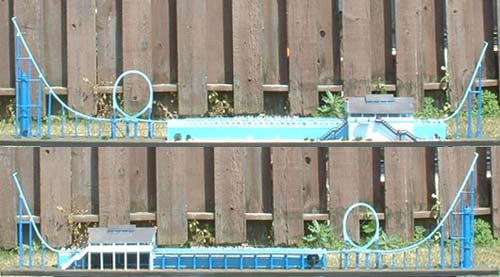
6/12/02: A profile of the entire model, along with some inspiration! At this point the launch area had been painted, but supports were still under way for both spikes. The train is coupled together but awaits paint. Once cut down, the tower will stand as tall as the loop.
The front spike, with everything except horizontal supports, bumper, and pulley wheel on the tower. As you can see, the train is just a tad large but must be to accommodate passengers correctly.
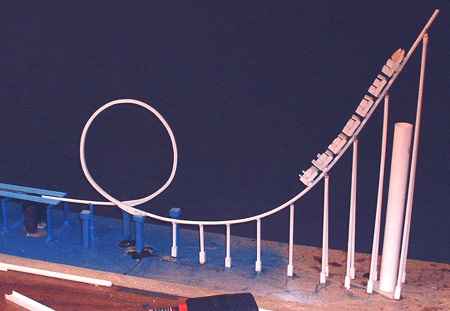
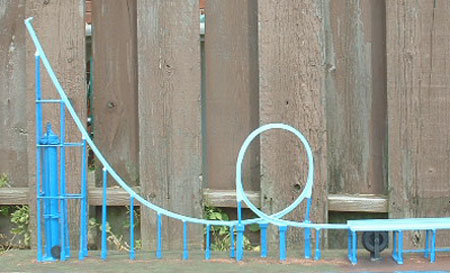
6/20/02 Two views, each from a spike. The track is complete and will be painted a light blue next. The board will soon have sand and queue theming. The loop's vertical supports are now in place, as is the pulley return channel.
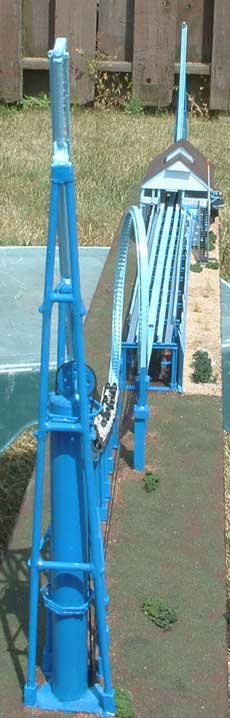
A profile of the loop and weight tower. The loop now has diagonal bracing inbetween the vertical supports and spine. I cut a V-shaped basswood piece and glued it in place for both sides. This spike needs only a couple more horizontal braces, and the tower will receive the pulley wheels and rope.
The 6" long train with headrests and running gear, but before the red stripe and nose graphics.

The loop and weight tower with final paint and detail. A close-up of the tower, and the weight pulley wheel (a solid button with holes drilled). Note the cable that runs down to the ground, then up to the catapult winch.

The station is scratchbuilt from basswood and styrene sheets. Steps, railing, queue gates and guests will follow shortly (not to mention a roof!).

Here is a sample of the waves that line the launch track on the left side. This graphic was printed out, and an xacto was used to carefully cut out the waves. Don't ask how long that took!
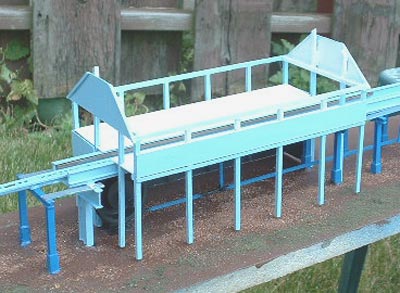
The exit side of the station. You can see the opposing catapult pulley with motor (this winds the launch mechanism up behind the train before each ride).
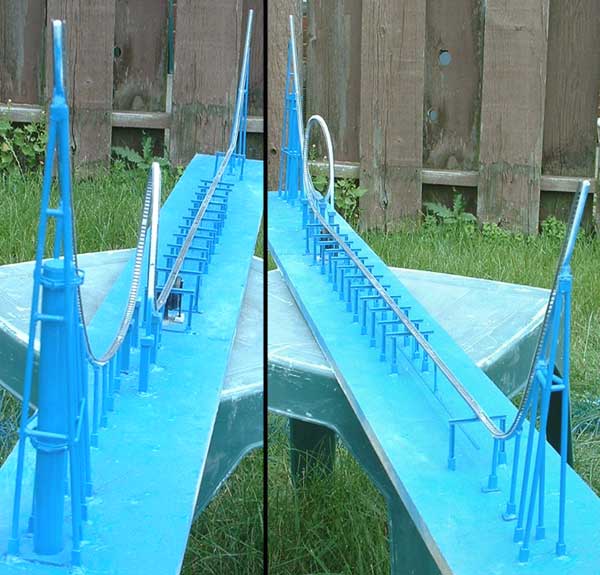
7/5/02: DONE! Here are profile views of each side

The newly installed waves, "sand", shrubs and finished station.

The station features a removable roof, so interior detail can be viewed. I added queue gates (upside down staples), operator's booth, article box and waiting passengers.

Back spike and exit path.

Side view of station. Details include printed guiderail graphics and ride signs inside, warning flag, boat, and hand made stairways. The ride entrance would meet these stairs at the opening (where the person is in the middle of the stairs), and then continue up to the platform. The section that comes up from the right was a shortcut from the exit. I wanted to add a separate board here and finished the queue and entrance theming, but accurate boats that size were impossible to find, so I abandoned that section.
Another look at the front spike, this time with the train approaching.
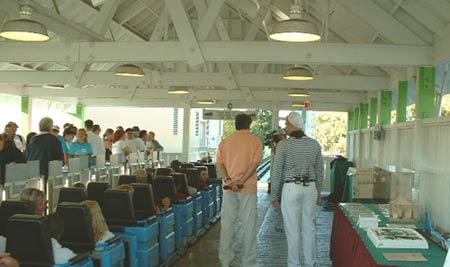
6/8/02: The following photos are from the event.

Hmm, seems like I'm the only one that showed up! Actually, these were taken during a test run. The TV crew interviewed us & did several takes live from the ride!
Kind of a neat perspective.....The sign was made from a printout of the original, and glued to two wood posts. Since I didn't have room for the entrance, I put this on the left to balance out the elements on the board.

I apologize for the low light, but you can kind of see the items on display, which included a nice wooden model by Great American Thrills website (defunct), which was planned to operate. Also the cool Schwarzkopf shuttle prototype blueprint, which the park displayed. A sharp eye will note that it shows the earlier web support design, seen on the first shuttles (King Kobra and White Lightnin', both of which have moved overseas).

The costume contest didn't get the turnout I had hoped, but here are two of the winners (center) who wore their Tidal Wave and Greased Lightnin' "1950's style" attire respectively. On the left is Great America's Derek Hanna and on the far right is Steven Wilson.
Here the crew prepares for another launch.
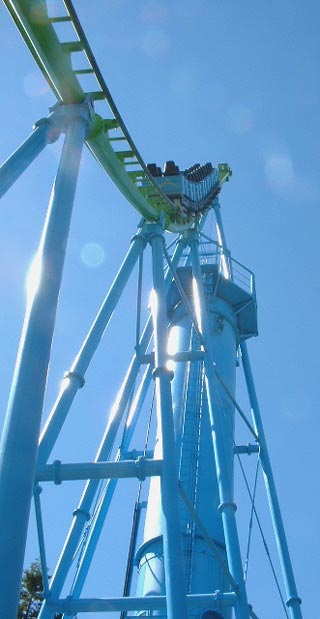
Sunlight strikes the front spike as the train reaches its highest point during filming.

The model next to the cool birthday cake and memorabilia. The event was a hit, and certainly the highlight of my first voyage to CA (besides Disneyland of course!). A big thanks to everyone involved.
BRAD'S SCALE AMUSEMENT RIDES / HOME
All images copyright Brad Sherman unless noted otherwise. Logos copyright their respective sources.