Right click on the above plans and select "Print Picture"
For this project you will need 3/4" PVC and fittings, 3/4" pipe insulation for the handles, Household Goop (glue), a pair of pliers or wire lugs for pulling nipples out of fittings, and a glue stick.
The nice thing about using Goop is that it allows you to take your time assembling PVC and if you've made a mistake, you can take things apart and correct the mistake. Once the Goop has cured, your project is solid as a rock.
1. Wash the PVC with a wash cloth and soap to clean off grease and dirt.
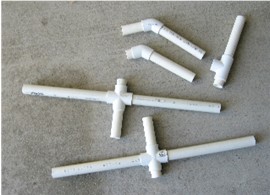
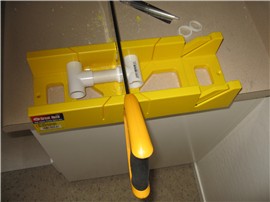 2. Cut 3/4" PVC pipes and fittings to size as indicated in the plans. Write the letter as indicated on the plans on each of the cut lengths of PVC to keep track of them. There is no need to mark the nipples, as they are obvious. I do my cutting with a mitre box and hand saw. The way to get straight, square cuts, I've discovered, is to simply let the saw do the cutting. Don't apply downward pressure and don't grip the handle of the saw tightly. To cut 1/4" off of the designated fittings, put two of them together on a short length of PVC as shown in the picture and brace the assembly against the back of the mitre box. You will end up with a piece of PVC inside the cut fitting, and that you can work out with a screw driver. The lengths of the handles are your own preference. I cut 10" lengths for mine.
3. Once all parts have been cut to size, roughen the ends of the pipes and the insides of the fittings with a file or course sandpaper so that the glue will have something to grab hold of. Wipe them clean.
4. Put the entire assembly together without glue to make sure that everything fits and to get a feel for how it is put together. Align and cut the pipe insulation for the handles.
5. Glue the parts together first that don't matter. As can be seen in the picture, it doesn't matter which way the fittings are rotated or in which direction the pipes point. Apply a liberal amount of Goop and spread it around the inside surfaces of the fittings and then insert the PVC pipes into them. Rotate the pipes around within the fittings to evenly spread the Goop. Push the pipes tightly into the fittings. Setting sub-assemblies on end and pushing down on them will ensure a tight fit.
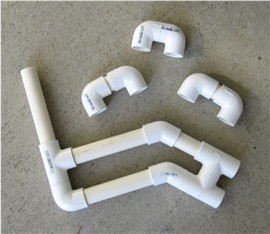 6. Assemble and glue the sub-assemblies that are on the same planes. Once assembled, push them down on a flat surface to ensure that all parts of each of the sub-assemblies are straight and that all fittings are aligned with each other. You could allow these to completely cure before the final assembly, or you could move on from here before the glue is dry, in which case, be very careful not to deform the body sub-assembly while attaching the handles. When putting together sub-assemblies on this project or any other project, always keep in mind exactly how the final assembly will be put together, and make your sub-assemblies accordingly. You don't want to start putting together a final assembly only to find that an elbow with a pipe, or something, conflicts with a straight-in connection and should have been attached seperately.
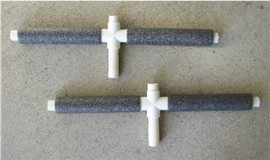
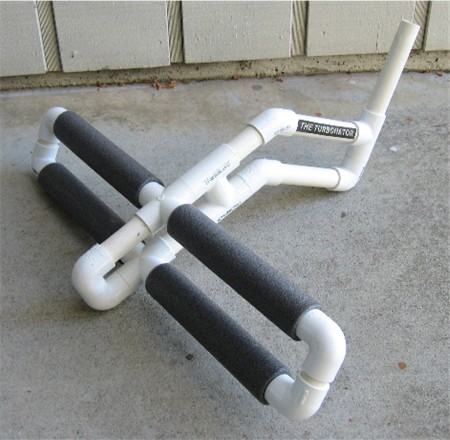
7. Slip the pipe insulation on to the handles and then, using the picture at the top of the page as a guide, assemble the entire Turbonator Carbine. Make sure that the top handles are forward on the assembly and that the bottom handles are aft. Once assembled, twist the connectors on the ends of the handles to adjust the handles so that they are straight and parallel.
8. This next step is required. Place your mouse on the "The Turbonator" graphic text at the top of this page, right click and print picture. Once printed, carefully cut out the graphic, spread glue on the back of it with a glue stick, and then carefully align and laminate it to the front, top extension of the Carbine.
9. Place your Turbonator Carbine in a safe place and allow it to cure for a full 24 hours before using.
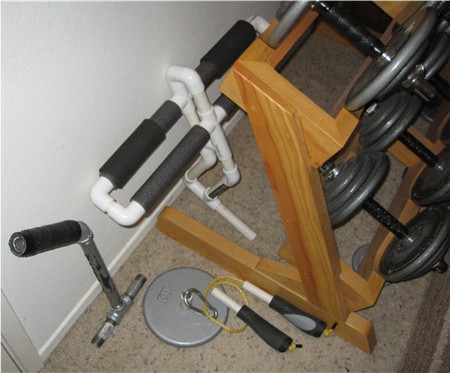
Addendum: I have added 1/4" soft rubber to the bottom handles for additional padding and to decrease the gap between the handles.