

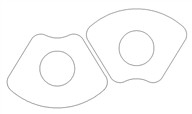
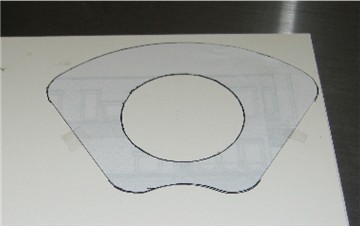
3. Cut the pattern from the PDF print. When you cut out the pattern, carefully cut out the hole with an exacto knife. You want that hole to be as round, and cut right on the line as possible. Tape the pattern to the mat board and trace around the edges. When drawing up the pattern, I accounted for the fact that the line drawn within the cut out hole will be slightly smaller than the hole itself.
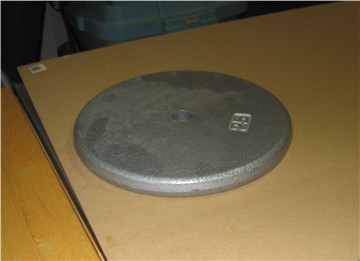
4. Carefully cut the hole in the mat board out with an exacto knife. Again, the hole must be as round and accurate as possible. Before cutting out the rest of the base, place it over the Dyna Flex to see if it falls close to 3/8" from the center of the seam that encircles the Dyna Flex. The casting will ideally encompass a 3/4" band around the middle of the DynaFlex. A tolerance of 1/16", more or less, is acceptable. Note that I had cut out the sides of the base with a straight edge and razor knufe. If everything seems ok, cut out the rest of the base. I used a pair of sharp scissors the cut out the top radii and a portion of the lower, outside radii, and then I cut out the thumb radius and the rest of the two radii on the sides with an exacto knife.
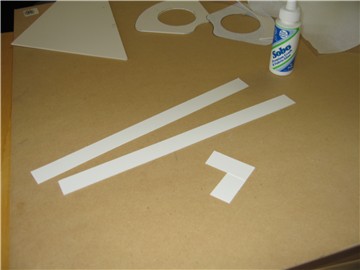
5. Using a steel straight edge and a razor knife, cut two strips of poster board 7/8" wide. Cut a couple of inches off of each strip to make a little square, as shown. Glue the two pieces together with Sobo Glue, found in most hobby stores. If you can't find Sobo, Elmer's white glue is about the same thing. The square will be used to mark a square line on the strips for cutting.
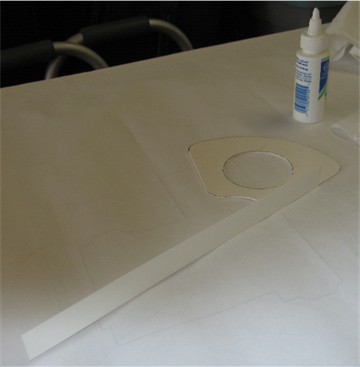
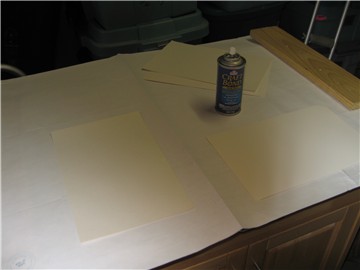
6. Spread a large sheet of paper over a smooth work surface and have plenty of paper towels on hand. Using the Sobo glue, begin gluing the poster board strips around the edge of the base. Start at the center of one of the sides. Run a bead of glue along the bottom surface of the strip, the same length as that portion of the side of the base that it will be glued to. Don't be afraid to be liberal with the glue. Press the strip up against the edge of the base and hold it there. As the glue dries, keep running your thumb nail along the connection to keep the pressure up. Also, continuously keep moving the structure around on the surface you're working on to prevent the structure from becoming glued to the paper underneath. At the same time, make sure that you keep the edge of the strip down on the work surface rather than angling upward. As the strip begins to adhere to the edge of the base, you might want to grab a paper towel and wipe up some of the glue that is spread around the paper on your work surface. It takes about five minutes of doing this before you can let the structure alone to thoroughly dry.
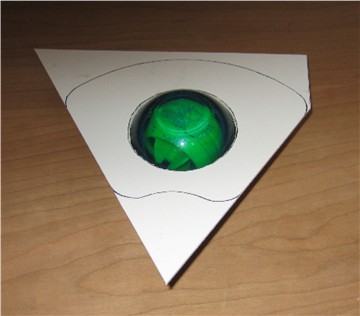
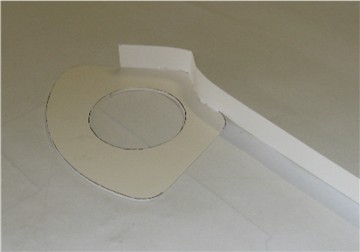 7. Applying the format from step 6, continue gluing the strip around the base. Glue just one radius at a time. After gluing the strip to each of the radii, cut the strip so that it ends at the middle of the side of the base, and then glue that length. Take the other strip and glue that to the rest of the base. Begin by overlapping the second strip over the first and glue those two surfaces together (see the picture at the top). Again, glue each radus and straight length separately. For the large radius at the top, glue half of it first, and then glue the second half. After you get around each of the radii, cut the strip so that it will end up just overlapping the other strip and then glue those two surfaces together as well as the straight length. Once the the mold is all glued together, run a hefty bead of glue all around the inside edge where the strip meets the base. Allow the glue to thoroughly dry before continuing.
If All this sounds tedious, it is. But you only have to do it once. I put this thing together little by little throughout a day while doing other things.
 8. ok. Here we go. First, have several sheets of paper covering your work surface. Casting resin can seep through one sheet and adhere to a surface underneath. Set the mold on top of any items that will keep it up off of the work surface a few inches and will leave the hole clear. I stacked 3 sets of magazines. You could use some 2 X 4's, or whatever. Place several sheets of paper over whatever the mold is resting on. There is a chance that the mold could adhere to what ever it is on top of, so it would be a lot easier to pull some paper off of it rather than a 2 X 4. Whatever you set the mold on, be sure that it (they) is something you are willing to part with.
9. Take the DynaFlex and cut some gouges around its surface with the edge of a file, keeping those gouges within that 3/4" band around the middle. Thoroughly clean off all shavings.
10. Set the bottom of the DynaFlex into the hole of the mold. Try to get it as straight, up and down, as possible. Press down on the DynaFlex to make sure that it is securely set in the hole. Run a hefty bead of glue around the DynaFlex around the edge where it meets the mold. Make sure that the glue covers both the DynaFlex and the mold at that connection.
11. After the glue is dry, carefully take the whole structure in your hand, turn it over, and, while holding it, run a bead of glue around the bottom of the DynaFlex at the mold connection, just as was done around the top.
12. Place the whole structure back on the mounts and allow the glue to dry. Have plenty of paper towels and mixing sticks on hand and perpare to pour the casting resin. Mixing sticks are like pop-cicle sticks and can be found in a hobby store.
13. Spread an even layer of vaseline (a release agent) around the inside surface of the mold, on the base and the inside walls, being careful not to get any on the DynaFex. I had originally thought that the vaseline would prevent the casting resin from adhearing to the mold. Well, I was wrong, so I've just left the mold attached to the resin as seen in the picture at the top of the page. Doesn't hurt anything. However, I believe that the vaseline might help to prevent the resin from seeping through the poster board, so I would advise doing it.
14. Have several small pieces of poster board handy. As you pour the resin, you might have to wedge some pieces of poster board under one side of the mold or another to level it up. You want the resin to end evenly all around the lip at the top of the mold.
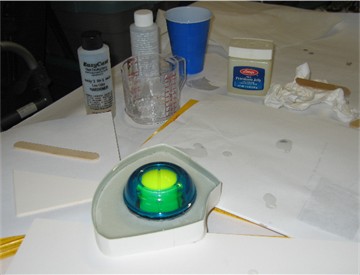
15. For a casting resin I got EasyCast by Castin'Cast from Michael's hobby store. You could also find casting resin at a tile store. A measuring cup is an essential item. I picked up an inexpensive plastic cup at Walmart's. You might also need another cup. A plasic throw-away cup would be ideal. The directions instructed that once the resin is mixed, to transfer the mixture to another cup for further mixing. I did this and then transferred the mix back into the measuring cup for pouring. Casting resin is some very sensitive stuff, so read the directions thoroughly and follow them to the tee! Have on hand a lot of mixing sticks and paper towels. Resin that drips will seep through paper and adhere to whatever surface you're working on, so be sure to use several layers of paper or wax paper. If any gets through, it will leave a thin layer of plastic which can be scraped off later.
16. Once the casting resin is mixed, begin pouring it slowly into the mold, being very careful not to drip any on the gyro within the DynaFlex! Allow some of the resin to spread out and then pour some more. Check for level as you near the top, placing wedges under the mold as needed. Pour the resin right up to the top. Once poured, do not touch it for 24 hrs.!!
Important! When the resin is poured, there might be some leakage. Do not panic. Let it leak. This is why you want to perform the resin pouring operation on a fully protected area, and why you use items you don't mind losing that the mold is in contact with. If there is leakage, just let it go, and then come back 24 hrs. later, mix some more resin, and fill in the gaps. The second batch won't leak and will finish off the mold.
17. Allow the resin to fully cure (and then some) per the directions. The resin I used stipulates 72 hrs. Once the resin is fully cured you can take hold of your Aikido Power Grip and finish it off. Peel off all the things that might be sticking to it. Take a file and file down sharp edges under the mold where you will be placing your fingers. The texture of rubber bands makes the best grip surface for this device. Get a couple of wide rubber bands and cut a length to cover the top of the Aikido Power Grip and one for the thumb hold. Wide rubber bands can be found in office supply stores. Super glue works well in laminating the bands to the surfaces.
