Today is . Page created 08/23/09
 Virtual Keyboard Interface Virtual Keyboard Interface 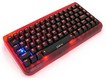
|
Today is . Page created 08/23/09
|
Virtual Keyboard Interface
|
|
Click the keyboard icon below |
|
This script is a reusable system for adding a graphical keyboard interface to text fields, password fields, and textareas so they can be filled with mouse only. It also adds easy access to special characters your existing keyboard may not otherwise have the ability to generate. Comes with Arabic, Belgian, Dutch, Dvorak, French, German, Greek, Hebrew, Hungarian, Italian, Lithuanian, Norwegian, Number Pad, Polish Programmers, Portuguese, Russian, Slovenian, Spanish (Spain), Turkish-F, Turkish-QWERTY, UK, US Standard and US International keyboard layouts, dynamically selectable. Add additional layouts is simple. Easily implemented on any Web site. We have tested the code in IE 8.0, Firefox3.5.2, Opera 9.64, Netscape 9.0.0.6, Flock2.51 and Safari Public Beta 4(528.16). This script worked well in all platforms with no variations observed. |
![]() For your Information:
Before we begin, we feel obligated to advise you that the above form is for all intensive purposes a "Stand Alone" script. In other words, it really does not do much of anything other than what you see. In order to make it function as designed, you need to incorporate it into a valid working form. If you do not have a good Solid Knowledge of HTML coding, javascripts, forms and reconfigurations, please
"Do Not Attempt" this until you are Proficient in the aforementioned areas.
For your Information:
Before we begin, we feel obligated to advise you that the above form is for all intensive purposes a "Stand Alone" script. In other words, it really does not do much of anything other than what you see. In order to make it function as designed, you need to incorporate it into a valid working form. If you do not have a good Solid Knowledge of HTML coding, javascripts, forms and reconfigurations, please
"Do Not Attempt" this until you are Proficient in the aforementioned areas.
Step One------ when you go to the site and get the code, the section marked "External File" has some reconfigurations before you can make it into the keyboard.js file and the CSS stylesheet section.
<!------ START KEYBOARD.JS FILE ------>
/* This script and many more are available free online at
The JavaScript Source!! http://javascript.internet.com
Created by: GreyWyvern | http://www.greywyvern.com/Licensed under: BSDL: http://www.opensource.org/licenses/bsd-license.php
*/
/* ********************************************************************
**********************************************************************
<!------ ALL CODE IN BETWEEN THE ABOVE AND TO THE BELOW IS KEYBOARD.JS ------>
}
function VKI_disableSelection(elem) {
elem.onselectstart = function() { return false; };
elem.unselectable = "on";
elem.style.MozUserSelect = "none";
elem.style.cursor = "default";
if (window.opera) elem.onmousedown = function() { return false; };
}
<!-------- END KEYBOARD.JS FILE -------->
<!-------- REMOVE FROM HERE DOWN -------->
</textarea>
</div>
<!-- /External File Tab -->
<!-- CSS Tab -->
<div class="tabbertab" title="CSS">
<h2>CSS</h2>
<p>Paste this code into your external CSS file or in the <code><style></code> section within the <code>HEAD</code> section of your HTML document.</p>
<button type="button" onclick="document.getElementById('source_textarea2').focus();document.getElementById('source_textarea2').select()">Select code</button><br>
<textarea readonly="readonly" rows="9" cols="65" id="source_textarea2" name="source_textarea2" wrap="off" style="font-size: .9em; padding: 0 10px;">
<!-------- DO NOT REMOVE PAST HERE!! -------->
<!-------- START CSS STYLESHEET HERE -------->
#keyboardInputMaster {
position:absolute;
border:2px groove #dddddd;
color:#000000;
background-color:#dddddd;
text-align:left;
z-index:1000000;
width:auto;
}
<!------ ALL CODE IN BETWEEN THE ABOVE AND TO THE BELOW IS THE CSS STYLESHEET ------>
}
.keyboardInputInitiator {
margin-left:3px;
vertical-align:middle;
cursor:pointer;
}
<!-------- END CSS STYLESHEET CODE HERE -------->
As you can see in the above section of code what needs to be removed from the copy and paste from the script site.
Step Two ------ Once you have made the required reconfigurations,you now need to make the keyboard.js file and upload it into your directory. Then paste the sniplet of code into the <HEAD> section to call the keyboard.js file.
![]() Note Of Importance: If you are not sure of howto make the external .js file and make use of it within your document, grab the below link and it is fully explained.
Note Of Importance: If you are not sure of howto make the external .js file and make use of it within your document, grab the below link and it is fully explained.
[ .js File Howto ]
![]() For your Information:
If you are not comfortable or prefer not to use the external.js file, you can use the traditional cut/copy and paste instead of the external .js file. If you need a little refresher on what is required to achieve this, grab the below link and it is fully explained.
For your Information:
If you are not comfortable or prefer not to use the external.js file, you can use the traditional cut/copy and paste instead of the external .js file. If you need a little refresher on what is required to achieve this, grab the below link and it is fully explained.
[ Traditional Cut/Copy and Paste ]
Step Three ------ Once you have made and uploaded the keyboard.js file, now you need to add the CSS section into the <HEAD> section of your document. If you have a CSS section already, just add it into it. If you don't and need a little refresher on howto, see below:
All you need to add to the unfinished CSS section are the opening and closing style tags into this section of code. If this is a little confusing, See below on where and howto:
<style type="text/css">
Paste CSS Section Of Code Here!
</style>
There are numerous tweaks you can make within the CSS section of code. They are all cosmetic and you just need to study and play around with it until if fits your page.
If you want to view our source code (we have it well documented), see how the CSS section has the opening and closing style tags positioned. See below how we documented our source code for easy viewing of the CSS code.
<!------ START CSS SECTION OF CODE ------>
<!------ NOTICE THE BELOW OPENING CSS TAG ------>
CSS CODE IS HERE
<!------ END CSS SECTION OF CODE ------>
<!------ NOTICE THE ABOVE CLOSING CSS TAG ------>
Step Four
------ Now you need to download the keyboard graphic ![]() then upload it in the same format and name to your top or root directory. Why the root directory? The way this script is configured, it would take too many reconfigurations to change the path to call the graphic so...... to make life easy, just upload it to your root directory.
then upload it in the same format and name to your top or root directory. Why the root directory? The way this script is configured, it would take too many reconfigurations to change the path to call the graphic so...... to make life easy, just upload it to your root directory.
Step Five ------ Once all the above is done, now all you need to do is insert the <BODY> section of code into a working form.
![]() Little Extras Not Included In The Script: Depending on how you are going to implement this effect, you may want to mask the letters, numbers etc. that are being typed from the virtual keyboard. It may be good to mask the typed characters for passwords. This is an extremely easy effect to change from the default which you see all the characters that are being typed. See below where and howto:
Little Extras Not Included In The Script: Depending on how you are going to implement this effect, you may want to mask the letters, numbers etc. that are being typed from the virtual keyboard. It may be good to mask the typed characters for passwords. This is an extremely easy effect to change from the default which you see all the characters that are being typed. See below where and howto:
|
Visible Form Field Type something into the below form <input type="text" value="" class="keyboardInput"> |
Masked Form Field Type something into the below form <input type="password" value="" class="keyboardInput"> |
All we actually did was to change the <input type="text" value to that of <input type="password". Now the text is masked from the being seen.
We hope our tutorial was easy to follow and we covered everything in detail. If you would like to add this effect into your pages, grab the respective below link and you are there. If you have any problems with this or anything else, feel free to consult our [ FAQ ] and if you can't find the answer there, [ contact us ].
[ Get Code Here ]
[ Rate This Page ]
[ Scripts In Conflict ]
![]()