| Windows 95 and above | Mac OS 8.1 and above |
| Setting up your Virtual Memory to higher levels keeps your system from running out of memory. By setting Virtual Memory (VM) to a set size, your system does not have to waste time continually changing the VM size to meet your system's need. Therefore set VM to a higher number, see step four. | Setting up your Virtual Memory to higher levels keeps your system from running out of memory. By setting Virtual Memory (VM) to a set size, your system does not have to waste time continually changing the VM size to meet your system's need. Therefore set VM to a higher number, see step four. |
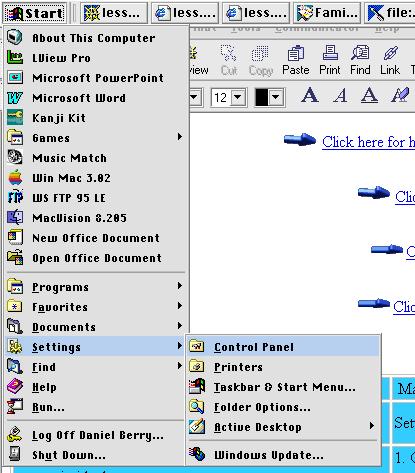
1. Click on the start button, Settings, Control Panel...
2. Click on the "System" Icon, found in the Control Panel. 3. Click on the "Performance" tab. 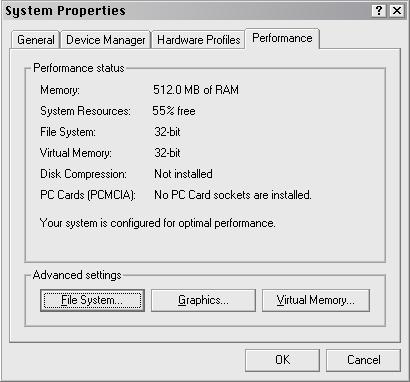
4. If you have more than 128 megs of RAM, set VM to at least 196 megs. 4a. If you have 64 megs of RAM, set VM to at least 224 megs 4b. If you have 32 megs of RAM, set VM to at least 256 megs. 4c. DO NOT DISABLE VM! 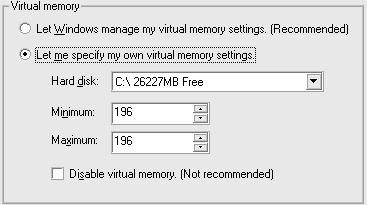
New system setting will take over after you restart the machine. You are done! : ) |
1. Click on the Apple button, Control Panel...
2. Click on the "Memory" text. 3. Click on the Virtual Memory settings. 4. If you have more than 128 megs of RAM, set VM to at least 196
megs.
You are done! : ) |
| Windows 98 and above | Mac OS 8.1 and above |
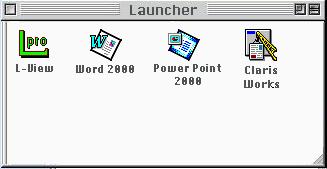
| Setting up Launcher. This is a short-cut window that contains
the program's
icons that you use most often. By using the Launcher, the user does not have to look for the program icon in the folders. Therefore the Launcher saves time. |
Setting up Launcher. This is a short-cut window that contains
the program's
icons that you use most often. By using the Launcher, the user does not have to look for the program icon in the folders. Therefore the Launcher saves time. |
| 1. Click and hold on the program's icon that you wish to appear inside
the
Launcher. 2. Pull the icon and drop it into the Launcher area (gray menu bar) 3. Windows will automatically update the Launcher menu and show a shortcut icon inside the Launcher as seen in the above picture. You are done! : ) |
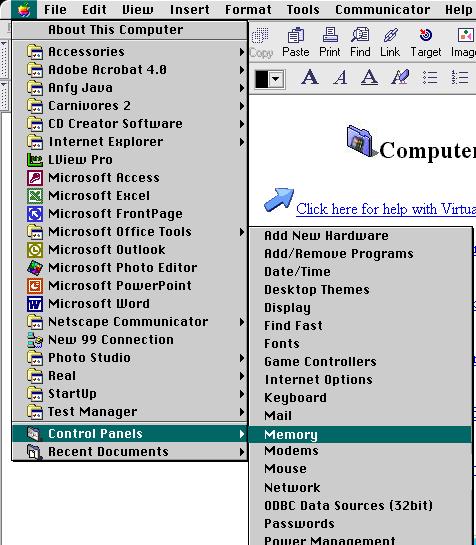
1. Open the launcher by clicking on the Apple menu, and clicking on
the Control Panel icon. Inside the Control panel, you will see a
title called "Launcher," click it.
2. The Launcher will now appear on the desktop.
You are done! : ) |
| Windows 98 and 98SE | Mac OS 8.5 and 8.5.1 |
| To update a Windows machine, just follow these instructions. | To update a Mac machine, just follow these instructions. |
| 1. Click on the start button
2. Click on the "Windows Update" Icon found on the pull up menu. 3. Windows will automatically download and install the fixes for you from the Internet. You are done! : ) |
1. Open your Internet browser (IE or Netscape).
2. Go to www.apple.com by clicking this address in the browser. 3. Click on "products" within the Apple web site. 4. Click on the "Mac OS 8.6 Update" 5. Once this file is downloaded, click on that Icon and follow those instructions from there. 6. The Mac OS will then fix many of its bugs. You are done! : ) |
| Windows 98SE to 2000 ( for Windows 95, click here ) | Mac OS 8.5 to 8.6 |
| Windows 95 to 2000 was designed with networking in mind. Once you have the appropriate hardware in place and a little know-how, you're set. | Mac OS 8.5 to 8.6 was designed with networking in mind. Once you have the appropriate hardware in place and a little know-how, you're set. |
| Networks can be made using Thin Coax 10Base2 (w/ BNC connectors), Category 5 (CAT5 w/ RJ 45 connectors) and USB (Universal Serial Bus) to Ethernet cables. | Networks can be made using Thin Coax 10Base2 (w/ BNC connectors), Category 5 (CAT5 w/ RJ 45 connectors) and USB (Universal Serial Bus) to Ethernet cables. |
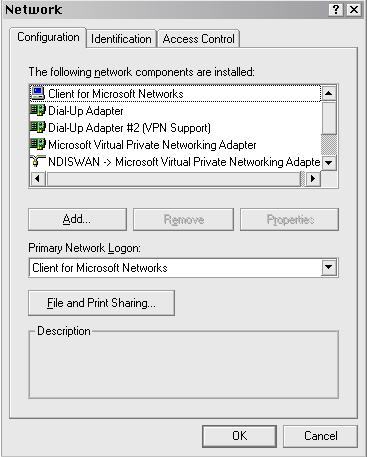
1. Double click on the Network icon found on the desktop.

2. Click on the Configuration tab, and make sure all the following are installed:
Client for Microsoft Networks
3. If any of the above components are not installed, manually install
them by selecting add, then the missing component.
|
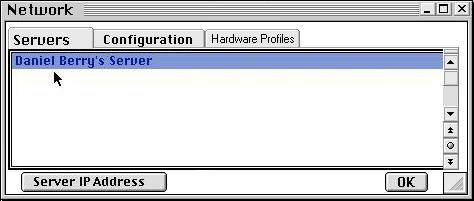
1. Double click on the Apple Menu Icon.
2. Click on "Chooser" from the pull down menu. 3. The Chooser window will appear. 
4. Click on the "Apple Share" Icon. 5. Do be certain that the AppleTalk selection is "ACTIVE." 6. If AppleTalk is inactive, then click on the active button to make it so. 7. Select the server which you wish to be connected to. 8. Click "OK." 9. Answer the questions on the next windows, by clicking "OK." 10. Click on the "name" dialogue box and type in the name of the Server which you will be connecting to. 11. Click "OK." 12.. Answer the questions on the next windows, by clicking "OK." 13. There are different types of Networks available, visit Doug's Networking Help, if you are selecting a different type of Network, such as "Peer to Peer," or "Direct Cable Connection." |
| Windows 95 | |
| To set up your computer to connect to a network | |
1. Click on the Network Icon found within the control panel.
2. Click Add. 3. Click Client, and then click Add. 4. Follow the instructions on the screen. Notes You can also open the Network dialog box by clicking Start, pointing to Settings, clicking Control Panel, and then double-clicking Network. With the Microsoft Client for NetWare Networks that is included in Windows 98, you can connect to Novell NetWare servers. To install this client, follow steps 1-3, and then in Manufacturers, click Microsoft, and in Network Clients, click Client for NetWare Networks. Two versions of the Novell NetWare workstation shell are also available. To install one of these, follow steps 1-3, and then in Manufacturers, click Novell, and in Network Clients, click the version you want. |
| Windows 95 to 2000 | Mac OS 8.5 to 8.6 |
| Windows 95 to 2000 was designed to make the transfer of files as easy as possible, by simply dragging and dropping. | Mac OS was designed to make the transfer of files as easy as possible, by simply dragging and dropping. |
| 1. Select the file or folder you wish to copy.
2. Drag the file to the location, which you wish it to be copied to by holding the left mouse button. 3 Drop the file in the location by releasing the mouse button. |
1. Select the file or folder you wish to copy.
2. Drag the file to the location, which you wish it to be copied to by holding the mouse button. 3 Drop the file in the location by releasing the mouse button. |
PC On? PC Off?
Q. Should I leave my computer on all of
the time? Some people say keeping it off is better
for the computer, and others say keeping it on is better. Can you please
clarify this issue
for me?
A. There are positives and negatives on
both sides of this issue. I will write about both and
then give my recommendation.
Reasons for leaving your computer on:
Reasons for leaving your computer off:
My recommendation
Unless you run a server, or use your computer very frequently, I would
turn it
off when it's not in use. Most people do not use their computers long
enough for the SCSI hard
drive to get hot enough to cause any damage. The potential risks of
power surges, lightening strikes,
and power outages have more effect on a computer turned on (remember,
however, a computer
that is turned off can still be damaged by lightening if they are plugged
in).
If you decide to leave your computer on, follow these tips to
make sure your computer lives a
long healthy life:
Purchase a UPS, a backup power device.
If you over clock your processor or have a lot of hot running devices
in your computer
make sure there is good ventilation in both the computer and the room
that the computer
resides in.
Make sure you check frequently to see if the fans in the computer are
still running. Asus motherboards have a utility to inform users if the
fans off.
A burnt out fan can mean death to your CPU and power supply in a matter
of minutes.
If you are running a server or simply have your computer hooked
up to a phone line, make
sure that all cables running from your PC to the outside world
are protected against power surges and lightening strikes!
Click here to return to the Greeting Room
Created and maintained by

Daniel Lloyd Berry
1999, 2000
-Disclaimer statement-
Remember- you are responsible or your own PC's maintenance and up keep.
The steps described here are only a helpful suggestion on questions, which
I have received from other users. Therefor use caution when configuring
your PC's settings. I am not responsible for careless users, who
recklessly use commands and do harm to their data.