 Tips for Your Sewing Pleasure:
Tips for Your Sewing Pleasure:ôDonĺt Feed the Dogs!ö

Weĺve all experience those hungry dogs that want to eat our sewing! Our wonderful fabric on a beautiful outfit gets chewed up, pushed down into the feed dogs of our sewing machine, sometimes with a huge lump of thread! Yikes! What a nightmare! I learned the following trick several years ago when I first began machine quilting, and have found it invaluable when sewing almost anything, not just doll fashions!
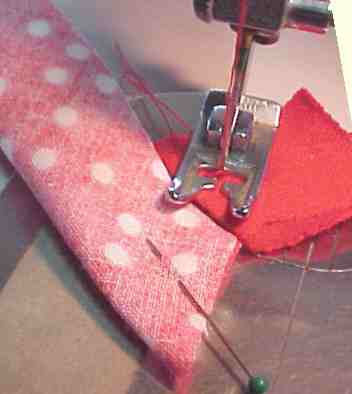
When starting to sew a seam, the needle wants to push the edges down into the feed dogs. It may look like itĺs starting okay, only to start chewing on it when you try to lock the stitches (usually this is done by taking a few back stitches after starting, then continue sewing the seam, or your machine may have a lock stitch). [Note: I try to keep the lock stitches in the area of the seam allowance since they may add a teeny bit of bulk to a seam. Sometimes I just sew 2-3 stitches in place.]
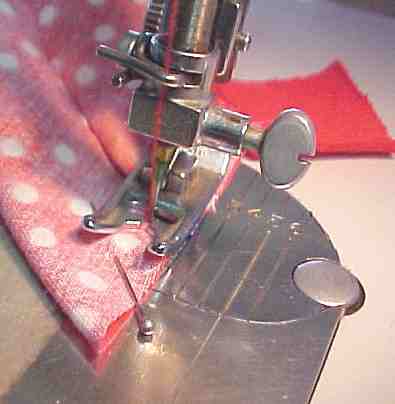
I now use a ôstarter scrap,ö commonly used by machine quilters, at the beginning of stitching almost every seam. Using a scrap of the same fabric (double, triple, or whatever thickness you are sewing on the garment) will give you a perfect transition from scrap to garment. One inch square is about the smallest I use, use bigger if you like. Place scrap under the presser foot, allowing about ╝ö to start sewing. Begin sewing, butt the garment next to the scrap and continue sewing right off the scrap onto the garment. Itĺs so easy to make that transition smoothly, and also do your lock stitches, then continue sewing the seam. You can also use the starter scrap as a ôhandleö to hold onto with your left hand as you guide the garment under the needle.
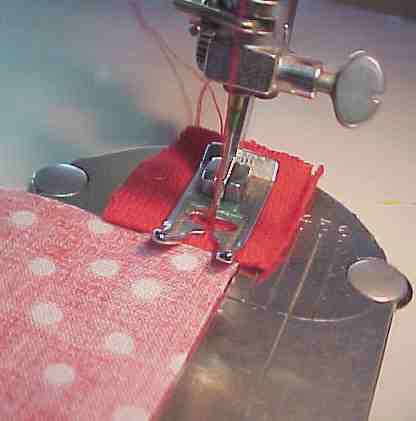
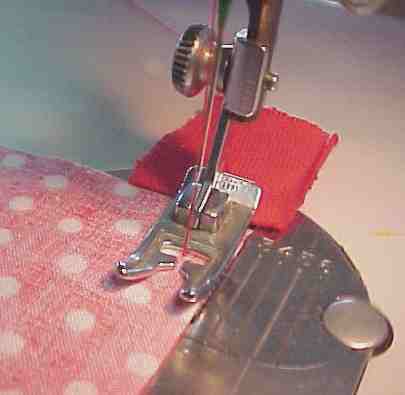

This is easy to picture if the seam you are sewing is at 90║ to the top edge (for instance a skirt or pants seam as shown above), but sometimes the seam starts from an angle, as in a collar or side seam with an armhole. In this case, place the garment where you would start the seam and note the angle of the top edge (collar). Position the starter scrap to butt the angled edge and then start sewing ╝ö back from the edge. Your starter scrap and the sleeve angle are angled together, but your sewing is straight with the side seam.