

Welcome to my saga of numerous frustrations and final sucess with this challenging project! Maybe by sharing these with you it will save some from repeating the same mistakes! I think I learned a few things and certainly don't plan to repeat them! LOL So grab a cup of coffee or a soda, get comfortable, and let the journey begin!

After pulling out various fabrics and colors, I had an idea. I had recently replicated a prom dress for a Barbie in a pale green crepe back satin. Pulling out some black chiffon, I placed it over the satin. I was amazed at the transformation to nearly the exact hues of the hat fabric! I’d found my "fabric"! Also on the hat are three black flowers with brightly painted green centers which match the ribbon band. This bold splash of color was just the accent I also wanted to bring to the outfit.
But oh, so many challenges lay ahead—anyone who’s worked with satin and chiffon knows that both require some special handling. Using the two together as one was the biggest hurdle of all! They slip, slide, move around—no amount of pins would seem to hold the layers together. The garment would also have to be lined, so that would add a third layer!
The Design
But before I could address any of these questions, my next step was to decide on a design. Because I wanted a look reminiscent of the 40s, I perused several books, catalogs and even paper dolls depicting fashions of that period. I wanted something that would not overpower the hat because it was to be the focal point. But the dress should be glamorous enough, worthy to be worn with this wonderful hat. I made several sketches of various design elements that I liked and finally came up with a design which I showed to my friend. After her approval, the next step was a pattern. I began with patterns I had on hand, looking for similar elements. The skirt portion wasn’t difficult because there were several similar so I knew that part would be easy to modify. The bodice was a bit more of a challenge; the closest I found being a fitted princess style which had many, many seams.
I started by making a muslin sample. This is something I do for all my designs. Sometimes the final sample is achieved after several evolutions! I’m looking at not only perfecting the design elements, but the fit as well.
The Sewing
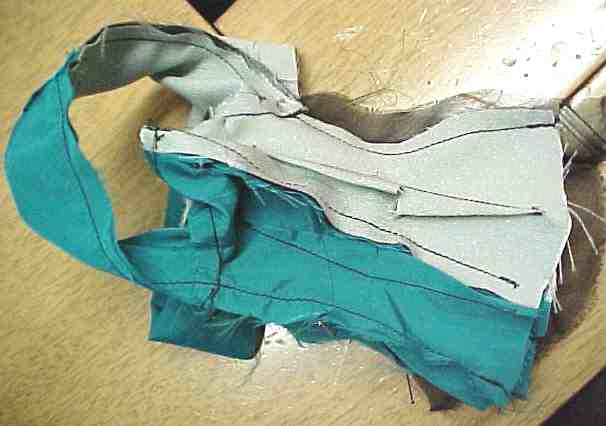
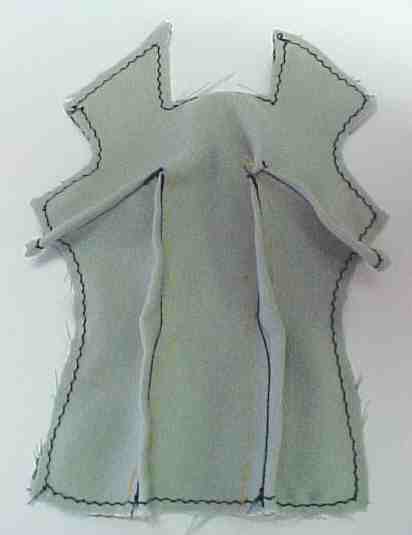
Once I had my muslin sample, I began working with the satin and chiffon material. These two layers were sooooo hard to manage! The following pictures show some of the steps, including the silky lining in the "splash of green":
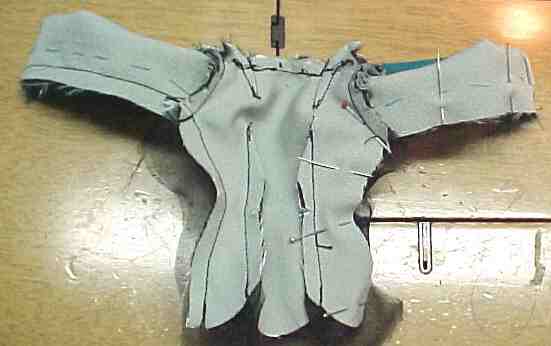

I did eventually get the bodice completed and lined, with minimal basting, but I was very disappointed with the results. I had been so focused on the color and design, that I forgot a very basic fundamental of multi-layered fabrics—they add bulk! Lots of bulk! And, even more importantly, this added bulk actually reduced the size of the finished garment! I had totally forgotten this principle—the bodice was not only way too snug, it was totally unsalvageable! So I ended up redoing the bodice which consisted of multiple pieces (for a princess-effect fit).
On the second version I added extra to the seam allowances for a better fit. After turning it RSO (right side out) and doing the final pressing, I was still concerned about the bulkiness at the front area where seams met. So I turned it partially WSO enough to get inside and trim away some of the bulky seams. Almost done, I nipped the last little bit, turned it RSO and to my horror I had cut a hole in it! Clear through both the chiffon and the satin!

So back to square one, I began again. I knew I not only had to reduce the overall bulk, but also correct the design on the bodice to eliminate all those seams. I also felt the lining I was using added too much weight as well. I had chosen a green acetate-type (for a splash of color hidden inside), but knew I would have to make a change. In many outfits, frequently use either tulle or chiffon. I felt tulle was the only answer—it would provide the shape and stability without the added weight. Only instead of green, I chose black to subdue the effect. Splashes of color would have to come from other elements.
After redesigning the bodice (and doing my muslins), I re-cut the satin and chiffon, then waited awhile before I began sewing again. I kept telling myself, "third time's a charm!" I spent this time pondering the difficulty in working with multiple layers. I had to improve my technique or drive myself crazy with the stress! I knew the only thing I could do for the results I wanted was to secure these two layers together so they could be handled as one. I reluctantly decided I would first have to baste the two layers together more completely than I had before. After that was done, I still wasn’t satisfied, so took the next step of sewing the layers together around the outer edges. This area would either be trimmed away or end up in the seam allowance depending on the final fit. It was a tedious process but once done, I felt much more confident moving on to completing the rest of the sewing.
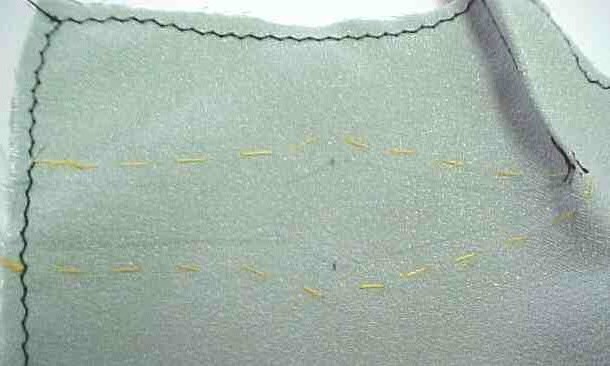
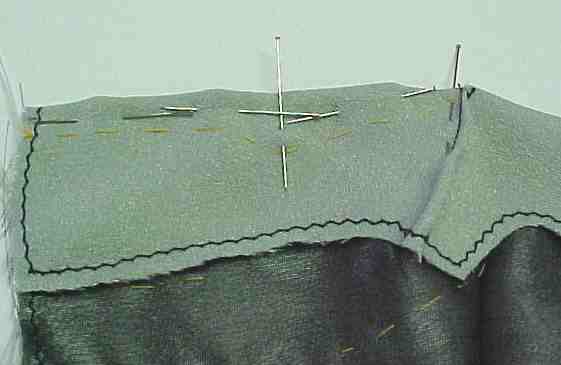
Darts are probably the least enjoyable element of fabric construction. And that’s under normal circumstances! Add the double layers of chiffon and satin and it gave me nightmares! Once again, I decided the only thing I could do was baste around the dart area so it would handle as one layer (there were no darts in the princess-style bodice of the previous two versions, just short ones on the skirt), then pin mark the darts and sew up. I lightly sketched the dart itself on the wrong side of the satin (although I usually cringe when I have to do this), so there would be no doubt that my stitches were perfect on the dart lines.
Pictures below show the stitching around the outside, pencilled darts, basting, pin marking and final results.


The Results
One final step before I called it done was to secure the tulle lining with tiny stitches along the seams inside--mainly from the bottom edge up to about the level of the bust/underarm area, as well as the darts themselves. This kept the tulle from moving around and meant the bodice had better movement as one layer. The new completed bodice finally met with my approval:


Mission accomplished! Hope you all had a good laugh, because we all seem to days like this! And just maybe there was a tip or two that will be remembered in a similar pinch! Thanks for your time!
You may email directly at:
© 2005 Mini-Fashion Boutique


srheater@earthlink.net
