Tutorial Eight - Playing
with Text
Requirements: Psp any version
This tutorial is written by me
exclusively for the Wendys Works PSP Class, any similarity to other tutorials
is purely coincidental.
Open a new canvas 500 x 500
Flood fill with black
Layer - New Raster Layer
Select your Text tool - type HELLO
in capitals using Arial Black font at 72
Select RED as your font color
Using your mover tool, move the
text to the centre of the canvas
Select Object - Align - Centre in
Canvas
You can make your text larger or
draw it out left or right, using the nodes in the selection frame.
When you are happy with the text,
go to Object - Convert Text to Curves - as character shapes - like this
Click on your Object selection
tool  then
Ungroup objects like this:
then
Ungroup objects like this:
Single click anywhere outside the
selected area on your canvas.
Single click on the H of hello -
like this:
The nodes (little squares) around
the selected area, will let you reshape the letter however you like. Play with
it and see what you can come up with!
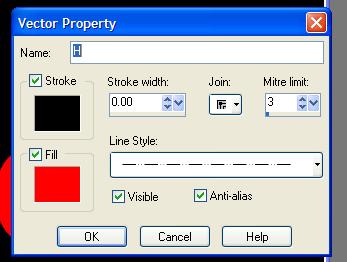
While the letter is selected,
double click on it and get this box:
Here you can alter different
aspects of the single letter. Play with this again and see what you come up
with.
When you get something you like -
click anywhere in the black area to deselect any of the letters
On your layer palette, select the
Vector layer and right click convert to Raster Layer
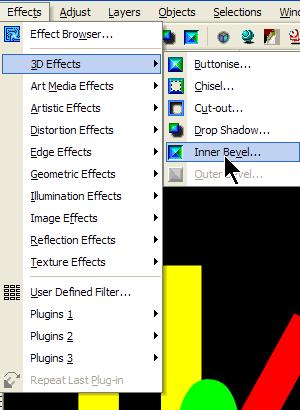
Now you can add a bevel
with these settings:
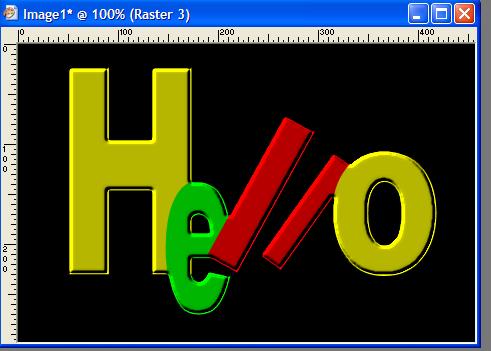
Now we can crop the text - Select
your crop tool and crop the image so that there is not too much extra around
your text. Something like this:
Now you can add a border to the
text/
Image - Add Borders -
With your magic wand, select the
new border you just created
Flood fill the selection with a
bright yellow - while still selected add a bevel
Selections - Select none
to end up with something like this
This can now be used as a header
for stationery, or resized (as you were shown for the sig tag) for an extra or
tag.
Please complete this tutorial as
written and submit to the group. Once you have done the tutorial as laid out,
you may experiment further. It is required that you FIRST do the tutorial as
laid out BEFORE experimenting.
This technique can be adapted to
create text in many creative ways. Enjoy playing with it!