
Tutorial Seven - Using a Mask
Requirements
PSP Any version
Graphic HERE
Mask HERE
This is what we are making:

Open the graphic
Shift D - to duplicate
Layer palette - right click - Promote Background layer
Image - Resize with these settings:
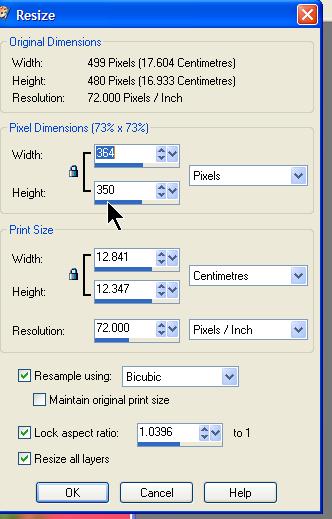
Just change the height to 350 and allow width to automatically set itself. Make sure you have Resize all layers checked.
Now we can apply our mask.
Layers - Load/Save Mask - Load Mask from disk and locate the 20.20 mask you should have already downloaded (Tutorial Seven Pre)
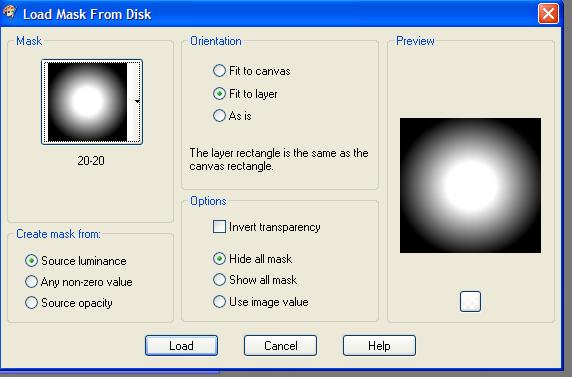
Click Load and you should now have this

Now go Layers - Delete -
and you get this

Click Yes
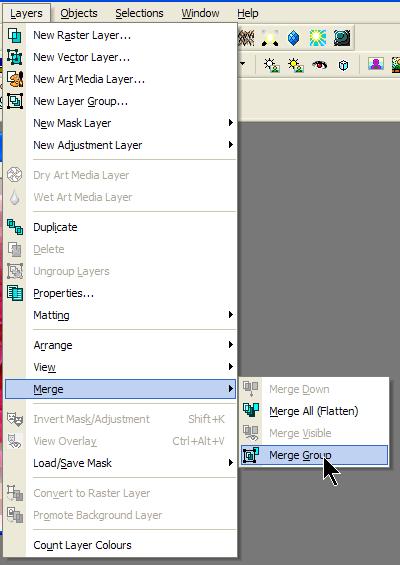
Now Layers - Merge Group
(NOTE: Not Merge All)
OK now we're going to resize our canvas
Image - Canvas Size

Giving you your background strip
Now Layers - New Raster Layer - default settings
Flood fill this layer with a contrast color (I used the color of the background of the graphic to give a nice pink)
Now Effects - Texture Effects - Blinds with these settings

Now we're going to make the strip seamless. Still working on your background layer (pink now with blind effect applied)
Effects - Image Effects - Seamless Tiling with these settings

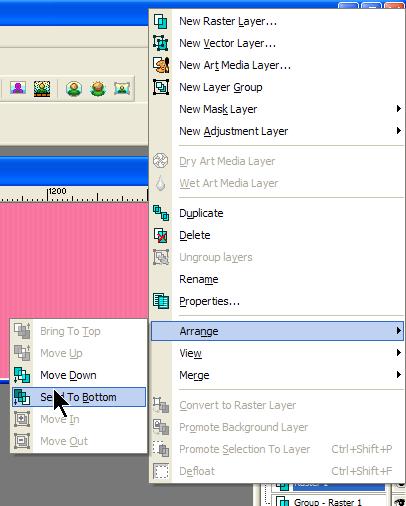
Having done that,you now want to send this layer to the bottom.
Layer Palette - right click - Send to bottom
Your flower is now over the background.
Layers - Merge - Merge All (Flatten)
Save your strip
File - Export - Jpeg Optimisation - compression 10%
Assemble in Letter Creator (if you are using it)
The strip goes in the BODY tab.
Please link this tutorial to mailto:wwpspclasses@yahoo.com.au NOT the group URL.
This tutorial was written by me, exclusively for the Wendy's Works PSP Beginners class, any similarity to other tutorials is purely coincidental.
