
Tutorial Five - Seamless Textured Background Border Stationery (1)
This tutorial was written by me, and any similarity to any other tutorial is purely coincidental. If you use my tutorial please link back to my email address in your footer by using the mailto:wwpspclasses@yahoo.com.au Please DO NOT add the GROUP URL or my website URL to your footer.
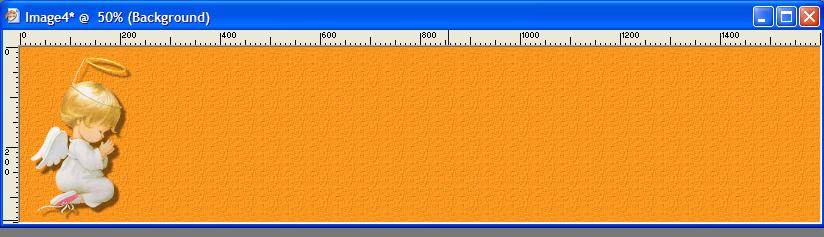
This is what we are making:
Supplies for this tutorial can be found HERE
Please use the supplies given for completing the tutorial. You may substitute other graphics if you wish to repeat the tutorial, but to have your tutorial "passed" in the group, it is required that you use the graphics supplied. This applies to all tutorials - you are requested to complete the tutorial as given and submit that as your result. You may improvise later on.
Ok let's go
Open the graphic supplied - Shift D to duplicate and close the original
You can see that the graphic has a "watermark" looking like this:"

Click on the Watermark layer in your layer palette to make it the active layer and right click on the layer, select DELETE.
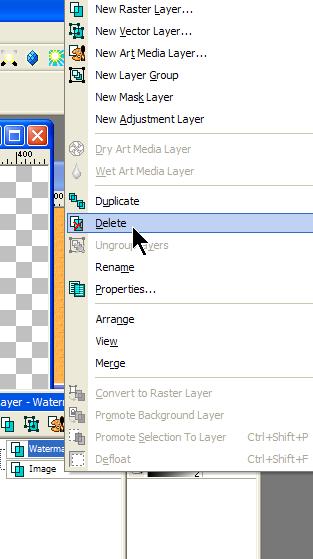
The watermark goes. This is OK to do to use the graphic. If you are sharing the graphic elsewhere you must leave the watermark on it.
Now we need to resize the graphic so it's small enough to use for our side border stationery.
Image - Resize - or if you like keyboard short cuts you can use Shift + S
(The above instruction mean go to the Image Menu at the top of the screen, and from the drop down menu select Resize - as I have already shown you this step, I will not put in screen shots for it)
You want these settings: set the height to 350 pixels and the width with automatically set itself. Make sure you have checked Resize all layers.

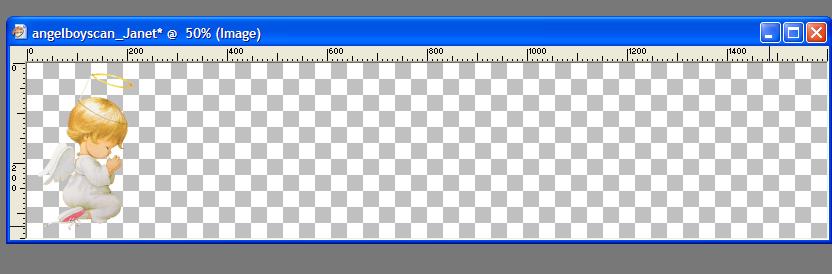
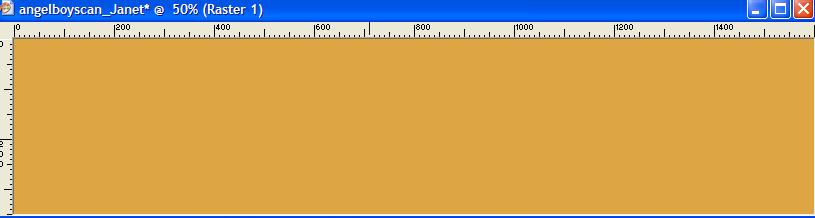
Your graphic should now be much smaller, and look like this

Now we are going to resize the CANVAS - this is different from resizing the image and is a very handy technique to know.
Go to Image, Canvas Size - like this

and change your settings to this:

Make sure you click the arrow indicated here. This places your graphic like this:
Now we're going to add another layer.
Layer - New Raster Layer like this:

Default setting

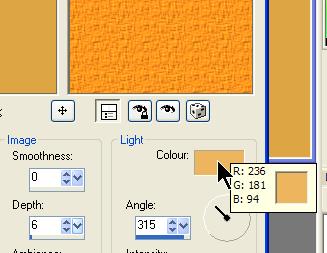
With your Eye Dropper tool
![]() (ie click on this
icon, then run your cursor over the graphic, click when you see the color you
like)
(ie click on this
icon, then run your cursor over the graphic, click when you see the color you
like)
Select a contrasting (lighter) color from your graphic
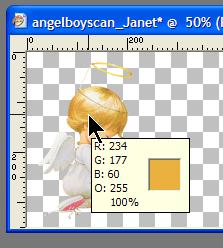
The color you choose will appear in your material palette, top box, like this:
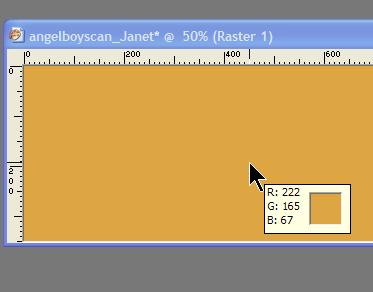
Select your flood fill tool
![]() and left click on
your canvas. Your canvas is now flooded with the color you chose. Like this:
and left click on
your canvas. Your canvas is now flooded with the color you chose. Like this:
Now we're going to add a texture to this layer.
Effects - Texture effects - Texture
(when written like this it means you select Effects from the top bar menu, then texture effects from the drop down menu, and then texture - like this:

Which gives you this:

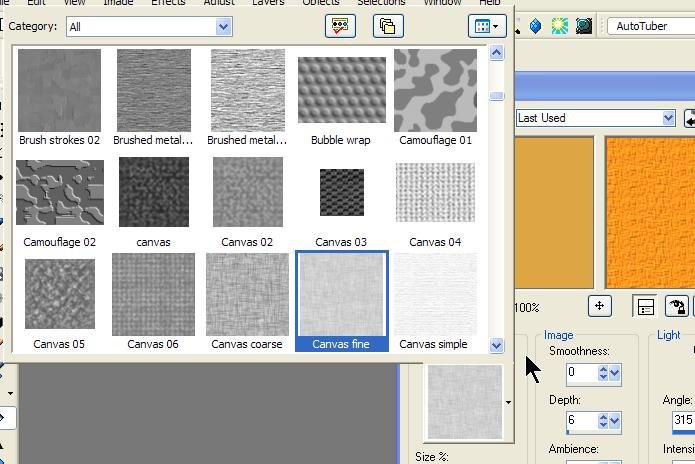
Click on the down arrow next to the Texture box as I've shown here.
Select Fine Canvas like this
and apply these settings:
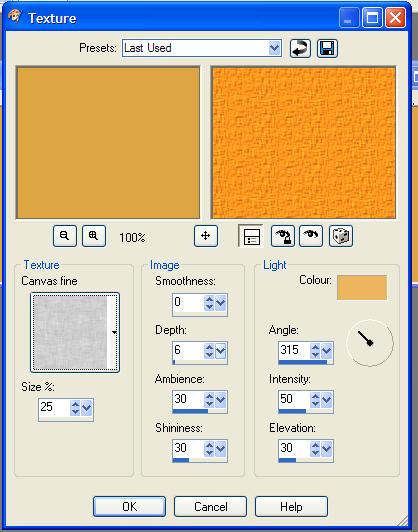
Select your background color by putting your cursor over the little color box like this:
and then clicking on your background strip to make your texture effect the same color as your background strip
Now your strip should look like this:

Now we're going to use the plug in that you should have downloaded and installed in Tutorial Four.
Effects - Plug Ins - Mehdi
(**note your screen will not look exactly like this as you will not have the plugs ins that I have here - we are at this time only interested in the Mehdi plug in)
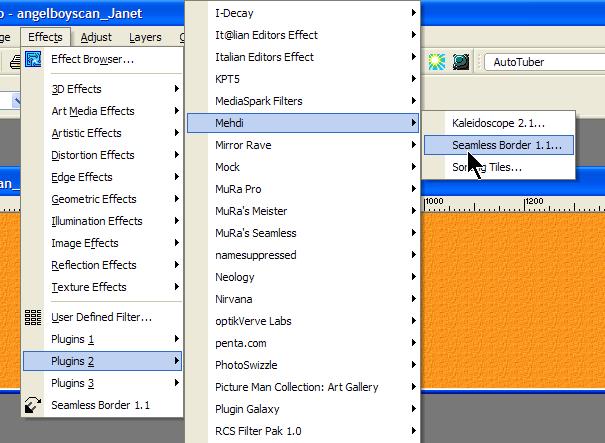
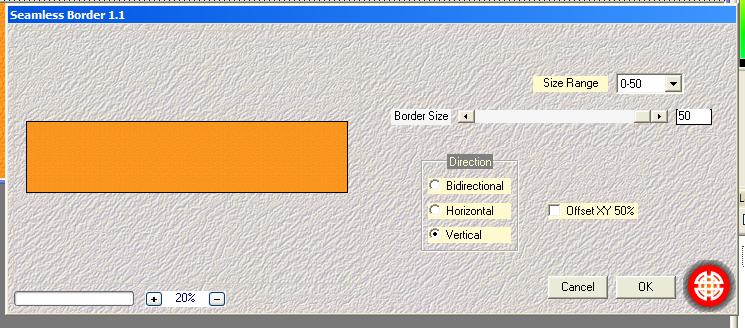
You need to set the seamless border like this:
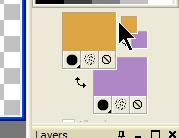
Now we need to send this to the background of our strip.
On your layer palette - one left click on Raster 1 (should be the top layer) like this

one left click brings up this:
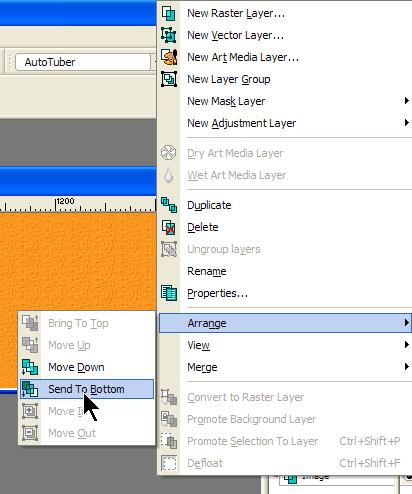
Now you should see this:

Your graphic is now over the textured background!! How are you doing so far????
Now make sure that the graphic layer is the active layer. Remember how? Click on the IMAGE layer in your layers palette, like this

Remember that whichever layer is highlighted in blue is the "active layer" when you are working with layers.
Now we're going to add a drop shadow to our graphic.
When you are sure that the graphic (image) layer is the active layer,
Effects - 3d Effects - Drop Shadow

With these settings:

These are the default drop shadow settings.
(If you change these for other graphics, you can always just click this icon
![]() which returns the
settings to the default)
which returns the
settings to the default)
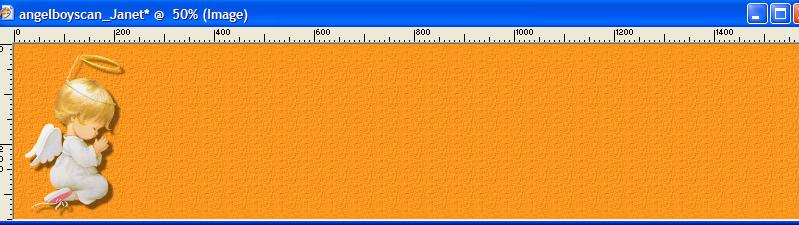
Ok now you should have this:
You're nearly done!! Are you still with me??
OK, now we're going to merge the background layer with the image layer.
Layers - Merge - Merge all (flatten)

Your strip is now like this:

You're right!! It doesn't look any different now than it did before this step!!
BUT - look at your layer palette -

There is now one layer! That's what we want!
Now you can save your strip -
File - Export - Jpeg Optimizer
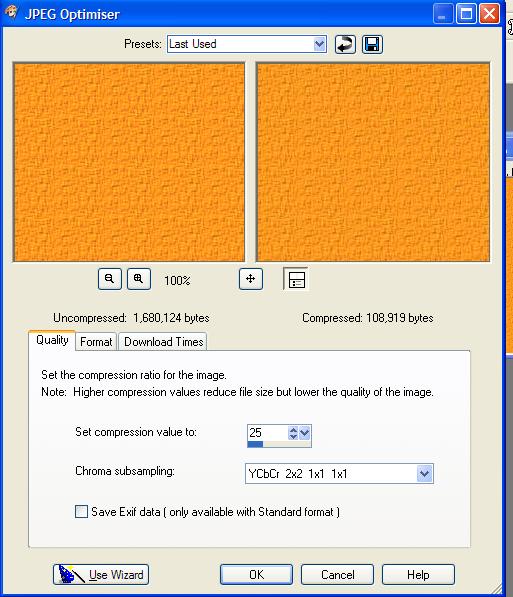
Name your strip and save it to a folder of your choice.
That's it!! You're done!! Unless you are wanting to take your creation into Incredimail!!
INCREDIMAIL LETTER CREATOR USERS ONLY
Your strip needs to be placed in the BODY tab in LC and your left margin adjusted so that the text does not flow over the graphic. Font and color of font up to you.
This tutorial was written by Tzeriah, exclusively for the Wendy's Works PSP Classes and is copyright to Tzeriah. Any similarity to other tutorials is purely coincidental.
