
Tutorial Eleven - Making Selections/Working with Layers
This tutorial was written by Tzeriah exclusively for the Wendy's Works PSP Beginners Class. Any similarity to other tutorials is purely coincidental. The skills used in this tutorial I have gained from many talented others who have all contributed to my learning.
Supplies for this tutorial are HERE
Let's begin!
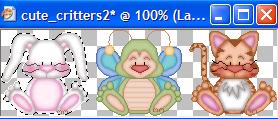
Open all the supplied graphics - Shift D to duplicate and close the originals.
You may use as many, or as few of the "critters" as you like for this tutorial. The idea here is to teach you about selecting, copying and pasting from a graphic.
<Note: This technique ONLY works on PSP graphics or transparent background graphics, it WILL NOT work with jpeg or bmp files>
Create a new canvas 500 x 500 pixels - transparent background.
Ok - starting on the first graphic strip of your choice - using your magic wand tool

With the following settings:
![]()
Click on the first "critter" and you should get "Marching ants" like this":
Now go Edit - Copy - activate your new canvas - Paste as New layer onto the canvas.
With your mover tool - place the "critter" somewhere on your canvas. Because we will create each new "critter" on a new layer, you will be able to move them around on the canvas as you develop your design.
Click back on the graphic image again - Selections - Select None
The marching ants disappear.
Now activate your magic wand again and click on the second "critter" - the marching ants appear again.
Edit - Copy
Edit Paste as New Layer onto your larger canvas
Using your mover tool again, position this "critter" somewhere on your canvas.
Continue this proceedure for as many "critters" from the four graphics as you would like to add to your canvas.
When you are done and you have selected as many "critters" as you want, and placed them where you want on your canvas, you can add a drop shadow to each layer. Highlight each layer in turn, adding the SAME drop shadow to each one.
Now you can add some text
Layers - New Raster Layer
Activate your text tool - type your desired text - select your font, font color and size (anything you think looks good)
Now add the SAME drop shadow to your text
Now add a new layer - Layers - New Raster Layer and select a complimentary color for your background. Flood fill your new layer with this color
Layers - Arrange - Send to bottom - to put the background behind your graphics and text.
Layers - Merge - Merge Visible
You may crop away any excess canvas around your graphic and text if you wish
Now we'll add a border around our new "header"
Image - Add Border - with these settings.
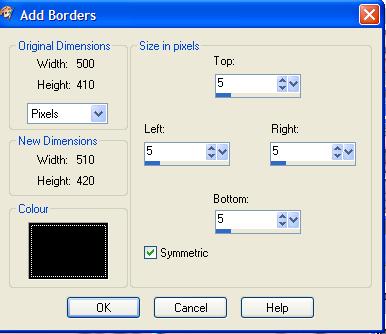
Image Add Borders - with these settings

With your magic wand and these settings:
![]()
Select the white border you just created
Flood fill this border with the same color you used for your text
While the border is still selected - Adjust - Add noise with these settings:

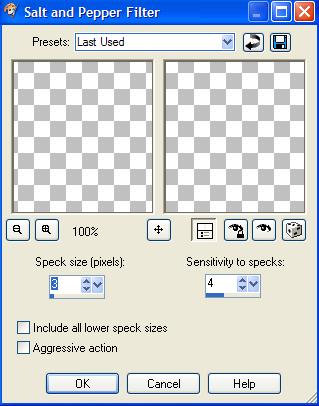
While still selected - apply this filter:

with these settings:
While still selected
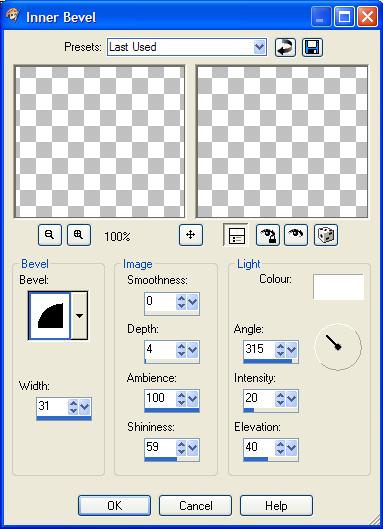
Effects - 3D effects - Inner bevel with these settings:
Selections - Select None
Now - you may add another 5 pixel black border to this if you like, following the same steps as above to add it. This is optional. I like the effect of the second black border, it brings out the depth of the frame, but this is purely personal preference.
When you are happy with your frame - File - Export - JPEG Optimiser - compression at aroud 10%
Save your header.
Create a new canvas 1600 x 350 - transparent
Layer - New Raster Layer - Flood fill with the SAME color as the background of your header. (It should be still the same color in your Foreground material palette box.)
Using the same method as in the beginning to select "critters" - add one or more to the left of this new strip. Remember to paste each one as a new layer so you can move them around without messing up the background tile. Remember to change the settings for your magic wand back to the same that we used for selecting the "critters" at the beginning.
Add the SAME drop shadow to these "critters" as you used before
When you're happy with what you have
Layers - Merge - Merge All (flatten)
File - Export - JPEG Optimiser - same settings
Save your background strip
Assemble in Letter Creator. Putting the Background strip in the BODY tab - tiled - and the frame in the HEADER tab - Centered.
Please use "Tutorial by Tzeriah" as your link text with mailto:wwpspclasses@yahoo.com.au as the link. Thanks!
