 May 2008

Nick's Chicks
 I think it was about Tuesday April 29th when I received a phone call from Nick. Nick is my 13 year old ... um, quasi
nephew? nephew-in law? He's my sister-in-law's sister's kid.
I wondered what was up. He'd never called me before. He proceeded to tell me he had acquired 12 baby chicks and
he had no place to house them except for his bedroom closet. He asked if I might help out by building a chicken coop.
Not grasping the urgency of the situation I said I would come by in a few days, when I had the chance, to see exactly what
was needed.
The following Sunday afternoon I made my way over to the house. I was surprised to find that the "baby chicks" were
already 5 weeks old and, as Nick described them, growing larger by the hour. I learned that Nick had gone ahead and
obtained the chicks without his mom's final approval and that she was less than pleased with the closet-as-chicken coop
living arrangement.
So What's The Plan?
It was obvious this problem needed a quick solution. But how do you build a chicken coop? Up to this point my experience
with live poultry was limited to holding one protesting chicken as still as possible while my friend, Claude, chopped its head
off with an axe. I had traveled with Claude's family to his grandmother's home in the hills of Tennessee. Granny wanted
to cook us a chicken dinner. That was 37 years ago and it hardly qualified me to design and build a chicken coop.
Nick had done considerable internet research on chicken farming and he had talked to people in the area who raised
chickens. So, fortunately, he already knew what features I needed to incorporate into my coop design. We discussed some
ideas. We looked at some photos of small homemade chicken coops on the internet. I asked Nick any questions that came
to mind. By the time I left Nick's house we had settled on a small A-frame plan. I thought that would be the cheapest and
fastest way to go. I drove home and sat down to work out the details. I did some more coop related web surfing and began
making thumbnail sketches. Pretty quickly I could see there might be serious issues with an A-frame. I was concerned that
the sloping sides and the approximately 4' X 8' footprint to which this coop would be limited wouldn't provide enough internal
volume for a dozen chickens. It also occurred to me that providing easy access to the interior for feeding, watering and
cleaning while, at the same time, keeping out the torrential summer rains would be problematic. I thought up a new design
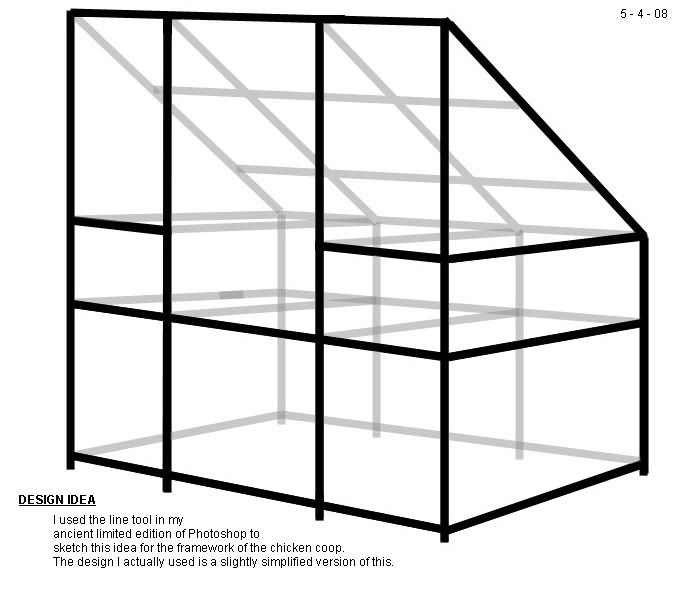
that I hoped would avoid the possible A-frame issues. I sat down at the computer to make a rough sketch of the coop's
skeleton.
The Build
Using the above sketch I figured out how much 2" X 4", 1" X 4" and 2" X 2" pressure treated lumber I would need to begin
building. The next day I fired up the brown beast and headed up the road to Home Depot. When I got home with the materials
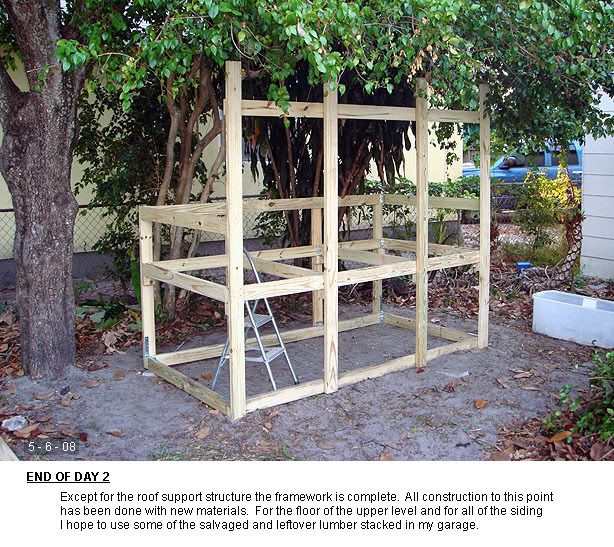
I began prefabricating frame parts in my carport. That first day of construction I made a 4' X 8' rectangular frame to serve as
the coop's base. I made a second rectangular section, with 2 additional crossmembers, to serve as the floor support for the
upper level of the chicken coop and to give strength and rigidity to the structure. Next I made four 7' long posts for the front
wall of the coop and four 4' posts for the back wall. That was all I was able to accomplish on day one.
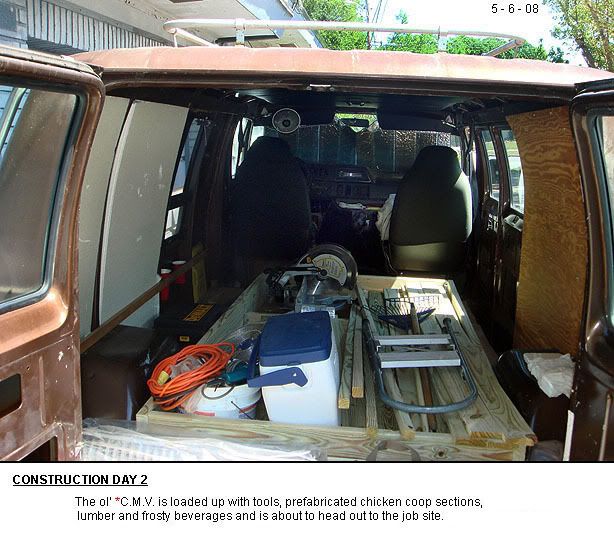
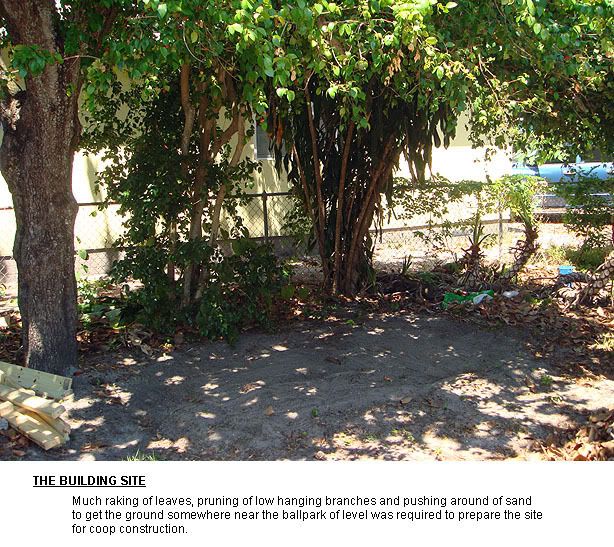
On day two I loaded up the C.M.V. and headed over to Nick's house to prepare the site and to assemble the sections I had
made the day before.
...(continued below)...
Over the next 8 days I alternated between prefabricating parts at my house and assembling those parts over at
Nick's. Finally, just after 11:00 pm on May 14th, the coop was ready for occupancy. The chickens took to it immediately,
running up and down the ramp between the pen (or run) below and the enclosed upper level. They also wasted no time jumping
up to and roosting on the perch (see interior view below).

Nick poses with his new chicken coop
* * * *
The end walls are made of tongue and groove cedar planks I salvaged from a friend's sister's condo
when she remodeled. It had been stacked in my garage for years waiting for the right project.

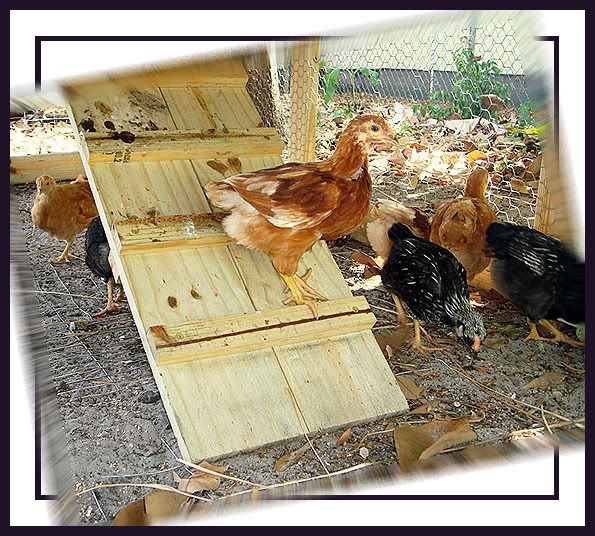
Nick demonstrates operation of the front hatches
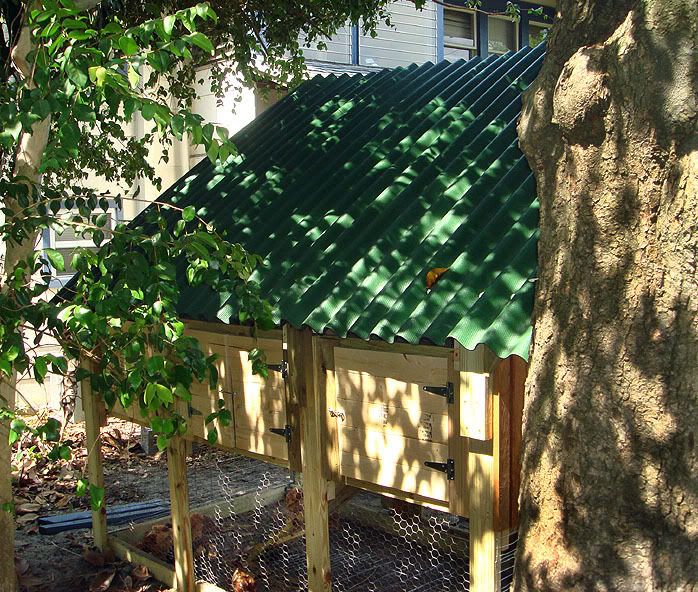
Rear view of the coop
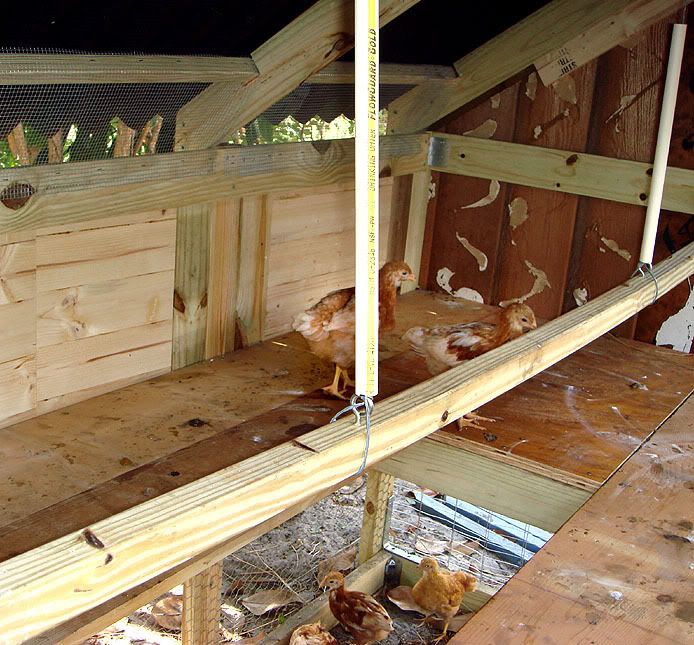
Interior view
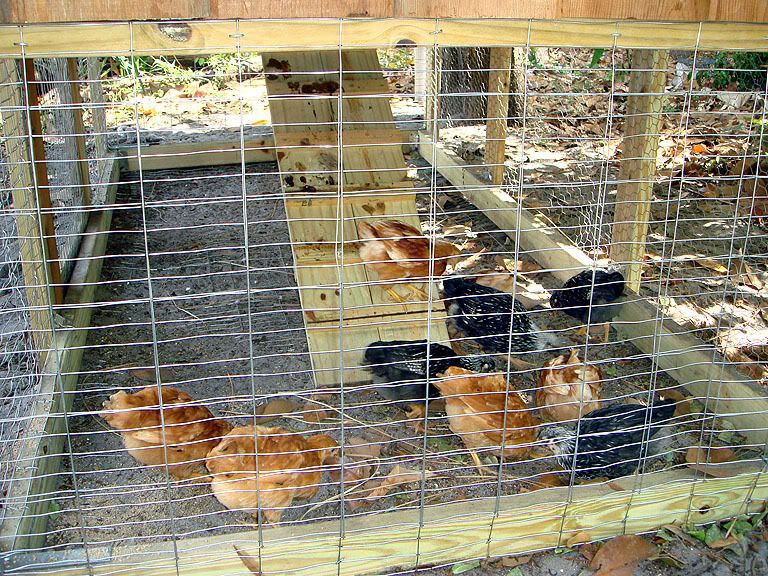
Frolicking in the dirt

All totalled, I spent $340.89 on new materials and hardware. However, that sum includes $25.17 worth of plywood and
metal braces I ended up not needing. It also includes $10.68 for a large box of special purpose screws used to secure the
roof. I needed only a few of the screws but they weren't available in a smaller package.
My cost would have been higher had I not been able to build the floor of the upper level and both end walls of the coop
entirely with scrap lumber from the stacks in my garage.
As of 5-25-08 the coop has weathered a couple rainy days with no trouble. I am working on an improved method for
securing the doors and I may slap on some paint in the near future to help make the coop more weather resistant.

Fly Away Home