|
How to make a 2 Layered Tag
.
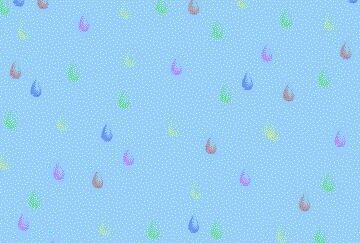
Here's the first pic we will be working
with...Right Click to save...
This is a tag someone else made.
But I just want the rain part from it. So, let's
open it in PSP.
Click VIEW>NORMAL VIEWING
Click the crop tool  and
draw a square on the rain and double click it. and
draw a square on the rain and double click it.
Now it should look like this...
Ok, shrink that.
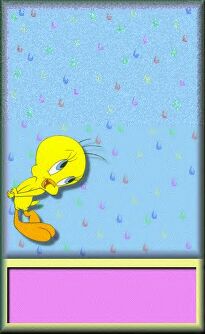
Here's the next pic we will be working with...Right
Click to save..

Open it. Now I want to get rid of the white bg and
all the rain.
So, let's go to SELECTIONS>SELECT ALL
go to EDIT>COPY Close out the pic and go to
FILE>NEW with the following settings...
Width: 150
Height: 182
Background Color: Transparent
Click ok
Go to EDIT>PASTE>AS TRANSPARENT SELECTION
This should have gotten rid of the white bg.
If it didn't then you need to click the eraser tool
 and erase
all the white. and erase
all the white.
Now erase all the rain drops. It should look like
this...

Ok, now go to EDIT>COPY and close out the bird
pic.
Unshrink your rain pic and go to
EDIT>PASTE>AS TRANSPARENT SELECTION
Now it looks like this...

Go to SELECTION>SELECT NONE
Click the crop tool again and we are going to crop
the pic.
Now it looks like this...

Now go to EDIT>COPY and close out the tag.
Go to FILE>NEW with the following settings...
Width: 194
Height: 242
Background Color: White
Click ok
Go to EDIT>PASTE>AS NEW SELECTION
Now we need to make it a button.
Go to IMAGE>EFFECTS>BUTTONIZE with the
following settings
I used a Transparent Edge
Height: 16
Width: 16
Opacity: 63
Click ok.
Now it looks like this...

Go to SELECTIONS>SELECT NONE
Now click the selections tool 
and we are going to make alittle box at the bottom
like this...
Go to IMAGE>EFFECTS>BUTTONIZE with the
following settings
I used a Transparent Edge
Height: 11
Width: 12
Opacity: 63
Click ok.
Now it looks like this...

Now go to IMAGE>EFFECTS>DROP SHADOW with the
following settings...
Color: Black
Opacity:100
Blur: 3.3
Vertical: 1
Horizontal: 1
Click ok.
Now it looks like this...

Go to SELECTIONS>SELECT NONE
Click the top box on the right hand side.
Select a color. I picked blue.
Now you can add text in the box you made by
clicking the text tool.
I used Arial font, Bold, size 16.
Make sure the box beside Floating is checked and
click ok.
Now go to IMAGE>EFFECTS>DROP SHADOW with the
following settings...
Color: Black
Opacity:100
Blur: 3.3
Vertical: 1
Horizontal: 1
Click ok.
You can move your text around by dragging and dropping it where
you want it. Go to SELECTIONS>SELECT NONE. Go to FILE>SAVE AS and
type in a name and save it as a JPEG file and click ok.
Now it looks like this...
If you have any questions, please just ask...
Copyright © 2000-2001 by LovlyGypsy,
all rights reserved
| I, LovlyGypsy,
Give my permission to Ldy
Archrr aka Artists for PSP to place any and all tutorials
that I have made on her site.. this 22nd day of February 2001.
These tutorials were made solely by me and permission is mine
to give. |
|

