|

How to make a .msk from a tube
.
The Download
file contains the following file...
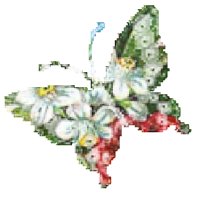
butterf.tub
.
Download and unzip to any file. Open PSP, open the tube butterf,
export it by going to FILE>EXPORT>PICTURE TUBE, when the box comes
up where it says Name: click there and type in a name and click ok. Go
to FILE>NEW with these settings...
Width: 200
Height: 200
Transparent background
Click the tube tool  ,
if your control palette isn't up bring it up by clicking the Toggle
Control Palette button ,
if your control palette isn't up bring it up by clicking the Toggle
Control Palette button  and select the butterfly tube you just exported, set the Scale to 217%
now place a butterfly in the center of your pic. If your Layer Palette
isn't up bring it up by clicking the Toggle Layer Palette button
  ,
now click the Add New Layer button ,
now click the Add New Layer button  ,
when the dialog box comes up just click ok. Now your Layer Palette
should read from top to bottom Layer2, Layer1. Click on Layer1, click
the selection tool ,
when the dialog box comes up just click ok. Now your Layer Palette
should read from top to bottom Layer2, Layer1. Click on Layer1, click
the selection tool  and draw a rectangle around the butterfly, single click inside the
rectangle. On the Layer Palette click Layer2. Select white as your
foreground color (top box) and click the flood fill tool
  ,
now flood fill the butterfly. I did have to click the air brush ,
now flood fill the butterfly. I did have to click the air brush  and
air brush the antennas. Let's select none by holding down the Ctrl
button on your keyboard and hitting the D or by going to
SELECTIONS>SELECT NONE. Make sure Layer2 is selected on your Layer
Palette, now set the Layer Blend Mode to color like this... and
air brush the antennas. Let's select none by holding down the Ctrl
button on your keyboard and hitting the D or by going to
SELECTIONS>SELECT NONE. Make sure Layer2 is selected on your Layer
Palette, now set the Layer Blend Mode to color like this...

Now go to LAYERS>MERGE>MERGE VISIBLE. Now select Black as
your foreground color (top box). Click the flood fill tool again and
flood fill the transparent background black. Ok there's a couple of
holes in the antennas and I'm going to select White as my foreground
color and click the paint brush  and just put one dot in to fill the holes. Now we want to make the pic
bigger so let's go to IMAGE>RESIZE and use these settings...
Pixel Size
Width: 400
Height: 400
Click ok. Now go to MASKS>NEW>FROM IMAGE and use these
settings...
Source Window: This Window
Create Mask From: Source luminance
Check....Invert Mask Data
Click ok. Now we just need to save it as a .msk by going to
MASKS>SAVE TO DISKS when the dialog box comes up where it says Save
in: it should already have your PSP>Masks folder selected so all I
have to do is hit the backspace key on my keyboard and type in a name,
I'm naming mine butterfly and then just click Save. Now you can close
out the butterfly pic and when the box comes up about saving it just
click no. That's it. We just made a mask from a tube. Here's what it
looks like on a pic...

Well maybe the butterfly wasn't the greatest of examples but it
gives you the basic idea any way. LOL
If you have any questions please just ask...
Copyright © 2000-2001 by LovlyGypsy,
all rights reserved
| I, LovlyGypsy,
Give my permission to Ldy
Archrr aka Artists for PSP to place any and all tutorials
that I have made on her site.. this 22nd day of February 2001.
These tutorials were made solely by me and permission is mine
to give. |
|