
First thing we need to make sure of is that your settings are correct. To do this go to "File" then slide down to "Preferences" then over to "General Program Preferences" once you have clicked on that selection you will be faced with a menu with tabs...select the "Transparency" tab. You should now be looking at this image..make sure your settings are the same as I have pictured here.
![]()
Ah lookie there see that gray and white checkerboard picture? this is what tells you if your picture is transparent or not. With these settings done you can now click OK and we'll move on to the actual making of a Transparent.
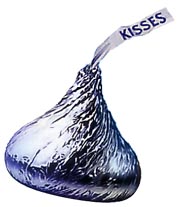
OK lets make a jpg into a transparent. I have chosen this picture to work on;
Next step is for me to
point out a few rules when making a transparent. If you notice a color in
your picture that is the same as the one in your background you will need
to flood fill the background a different color. Personally I choose a yucky
green..less chance of it being in the picture itself LOL. So go to your palettes
on the side and pick a yucky green..like I have here![]() ewwwwww pretty gross huh LOL.. OK notice both top and bottom palette
is the same color..DON'T FORGET THAT STEP!!..both palette's must be the same
color. Once you have done that go to your paint bucket
ewwwwww pretty gross huh LOL.. OK notice both top and bottom palette
is the same color..DON'T FORGET THAT STEP!!..both palette's must be the same
color. Once you have done that go to your paint bucket![]() and flood fill the white background (I do it a couple of times just
to make sure..I know silly but I hate doing things over again just because
I missed a spot.)
and flood fill the white background (I do it a couple of times just
to make sure..I know silly but I hate doing things over again just because
I missed a spot.)
OK you should be looking at an image that looks like this now:
![]()
OK now here is where we start using our top tool bar a lot. I want you to go to "Selections" and then "Select All" you should now have little running ants around the whole outside of your picture. Next step is to go back to "Selections" and then slide down to "Modify" then down to "Transparent Color" once there you will see this menu..make sure your settings are as I have them then click OK:
![]()
OOOO hey did you notice the running ants ended up around the Hershey kiss? Your pic should look like this now:
![]()
All right. We managed to get this far and we are almost done! Now we need to go to "Colors" slide down to "Decrease color Depth" then over to "256 Colors" once there you will be looking at this picture..make sure you have the settings I have in this picture then click OK;
![]()
Next we go back to "Colors" and slide down to "Set Palette Transparencies" and you should be looking at this picture. Make sure you have your settings as I do on this picture then click OK;
![]()
If you want to check to see if you have done this right so far you can click on "Proof" and it should show the checkerboard background behind your picture..like I have here AFTER I clicked on Proof;
![]()
If you are happy with your picture you can now click ok. Once you have done that go to "Selections" and click "Select None" you should have no running ants around your picture now and its time to save this picture *S*
To save something so its transparent you need to understand something. When viewing your picture in psp you can't tell its transparent unless you click to view transparency otherwise it will just look like a green background or white background. So don't think for a moment you have done something wrong..chances are if you followed this tutorial you have done everything correct and your picture is indeed transparent. To save something so it stays transparent you must save it in "gif" format. So go to "File" then "Save as" and once you have done that you should find a nice folder for you picture to live in and then choose a name and make sure your settings are as I have here;
![]()
Notice I have the "CompuServe Graphics Interchange (*.gif) chosen..this is important before you save your picture..if you don't do this your picture will simply have a green background. Your finished Hershey kiss should look like this;
Now go out
there is the big wide world and have fun!!
And be proud of
yourself for learning
a very valuable lesson in psp Five!
