|
Your Teacher for this class is Lady Sunshine
This class was written for PSP 5
So you want to learn
how to make those wonderful animated gifs do yah?
Well lets see if I can make this simple enough to get you started on your
way.

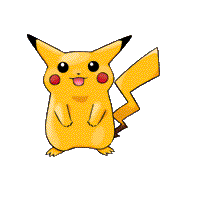
Hey Picachu's pretty cute don't you think?
but lets animate the little critter and see how he looks then.
To animate something its best to understand how animation works first.
What it is really is putting images together that are in different positions.
Picachu above there is the first step.
I've already made him transparent for you so you can bypass that step.
Really what this tutorial is going to do is take you through a few simple
steps. Seeing something in the process of being done helps you to understand
what you are going to achieve.
With that said,grab the Picachu above and save him on your computer in
a file...don't loose that file!! darn if your like me you have so many
files after awhile you forget where you put things LOL. So name the new
folder"Animation Tutorial" and save the first Picachu above...keep the
same name!! "1.gif"
OK now watch how the below pictures change..,I'll tell you how I did it
once we are done saving them...remember save all of these pictures to
that new folder.

OK did you notice the different positions
Picachu is in?I bet if you move the page up and down you can see just
what we are heading for here LOL.
Now this tutorial isn't the hard one. What
I mean is an animated signature takes you to another step in animation.
Lets face it most people just want to simply learn it and then have something
done NOW.,.not have to mess around to much. Animated signatures for example
is an advanced lesson and assumes you already have "tinkered" with the
animation program in psp to know how to use it.
This tutorial is just to get your instant gratification so you can be
excited by tinkering on your own later.
Now basically as we can see with Picachu he is 4 different
pictures...actually he is a four different tubes. And with psp I made a
gif out of all of them and went into psp animation to get it animated,thus
taking the messing around with doing the transparent part for you out of
this tutorial like I said earlier.
OK enough chit chat lets animated this critter now.
Open animation shop
Go to "File"
Hit "Animation Wizard"
First window settings should be:
Place a dot by:
"Same size as the first image frame"
These numbers next should be:
Width=100
Height=100
Click Next
Second window settings should be:
Place a dot by"Transparent"
Click Next
Third window settings should be:
Under the first paragraph,place a dot by:
"Upper left corner of the frame"
Under the second paragraph,place a dot by:
"With the canvas color"
Click Next
Fourth window settings should be:
place a dot by:
"Yes repeat the animation indefinitely"
Now the next selection is really up to you.
The faster you wish your animation to go the lower your number,
the slower you wish your animation to go the higher the number.
So this is where you choose,and you get to tinker
Once your done figuring it out(I normally have mine set at around 20 or
so for these kinds of animation's
Click Next
This Fifth window is where you will click "add image" You will need
to find the animation folder we named above.
Now add each image starting at #1 till you get to #4
Click Next
Now click Finish
This is the fun part you get to see what
your almost finished animation looks like...a preview...OH YAH!!
Now you should see what looks like a movie film in front of you now with
one of the images in view. Now to see it animated you will go to "View
Animation" icon on the toolbar. What is that you ask?
Well its the first little piece of a film on your tool bar...wayyyyyy
over to the right of the screen...the third icon in from the ? mark
Click the "View Animation" icon...lets see that critter move!
If you find that the critter moves too
slow or too fast then close those windows and start again...I know...I
hate doing that too...but after a bit of practice you get the feelings
of which numbers to use on how fast or slow images will be.
Now if we want to save the critter you will go to "File"...then slide
down to "Save" find a folder to save it in and then name the critter...DO
NOT CHANGE THE GIF FORMAT!! things will only stay animated if they are
in GIF FORMAT!!
Now with the next windows that come up:
Leave the Quality on High...remember the higher it is the better the Quality
of animation.
Click Next...Click Next again...and then "Finish"
POOF YOU ARE DONE!!
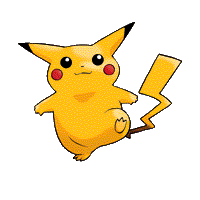
Finished product should look something like this *S*

© 1999 All rights protected.
To view the Sisters of the Golden Moon pages as they were designed to
be seen, get Merced
font.
This SGM Beauty School site was last updated March 8/00.
|

