
 |
Tutorial 1: Positioning LightsThis tutorial will teach you the basics of passing the positions of objects from the animation script to the fragment shader. 4 lights will be positioned. 3 will follow circles and the 4th will lead the camera. This tutorial will walk you thru understanding the code changes, using replay and recording a video.Download Tutorial1 Files |
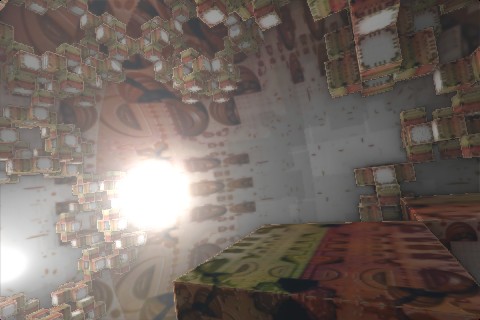
PrerequisitesYou should have AnimandelPro installed and the tutorial unzipped. Future tutorials may require this path "c:\AnimandelPro\tutorialX" as some paths may be hard coded.Tutorial 1: Positioning LightsStep 1: From File->Open choose the file "tutorial1.mndl"This opens the project's files and you should hear the annoying beep if it loads and compiles successfully. Step 2: Compare the fragment shader to the "default_fragment_shader.frag" script. Don't worry about the details but notice that the DE function and lighting calculations have changed. The important piece for this tutorial is the definition of the variable lite uniform float udef[32];//user defined params vec3[4] lite=vec3[4]( vec3(udef[4],udef[5],udef[6]), vec3(udef[7],udef[8],udef[9]), vec3(udef[10],udef[11],udef[12]), vec3(udef[13],udef[14],udef[15]) );The glsl code is a bit non-standard when initializing arrays but this is just 4 3d vectors for our light positions. "Uniform" variables are those that are passed from the application or the animation script. The array "udef" is where user defined data is passed. We will populate that array with data. You may wonder why we are staring with udef[4]. Why not udef[0]? The first 4 user defined variables are controlled by the keyboard so we will save those incase we need them later. Step 3: Switch to the animation script with the menu Edit->Animation Script. The only addition is the udPre function:
void udPre(unsigned char *tex, float *replay)
{
	REBIND_TEXTURE=3;//creates mipmapped textures
	//set the position of rotating lights, udef is for passing user defined values to shaders
	vec3Set(udef+4,0.0,sin(TIME*2.0)*0.577,cos(TIME*2.0)*0.577);
	vec3Set(udef+7,sin(TIME*2.0)*0.577,0.0,cos(TIME*2.0)*0.577);
	vec3Set(udef+10,sin(TIME*2.0)*0.577,cos(TIME*2.0)*0.577,0.0);
	//get the cameras future position and set one light to that
	int iStart=RP_POS+MNDT_FLOATS*50;
	if(iStart<RP_END)vec3Copy(udef+13,replay+iStart);
}
Here we are using macros and functions defined in the file "AnimandelPro.h".
The line REBIND_TEXTURE=3 will tell the application we want mipmapped textures.vec3Set sets the values of a 3d vector (it sets three array values) vec3Copy copies 3 array values from one pointer to another. In all these functions the destination array is the first parameter. Notice the line: vec3Set(udef+4,0.0,sin(TIME*2.0)*0.577,cos(TIME*2.0)*0.577); This is equivalent to: udef[4]=0.0; udef[5]=sin(TIME*2.0)*0.577; udef[6]=cos(TIME*2.0)*0.577;sin and cos are used to create a circular path with a radius 0.577 TIME is sent from the application and increments by a small amount each frame. The fourth light is positioned ahead of the camera. In this tutorial the camera positions are saved in the file "tutorial1.mndt" which was loaded with the project. This .mndt file holds the camera position for EVERY frame. AnimandelPro doesn't use control points for the camera but instead the camera is "flown" thru the scene and every position recorded and passed to the animation script in the array replay. So we find a position in this array ahead of the camera with: int iStart=RP_POS+MNDT_FLOATS*50; PR_POS is the current frame's position in the replay data. MNDT_FLOATS is the length of a data record (position & orientation) We are looking ahead 50 frames so we make sure this isn't past the end of the replay data. if(iStart<RP_END)vec3Copy(udef+13,replay+iStart); We copy the camera's future position to the udef array which will be passed to the fragment shader. Step 4: Activate the render window (the one with the picture!) by clicking on the title bar. Then press the "E" key. This will start the camera moving and you should see the image change and the time incrementing in the title bar. Press the "S" key. This stops the playback. Press the "Q" key, this replays the movement in reverse. Let the replay rewind all the way to time 0. Press the "C" key and a video compression window will pop up. It is highly recommended that you install the xvid codec and use that or you run the risk of creating .avi files that are unusable! (past 2 gigs the .avi functions fail). Don't worry about this tutorial as the resolution is small. Press "E" again and let the images record to video. When you have had enough (or the replay data runs out) press "S" again. VERY IMPORTANT! After the last frame has been displayed you can press "X" to release the video file. There is a known bug that sometimes crashes the app and LOSES ALL RECORDED VIDEO if the "X" key is pressed before the last frame has completed rendering. Step 5: Watch your video. If you think the camera was a bit erratic and want to smooth the ride just select Replay->Smooth. You can click this several times to smooth it more. Caution: corners will be cut as you smooth the data so the camera may hit the fractal. Just reload the .mndt file and smooth it less. If you want to record your own camera data just use the arrow keys as described in the help file. You can record over the camera data at any position so if you are driving and hit a wall just stop "S" and back up "Q" stop again "S" and then restart driving "up arrow key". Step 6: Test yourself! Click on Options->Parameters and enter 3.0 in the time field. Then activate the rendering window and press the key combo "ctrl-E". This starts the replay at time 3. Press "S" and then use the arrow keys to drive around a bit. See if you can record a video with a sound track. Use the Options->Output screen to add a .wav file. Use the Options->Parameters screen to set the time to zero. Activate the rendering window and use "C" to start capturing video and use the "ctrl-E" combo to start rendering at time zero. Download Tutorial1 Files Tutorial 2 The Hybrid System |
